The IP address or Internet Protocol address is a numerical label used in networks to identify and locate network devices, from computers and smartphones to printers, TVs, and other devices. The IP address can be a useful piece of information, especially when you want to set up your home router or connect to other devices on a network. But how do you see a computer’s IP address in Windows? In this tutorial, I cover six methods guaranteed to work in Windows 10 and Windows 11:
NOTE: If you are unsure of what an IP address is and what purpose it serves, I recommend you to read: What is an IP address and a subnet mask, in simple terms?
1. How to find your IP address using CMD, PowerShell, or Windows Terminal
You can open the Command Prompt, PowerShell, or even the Windows Terminal, type the following command, and press Enter:
For each network adapter inside your Windows computer, you see its IPv4 and IPv6 addresses. The first is found in the IPv4 Address field, while the second is stored in the IPv6 Address field.
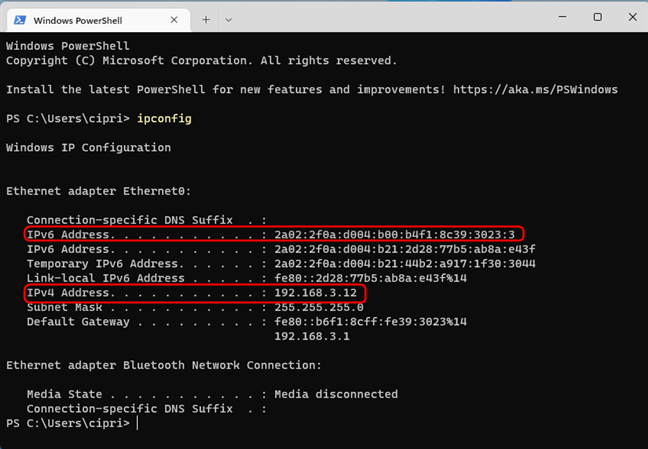
Find your IP address with ipconfig
You can also add a variable to this command to filter the data shown by this command to show only the addresses you're interested in, like this:
Notice how you see only the Address fields. One thing that may confuse you is that a network adapter can use two different IPv6 addresses at the same time, not just one, as is the case with IPv4 addresses.
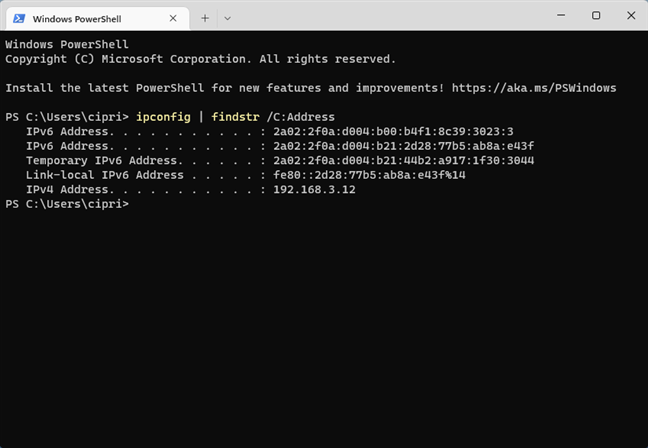
Find your IP address with ipconfig | findstr /C:Address
This second command variant is not that useful when you have multiple network adapters (Wi-Fi, Ethernet, VPN, etc.) on your computer because you can’t tell which address corresponds to each adapter. Therefore, if you have multiple network cards inside your PC, use the first command variant.
To learn more about the parameters accepted by ipconfig and what each of them does, run:
TIP: If you are interested in reading about other networking commands you can run using the Command Prompt, check this tutorial: Command Prompt (CMD): 10 network-related commands you should know.
2. How to find your IP address using PowerShell or Windows Terminal
You can also start PowerShell or open Windows Terminal and run other commands to find your computer's IPv4 and IPv6 addresses on the local network. Inside the PowerShell window or a PowerShell tab in Windows Terminal, type this command and press Enter:
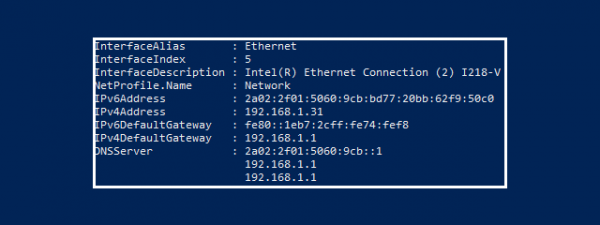
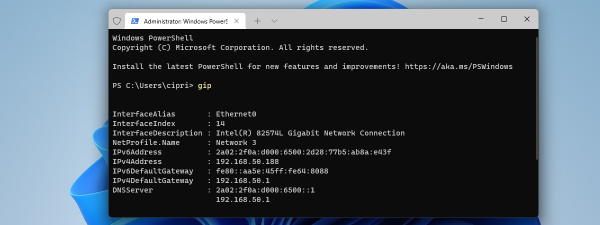
You see details about each network adapter on your computer, including the IP addresses you were looking for, in the IPv6Address and IPv4Address fields.

Find your IP address with gip
Another command which returns the same results is:
Don’t forget to press Enter to execute it. Then, you see details about each network adapter inside your computer, presented in a similar format. Look for the IPv6Address and IPv4Address fields to get the information you want.
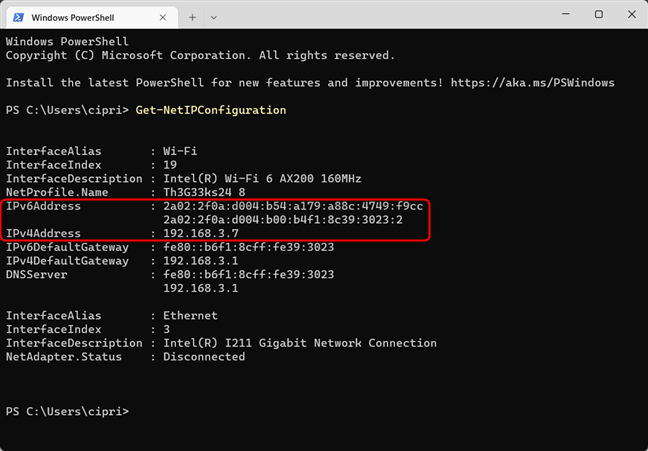
Find your IP address with Get-NetIPConfiguration
TIP: Do you need to find the IP address of your router? Read this guide: How do I find my router's IP address?
3. How to see your IP address in the Settings app
This information is available in the Settings app too. However, the steps involved are a bit different depending on whether you’re using Windows 10 or Windows 11. To help you out, we created a separate subchapter for each Windows operating system.
How to see your IP address in the Settings app from Windows 11
If you’re on a Windows 11 laptop or desktop computer, open the Settings app (Windows + I). In the left sidebar, choose Network & internet. On the right, select Wi-Fi or Ethernet, depending on the type of network connection you use.
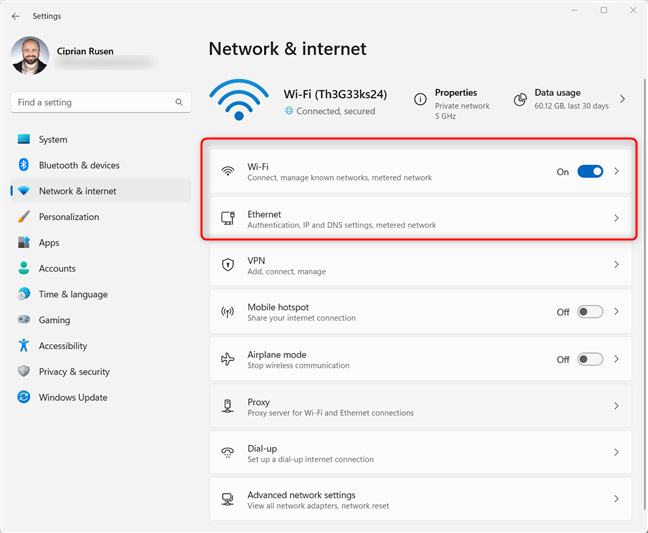
In Windows 11 Settings, go to Network & internet
I’m using a Windows 11 laptop without an Ethernet port, and you might be too. Therefore, I chose Wi-Fi. Then, click or tap on the Properties button for your active Wi-Fi connection.
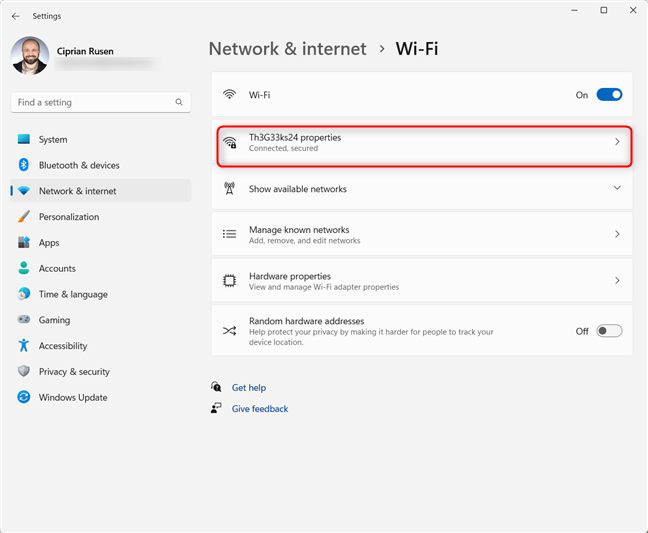
Access the Properties of your active Wi-Fi connection
Now you see all the technical properties of your wireless connection. Scroll down until you see the IPv6 address and IPv4 address fields.

Find your IP address in the highlighted fields
If you’re using a desktop PC with a cable network connection, choose Ethernet instead of Wi-Fi, and you immediately see the properties of your connection. Scroll down to see the IPv4 and IPv6 addresses.
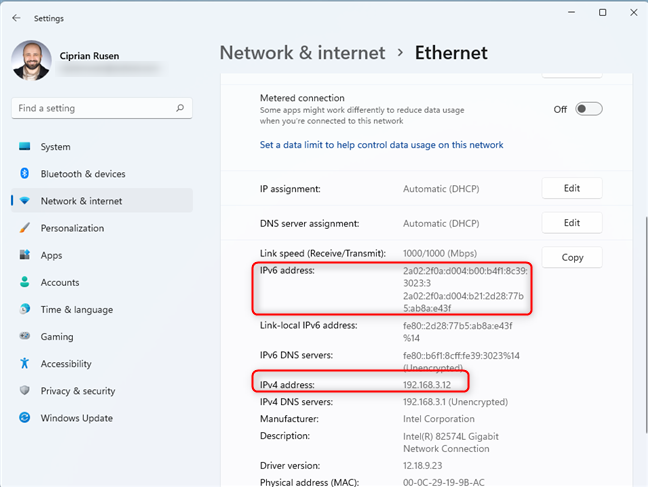
Find the IP address for an Ethernet connection in Windows 11
Close the Settings when you’re done.
How to see your IP address in the Settings app from Windows 10
On your Windows 10 PC, open Settings (Windows + I) and go to Network & Internet. You are shown a list of networking settings and categories. If you are connected to a wireless network, choose Wi-Fi on the left, and, on the right, click or tap on the name of the network you are connected to.
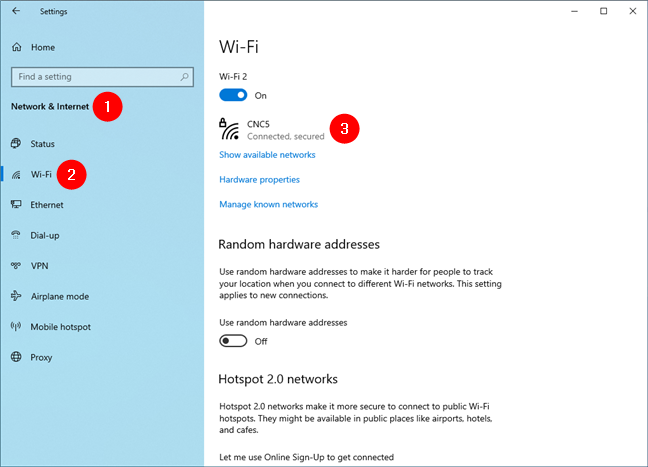
Click or tap Wi-Fi and then on the network's name
Windows 10 will then list a whole series of properties for your Wi-Fi connection. Scroll down until you find the fields for the IPv6 and IPv4 addresses highlighted below.
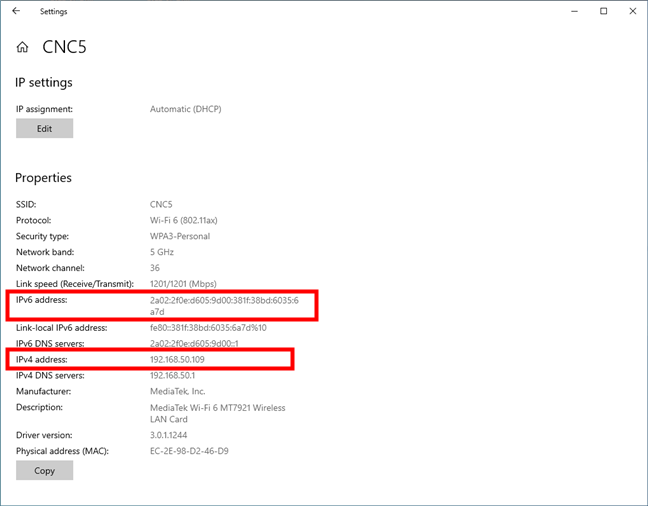
Find the IP address for a Wi-Fi connection in Windows 10
If you are connected using a network cable, in the left sidebar, choose Ethernet and then click or tap on the network’s name on the right.
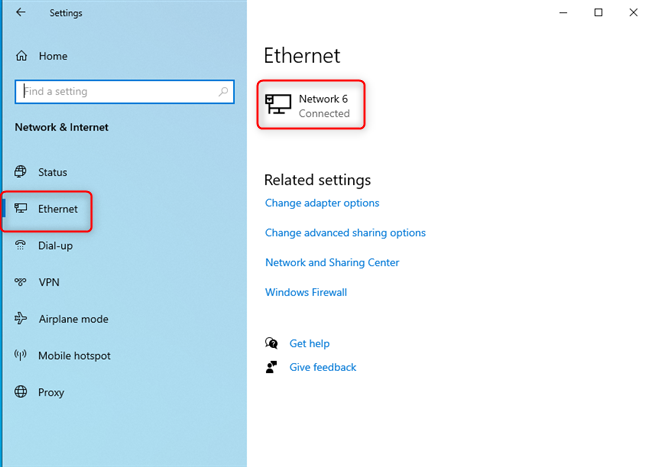
Click or tap Ethernet and then on the network's name
Scroll down the list of network properties until you find the entries for the IPv6 and IPv4 addresses highlighted below.

Find the IP address for an Ethernet connection in Windows 10
Close the Settings app when you’re done.
4. How to find your IP address in the Control Panel
If you’re on an older version of Windows, you can also use the Control Panel to find this information. This works in Windows 10 and Windows 11 too, and the steps involved are the same in all versions:
Open the Control Panel and go to Network and Internet. Then, click on Network and Sharing Center.
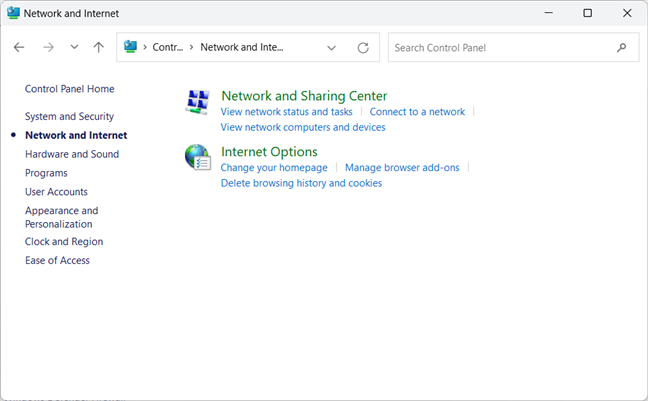
In Control Panel, go to Network and Internet > Network and Sharing Center
In the left column, click “Change adapter settings.”
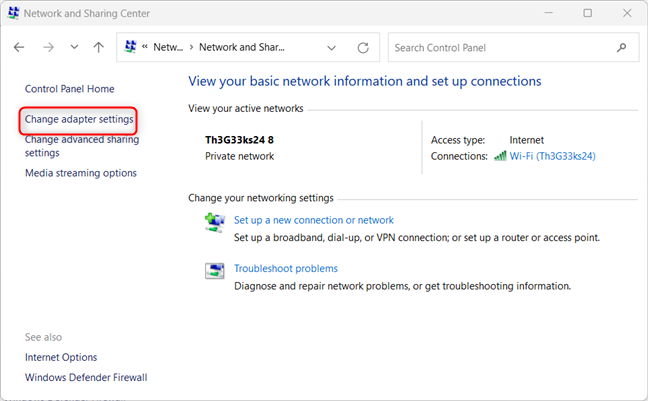
Click Change adapter settings
You see all the network adapters on your PC. Some of them may be virtual network adapters, like those installed by VPNs or Virtual Machines. Double click on the network adapter for which you want to see the IP address.
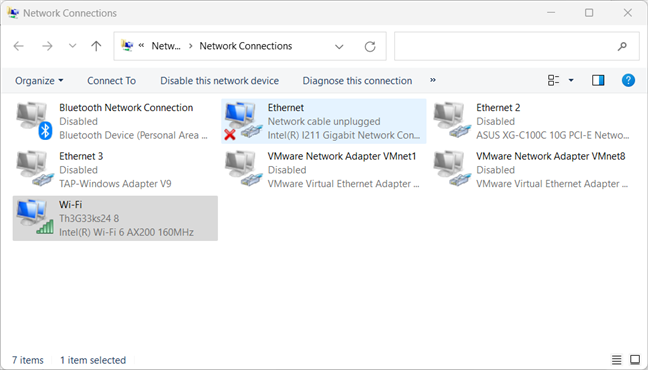
Double click on the network adapter
This action opens the Status window of that adapter. Next, click the Details button to see a series of details about that network adapter.
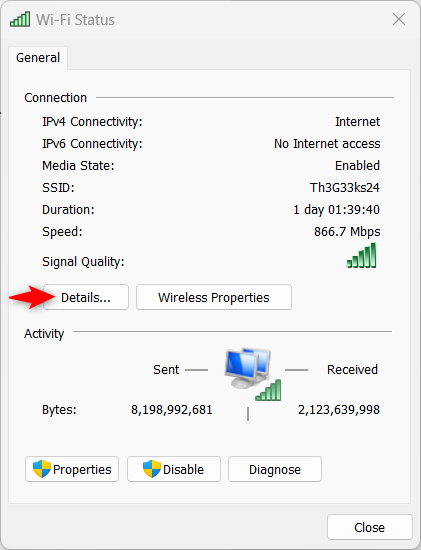
Click on Details
Scroll through the list of details until you find the IPv4 and IPv6 address fields highlighted below.
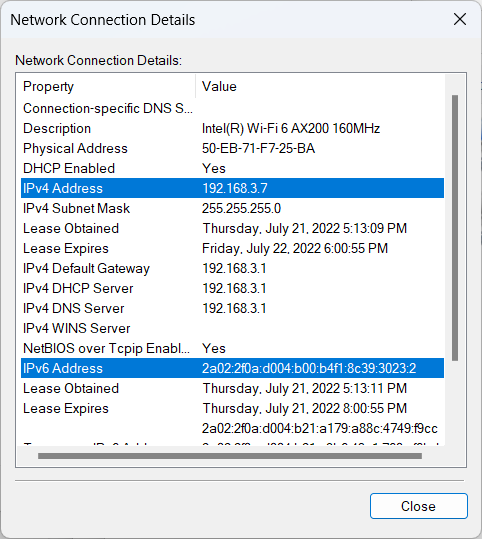
See the IP address
When done, click Close.
TIP: You may also want to find the MAC address of your PC.
5. How to find your IP address with System Information
You can use the Search bar in Windows 10 or the Search button in Windows 11 to look for “system information.” Click or tap on the app’s name in the search results list.
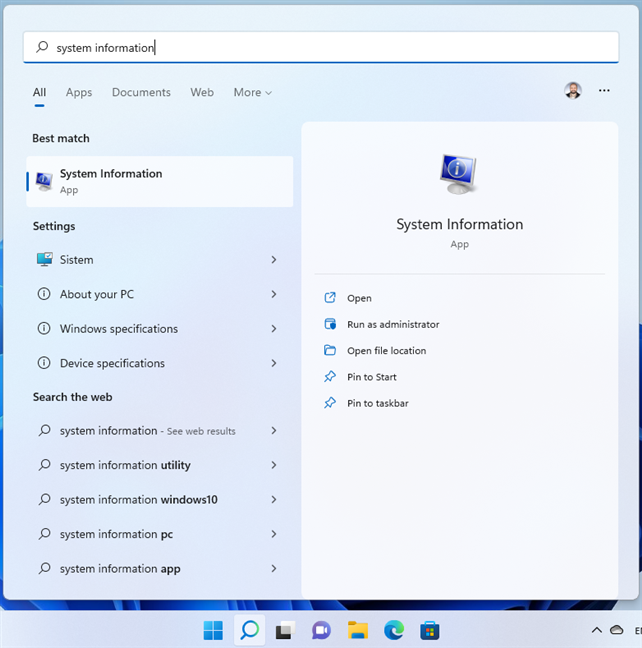
Search for system information
In System Information, in the left column, expand Components followed by Network and then Adapter. On the right side, you see detailed information about each network adapter on your computer. Scroll down the list until you find the network card you are interested in. There, you see a field named IP Address that shows both the IPv4 and the IPv6 address on the same line.
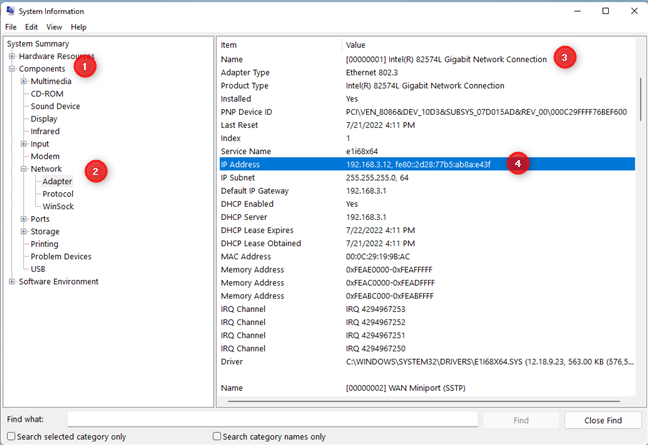
View the IP Address in System Information
TIP: If you want to know more about System Information, read: How to see details about your PC's hardware and software using System Information.
6. How to learn your IP address using Task Manager
The Task Manager can also tell you the IP address you’re using on the local network. To fire it up, press Ctrl + Shift+ Escape on your keyboard or use any of the other ways of opening Task Manager. If you’re using Windows 10, and you start the Task Manager in the compact view, click or tap More details. Then, select the Performance tab and look for your network adapter. If you are connected to a wireless network, choose Wi-Fi. If you’re using a cable connection, choose Ethernet. Then, on the right side, you see the IPv6 and IPv4 addresses.
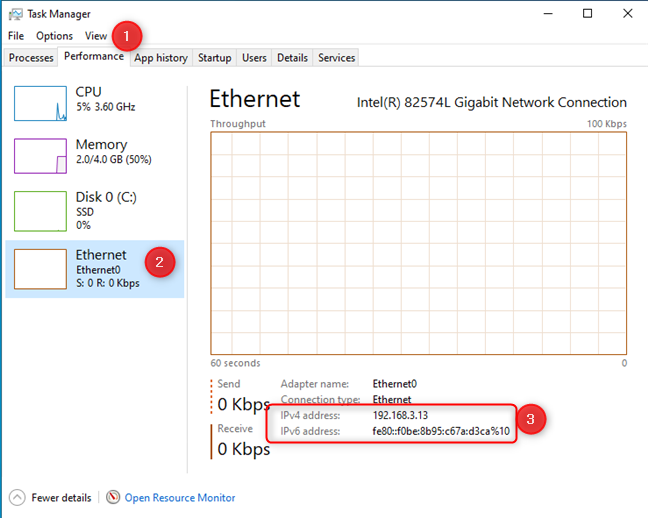
View the IP address in Task Manager (Windows 10)
Things are similar in Windows 11. However, when you fire up the Task Manager, there’s no annoying compact view. Instead, you just select the Performance tab on the left and click or tap on Wi-Fi or Ethernet, depending on your network connection. Then, on the bottom-right, you see your computer's IPv6 and IPv4 addresses.
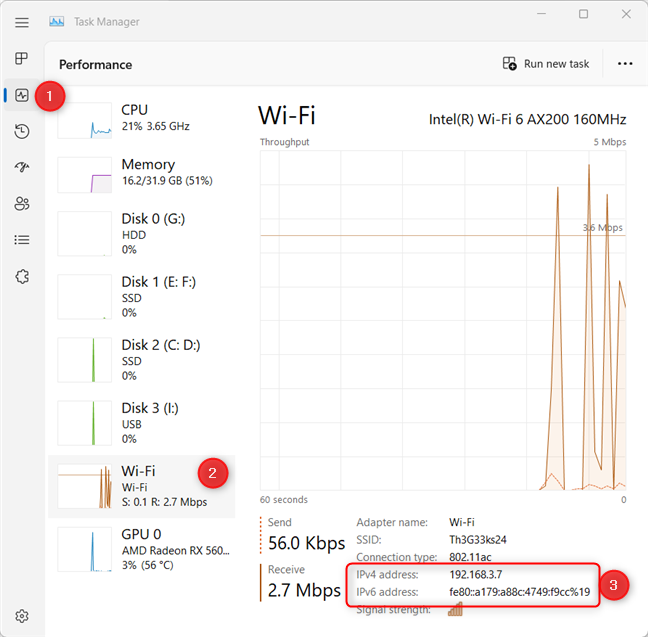
View the IP address in Task Manager (Windows 11)
Do you know other ways of finding your IP address?
When writing this guide, I aimed to make it the most complete tutorial on this topic available right now on the internet. I hope I was successful in my mission and managed to help everyone reading it. However, if you know other ways of finding the IP address of a Windows PC, don’t hesitate to share it in a comment using the options below. I promise to update this guide based on your feedback.