An ISO file (or an IMG file) is a disk image that stores a disk’s content and structure, whether it’s a CD, DVD, Blu-Ray disc, hard disk drive, or USB flash drive, into a single file. Windows 10 and Windows 11 have a built-in app named Windows Disc Image Burner, which can be used to burn disc images. The app is easy to use and helpful, eliminating the need for third-party apps to complete the task. Here is how to burn ISO files (and other disc images) to Blu-Ray, DVD, or CD in Windows 10 and Windows 11:
TIP: To understand what disc images are and how they work, you should first read: What is a disc image file (ISO, NRG, BIN)?
Windows Disc Image Burner: What is and how to open it
Windows Disc Image Burner is an app that can help you burn disc images for free without installing third-party software. The procedure for opening Windows Disc Image Burner is different in Windows 10 and Windows 11. However, the first step is to have the ISO file you want to burn available on your computer. Then, read the appropriate section depending on the Windows version you’re using.
How to open Windows Disc Image Burner in Windows 10
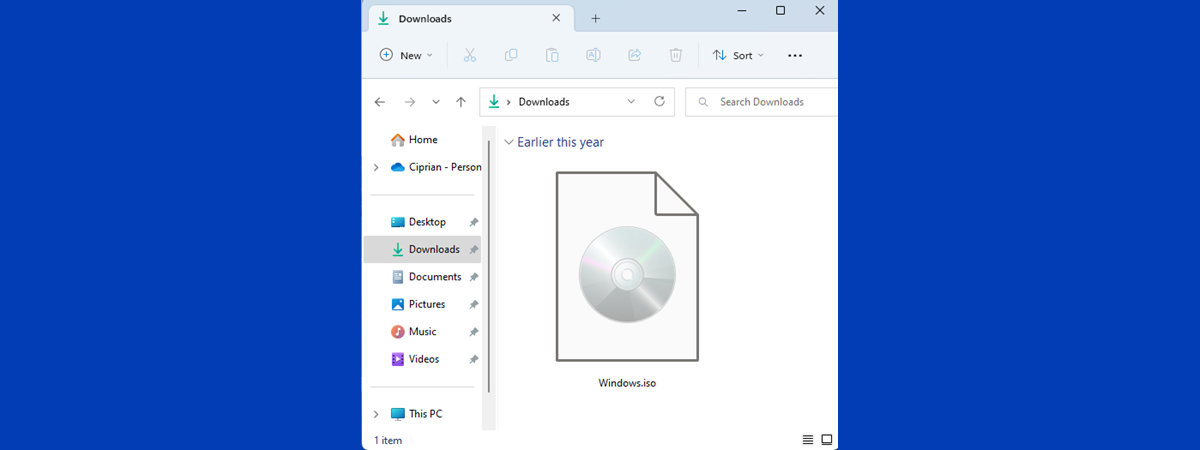
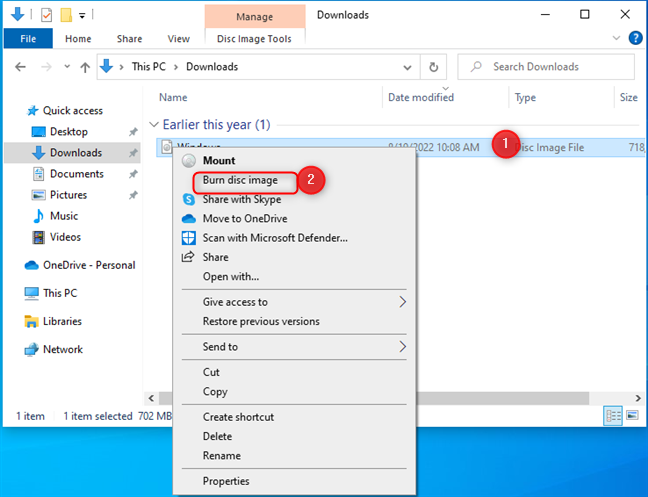
On your Windows 10 computer, open File Explorer and navigate to the ISO file you want to burn. Select it with a click or tap on its name.
Navigate to the ISO file in File Explorer
Next, click or tap the Disc Image Tools tab on the ribbon and then the Burn button.
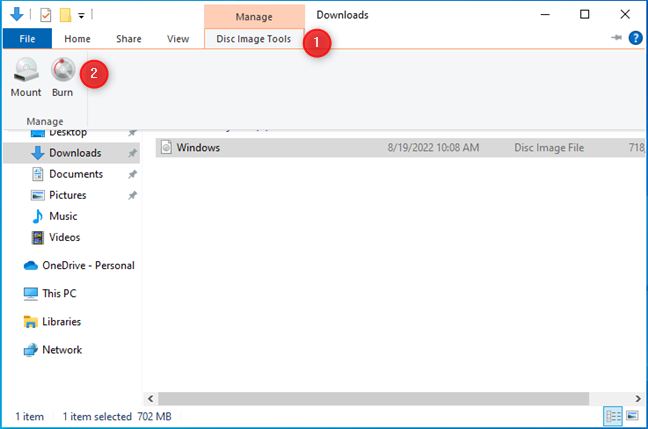
Click Disc Image Tools > Burn
This action opens the Windows Disc Image Burner app.
The Windows Disc Image Burner app
Another way to open it is to right-click (or press and hold) on the ISO file and choose to Burn disc image.
Right-click and choose Burn disc image
Then, skip the next section and follow the instructions for burning a disc image with Windows Disc Image Burner.
How to open Windows Disc Image Burner in Windows 11
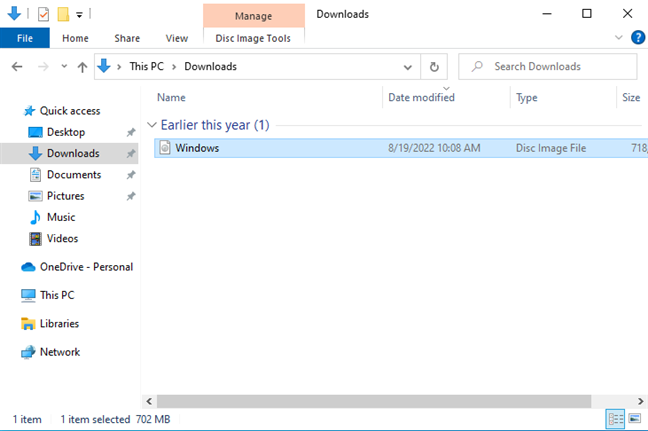
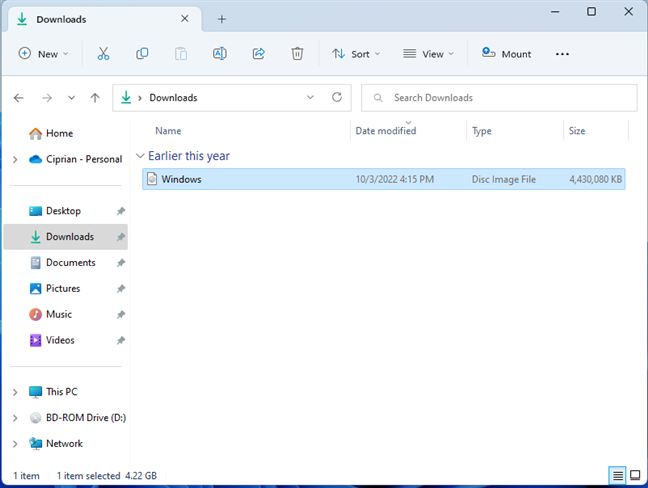
In Windows 11, open File Explorer and navigate to the ISO file you want to burn. Select it by clicking or tapping on it.
Navigate to the ISO file in File Explorer
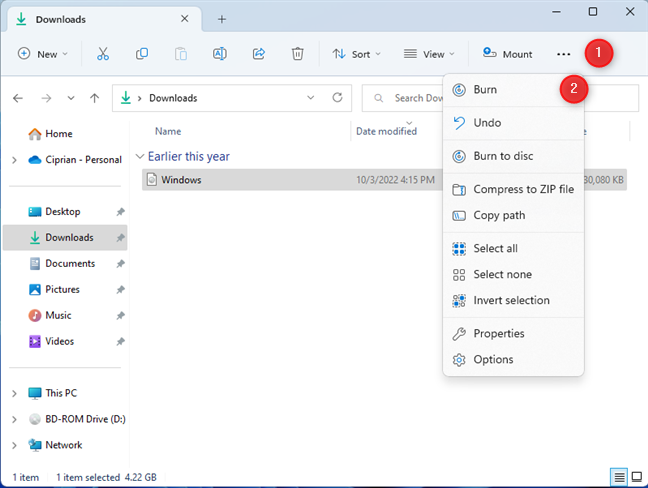
In the menu bar at the top, click or tap See more (three dots) and choose Burn in the menu that opens. If the File Explorer window is bigger on your screen, you might see the Burn button directly next to Mount, in the menu bar.
Click or tap See more > Burn
IMPORTANT: Do not choose Burn to disc. This option copies the ISO file to the disc; it doesn’t burn the contents of the ISO file onto the disc. Therefore, the result will be a DVD or Blu-Ray disc with the ISO file from your computer.
The Windows Disc Image Burner app opens, as seen in the screenshot below.
The Windows Disc Image Burner app
Another way of opening Windows Disc Image Burner is to right-click (or press and hold) on the ISO file you want to burn and then choose to Show more options.
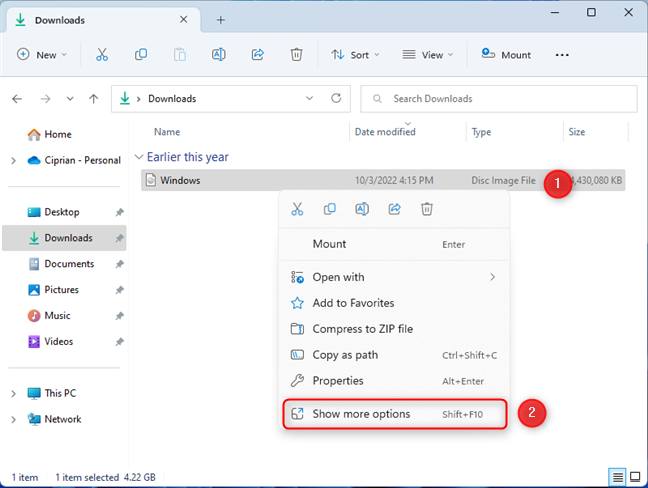
Right-click the ISO file and choose Show more options
The classic right-click menu is shown, where you find the Burn disc image option. Click or tap on it.
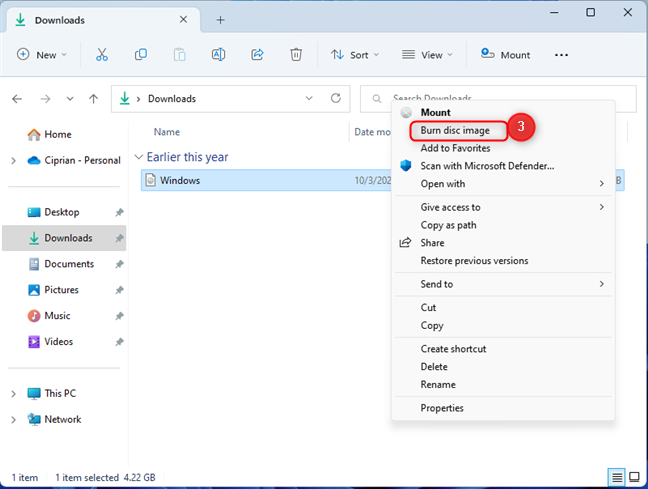
Choose Burn disc image
TIP: If you don’t like the new right-click menu from Windows 11, here’s how to restore the old right-click menu.
Follow the instructions from the next section on how to burn the disc image you’ve selected.
How to burn a disc image (ISO file to Blu-Ray, DVD, or CD) with Windows Disc Image Burner
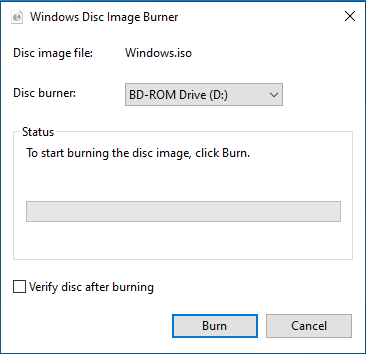
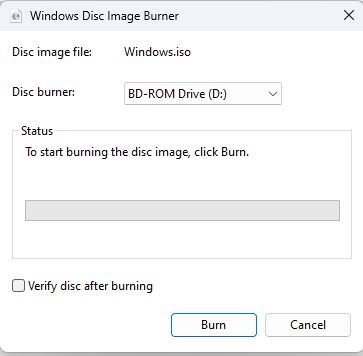
When you see the Windows Disc Image Burner window, select the drive you want to use for burning the disc in the Disc burner drop-down, and check whether you wish to Verify disc after burning.
This check is useful because it confirms that everything went well, and you can use the Blu-Ray, DVD, or CD you’ve created on other computers and devices. To start the disc-burning process, click or tap Burn.
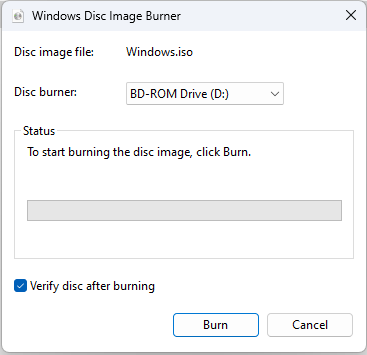
Select Verify disc after burning and press Burn
The app first burns the disc image to the recordable disc (Blu-Ray, DVD, CD). Then, it finalizes the disc and verifies it (if you’ve selected this option). For each step, you see a progress bar similar to the screenshot below.
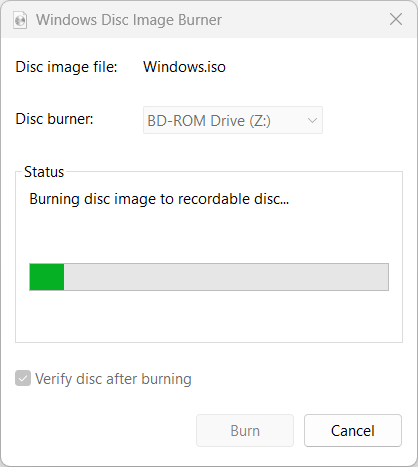
See the progress of the burning process
When everything is done, the Status section lets you know that “The disc image has been successfully burned to disc.” You also see the progress bar reaching its end, similar to the screenshot below. Click or tap Close.
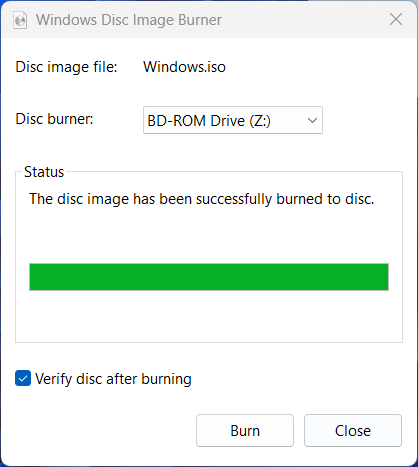
When the disc is done, press Close
Your computer automatically ejects the disc on which you’ve burned the content of the ISO file. Take it out, and close the disc burner.
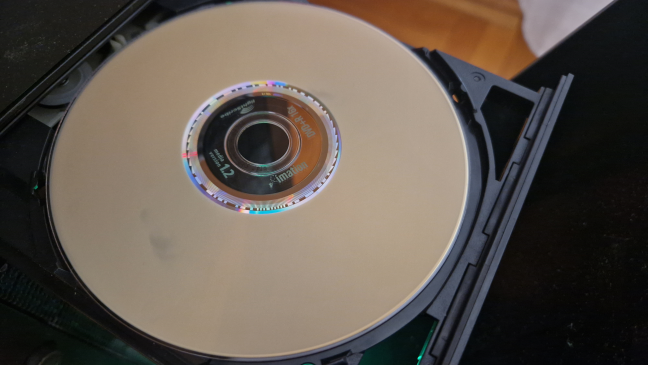
The disc is ejected automatically
BONUS: How to burn a disc image with isoburn (CMD, PowerShell, or Windows Terminal)
If you love the command line, you can use Command Prompt, PowerShell, or Windows Terminal to burn an ISO or IMG disc image file. First, open CMD, start PowerShell or Windows Terminal, depending on your preference.
The command you use for burning disc images is:
or
If you want to familiarize yourself with its parameters, type it in and press Enter before running it to burn an ISO file to a disc. You should see a Windows Disc Image Burner Usage help message like the one below.
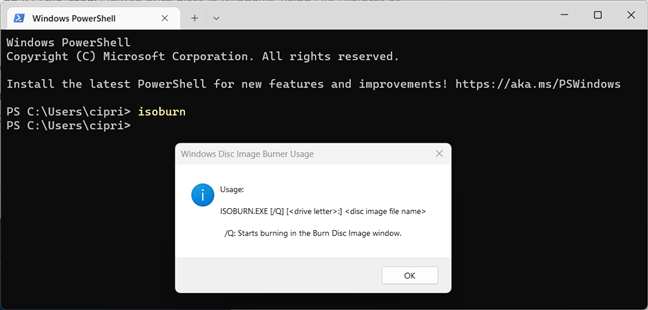
How to use isoburn
You can start the burning process using the following parameters:
The command is not case-sensitive, meaning it doesn't matter whether the path you enter has capital letters. Also, if your computer has only one drive that writes Blu-Ray discs or DVDs, you don’t need to specify the drive letter for the disc-burning drive. Windows knows it already. This letter is mandatory when you have two or more disc-burning drives.
The /q parameter is important because it tells Windows that you want to see the disc-burning window and follow the progress of the whole process. If you don’t use it, you won’t see anything.
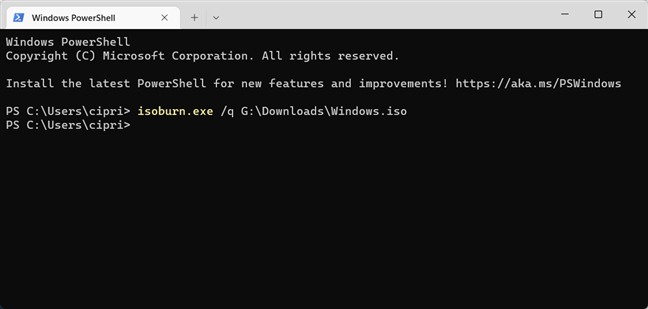
Here’s an example of how I used this command to burn an ISO file to a Blu-Ray disc:
“G:\Downloads\Windows.iso” is the path to the ISO file I wanted to be burned on a Blu-Ray disc. I didn’t specify the drive letter for the disc-burning drive.
Burning an ISO file with isoburn
After you press Enter, you can watch the Windows Disc Image Burner do its thing automatically. The only downside is that you can’t use this command to verify the disc after the burning process is over. It doesn’t have a parameter for this feature.
Which ISO file did you burn to a disc (Blu-Ray, DVD, etc)?
Most people don’t burn DVDs or Blu-Ray discs anymore. However, some still do, at least occasionally, for very specific reasons. So, before closing this guide, I’m curious to know which ISO (or other image files) you have burned and why. What did it contain, and how are you going to use it? Comment using the options below, and let’s talk.