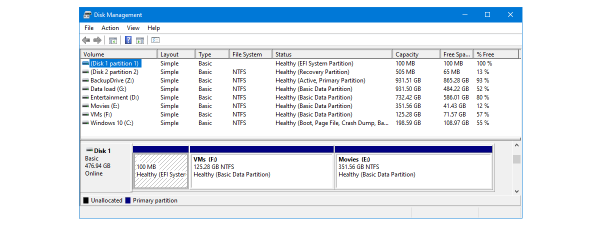
One of the easiest and most straightforward ways to manage your disks is to use the Disk Management tool from Windows. But hey, Disk Management is a visual tool and some of us like command-based interfaces a whole lot more. That is why we thought it would be a great idea to see how several disk management actions can be done from the Command Prompt or PowerShell, using diskpart, chkdsk, defrag, and other command-line tools. In this article we show you how to create, format, delete, hide and unhide, defragment and check your partitions for errors, directly from the Command Prompt. Let's get started:
Important aspects to consider before moving forward
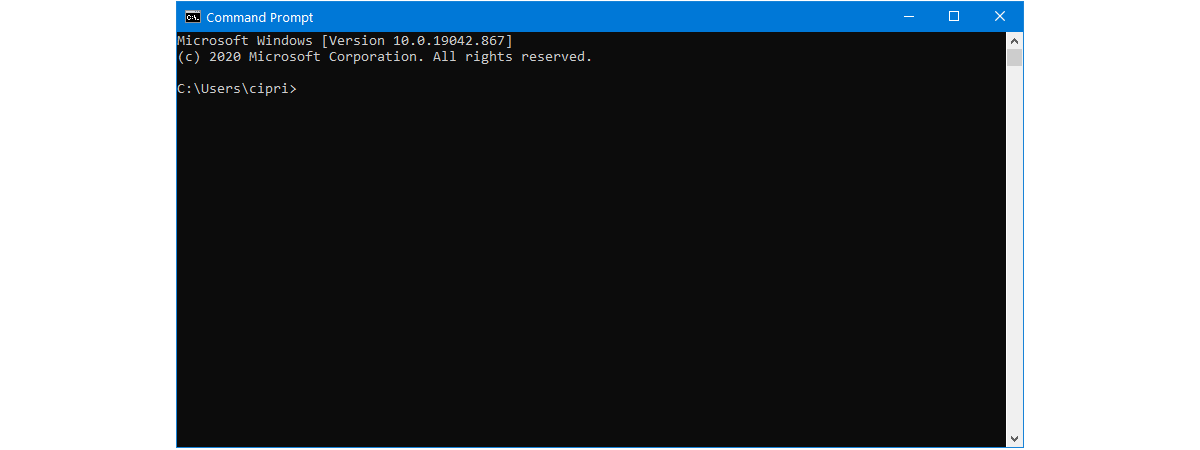
To be able to perform any actions presented in this article, you need to have administrative rights and run the Command Prompt or PowerShell as administrator. Read one of the following articles, depending on what you want to use:
- 10 ways to launch the Command Prompt in Windows
- 9 ways to launch PowerShell in Windows (including as admin)
It is also important for you to acknowledge the fact that, if you misuse the commands listed in this article, you risk losing your data. Be careful and make a backup of your data before going ahead. If anything bad should happen, we did warn you! 🙂
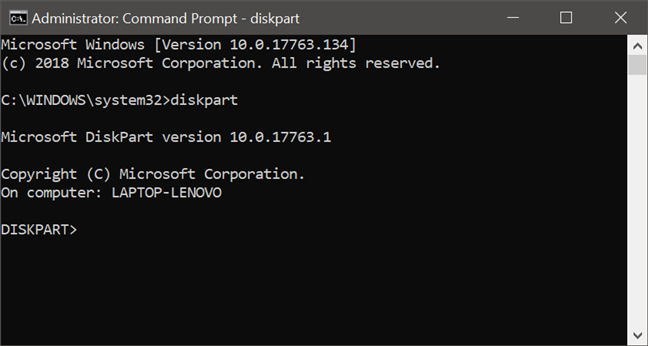
1. How to use diskpart to create a partition from the Command Prompt or PowerShell
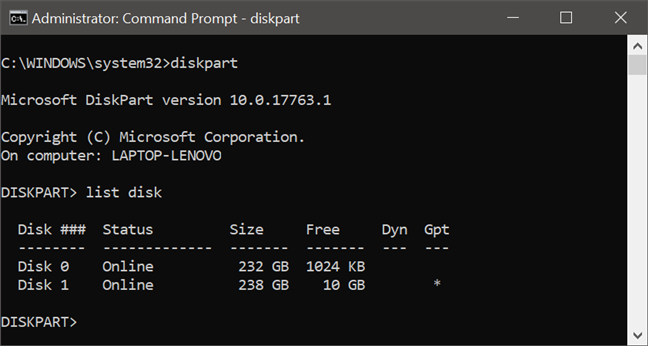
In Command Prompt or PowerShell, type diskpart to access the Windows tool called Diskpart.
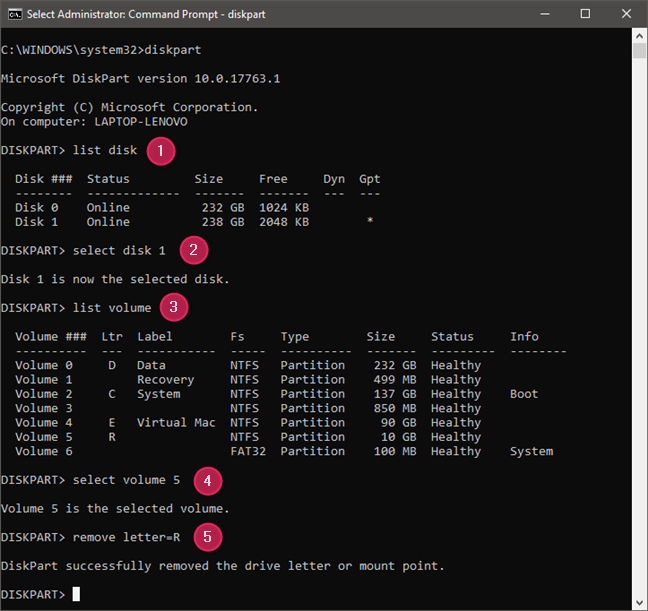
After you have launched diskpart it is time to establish which hard disk or solid state drive you want to use for creating a new partition. You can select the drive with the select command. To view the available disks on your system, run the command list disk.
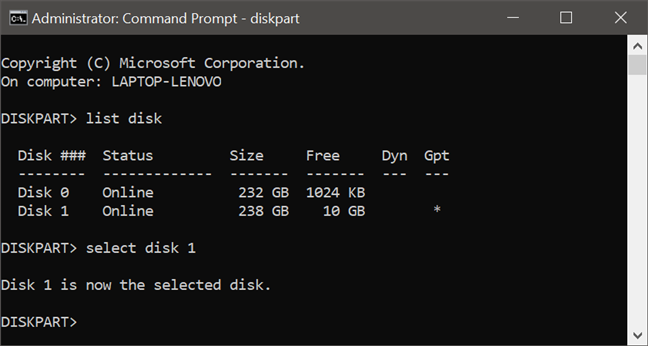
To select the disk you want to work with, type select disk followed by the number of the hard disk you want to use.
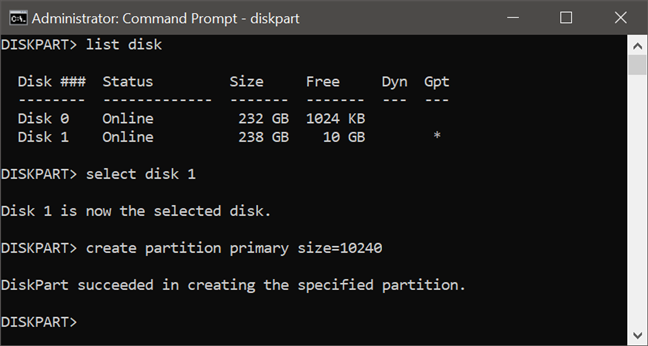
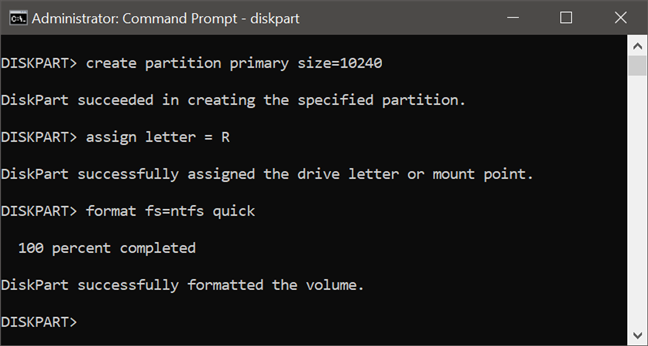
To create a new partition, you need to use the create partition command followed by the partition type and size. Note that the list command used previously also displays the available free space on each hard disk. Your partition must be of a size equal or less to the amount of available free space.
For instance, to make a new primary partition with the size of 10240 MB (10 GB), you must type "create partition primary size=10240". Use the same command and change the size according to your needs and the available free space on your hard disk.
2. How to use diskpart to assign a letter to a partition from the Command Prompt or PowerShell
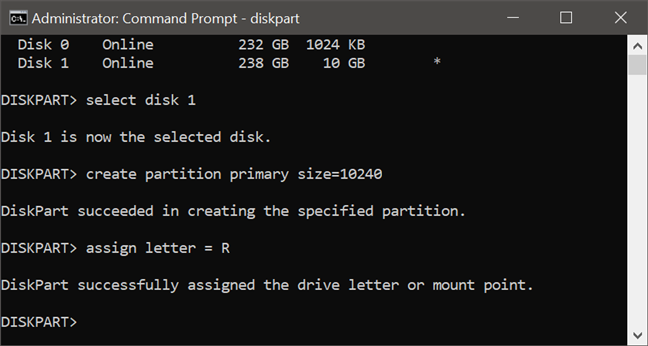
You can and probably want to also assign a letter to the newly created volume. Assigning a letter to a partition makes it visible in File Explorer so that you can easily access it. To assign a letter to a partition use the assign command.
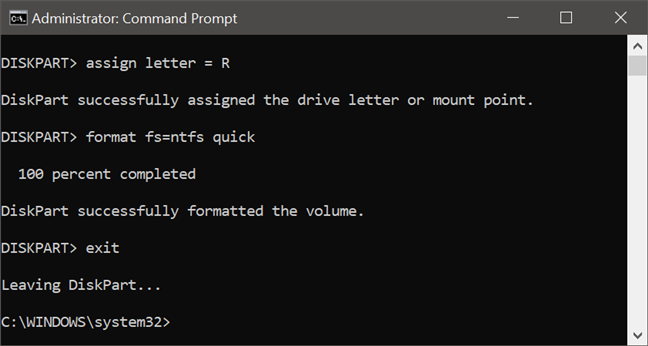
For instance, if you wanted to assign the R letter to the partition you just created, you should type "assign letter = R".
Please remember that before assigning a drive letter, you need to start Diskpart and select the disk for which you want to assign the letter.
3. How to use diskpart to remove the letter of a partition from the Command Prompt or PowerShell (hide a partition)
If you have a partition that contains private information that you do not want to be seen by apps and people, you might want to hide it from File Explorer. To do so, you can remove its partition letter and Windows stops making it easily accessible. To hide a partition, run diskpart in Command Prompt or PowerShell and select the volume that you want hidden. Then, run the command remove letter=R where R is that partition's assigned letter. That is all: now the partition is not visible in File Explorer anymore.
4. How to use diskpart to format a partition from the Command Prompt and PowerShell
Although you now have a new partition created on your computer or device and it also has a letter assigned so it is easy to access it, you are still unable to use it until you also format that partition. To do that too, use the command "format fs=ntfs quick". Use help format to find out more about this command.
This command should be used after you start diskpart and select the disk that you want to format.
5. How to use diskpart to delete a partition from the Command Prompt or PowerShell
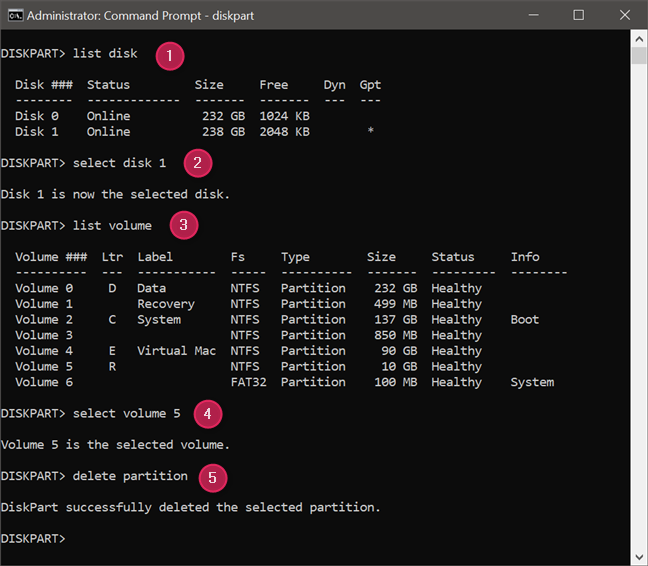
When you need to delete a drive from your computer, the procedure is quite simple. First, open the diskpart application. Then, select the partition that you want to delete and type the delete partition command.
You can see an example of how the delete operation works, below. It is a matter of selecting the disk where the partition is found, then selecting the volume to be deleted and running the delete command.
When you are done working with diskpart, type the exit command to close the program.
6. How to use chkdsk to check a drive for errors from the Command Prompt or PowerShell
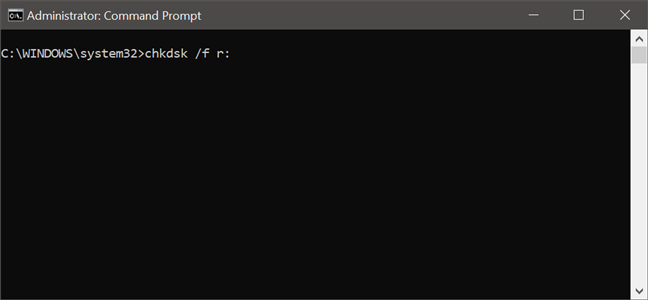
To check a disk for errors you have to use the chkdsk command. Type chkdsk followed by the drive's letter. We recommend that you always use this command in combination with the /f parameter. This enables the tool to automatically fix any errors it finds.
As an example, we are scanning the R: drive for errors by typing chkdsk /f r: and pressing Enter. The scan process starts immediately.
After the scan is finished you see a report similar to the one from the picture below.
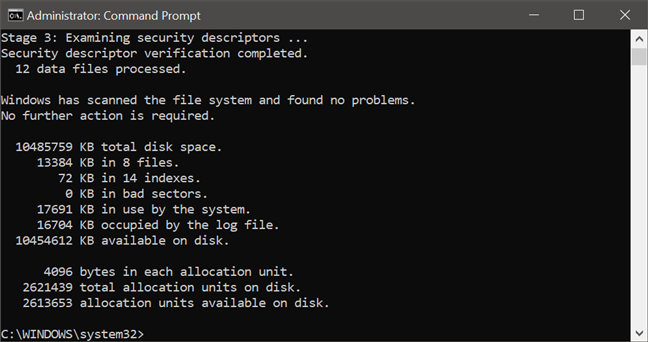
This summarizes how much disk space the partition has, how many files are in use by the system, how much free space is available on the disk, how many bad sectors were identified and so on.
7. How to use defrag to optimize a drive from the Command Prompt or PowerShell
Command Prompt and PowerShell also give you a way of optimizing (trimming or defragmenting) a partition. All you have to do is type the command defrag followed by the drive's letter. If you wanted to optimize the R: partition, for example, you would use "defrag r:". If everything worked well, you should get a report like the one below, after the volume you selected has been optimized (trimmed if it is an SSD, or defragmented if it is a hard disk).
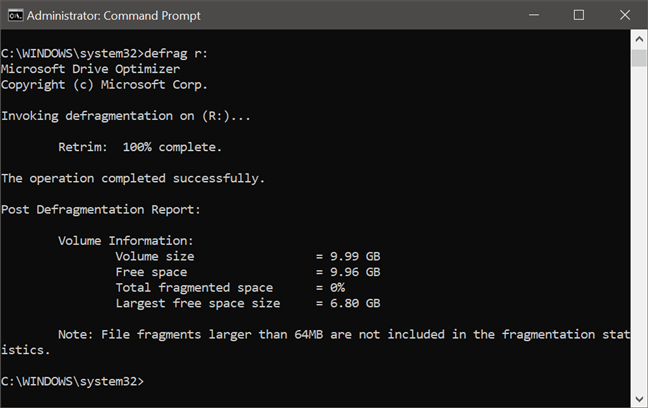
The report includes information prior to the optimization process and after it was completed, like the volume size, free space, total fragmented space, and the largest free space size.
Have you found this guide useful?
Even though you might think it is hard to manage your partitions through the Command Prompt or PowerShell, we hope that we managed to prove that it is not that difficult. The procedures involved are not complicated at all and, once you learn how to use diskpart and know the correct commands, using the Command Prompt or PowerShell can be a lot faster than using other tools like Disk Management. If you have any questions, feel free to leave a comment below.