Windows 10 has an excellent tool for managing your drives and partitions, called Disk Management. One of its best features is that it allows you to mount and unmount VHD files so that you can work with them as you need. In this guide, we show you how to attach and detach Virtual Hard Disk (VHD) images in Windows 10, as well as how to permanently attach a VHD file that’s always available. If we sparked your interest, read on:
What is the use of VHD (Virtual Hard Disk)?
A Virtual Hard Disk or VHD file is a virtual hard drive image that stores all the data from a hard disk partition or file system, all in a single file. VHD files are usually created and used by virtual machine software such as VirtualBox or Microsoft’s virtualization solution Hyper-V. Additionally, the old Windows Backup tool from Windows 7, which is still present in Windows 10, also saves system images as VHD files.
How do I open a VHD file? (or how to mount a VHD image with Disk Management)
First, open the Computer Management console on your Windows 10 PC. In it, select Disk Management on the left.
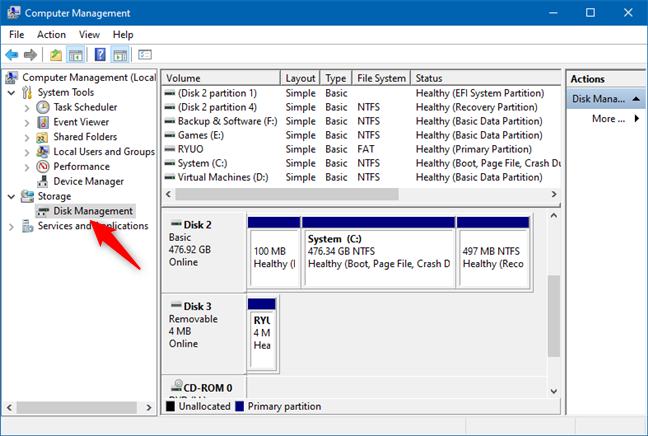
Disk Management in Computer Management
On the same left-side panel, right-click or press-and-hold on Disk Management and select the “Attach VHD” option.
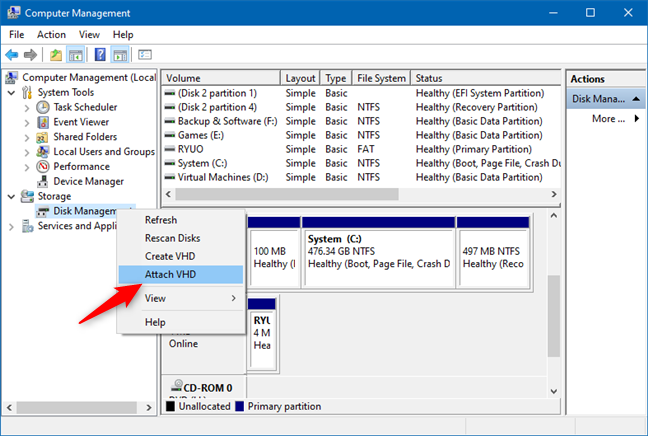
Attach VHD in Disk Management
You can also find an “Attach VHD” option in the Action menu from Disk Management, as shown in the screenshot below.
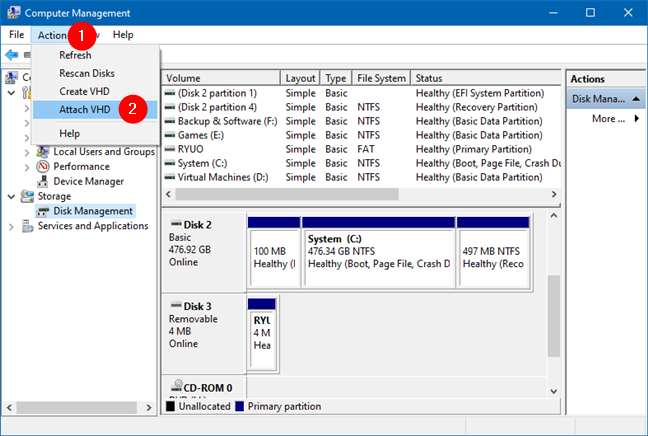
Attach VHD in the Actions menu from Disk Management
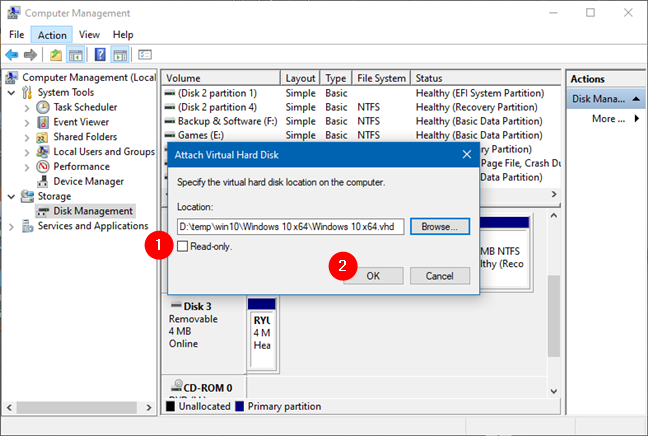
Then, Disk Management loads a dialog window called “Attach Virtual Hard Disk.” Type the path to the VHD file that you want to mount or click/tap Browse to find it on your Windows 10 PC.
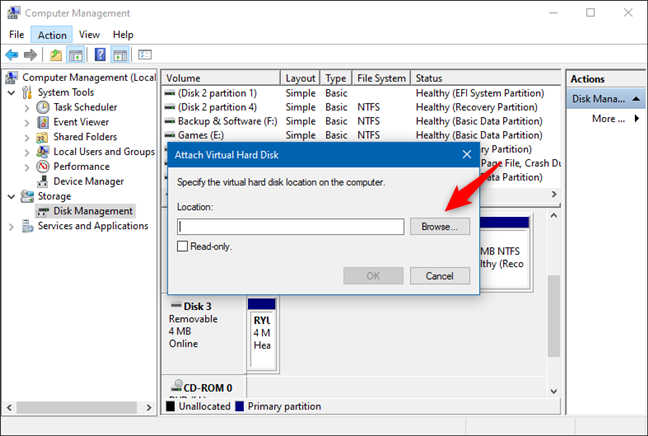
Attach Virtual Hard Disk
Locate the VHD file to mount and select it. Then press the Open button.
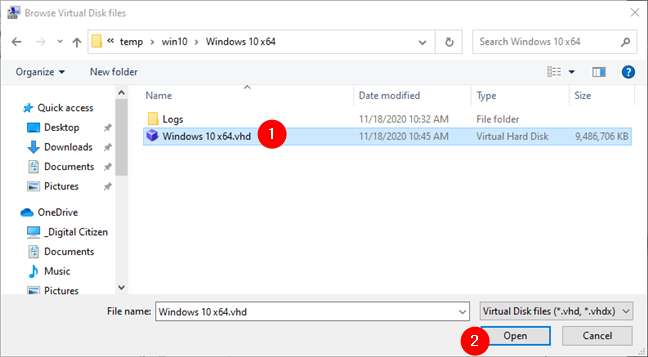
Browse Virtual Disk files and select the one to mount
You are now back to the “Attach Virtual Hard Disk” window. Our advice here is to let the “Read-only” box unchecked so that you can modify the files found inside the VHD image. If you check this box, you can open and copy files from the VHD, but you cannot alter them in any way. Click or tap on OK to open the VHD image.
Attaching a Virtual Hard Disk file
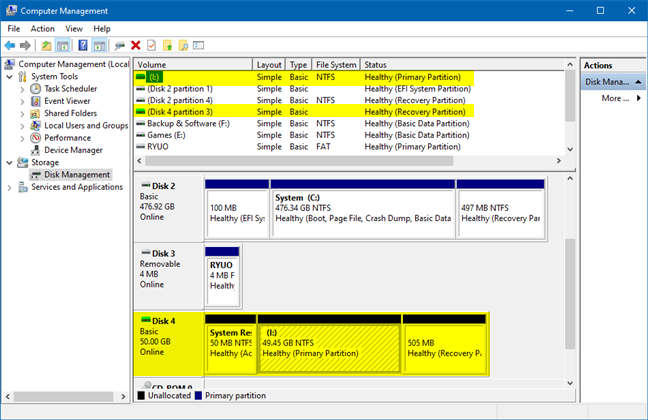
You should now see that the VHD file has been mounted as a separate disk drive, and it has its own drive letter assigned.
In our case, the mounted VHD image included three different partitions found on a Windows 10 system drive. Naturally, only the partition where Windows 10 was installed has a drive letter – I – as you can see in the screenshot below.
The VHD file has been mounted
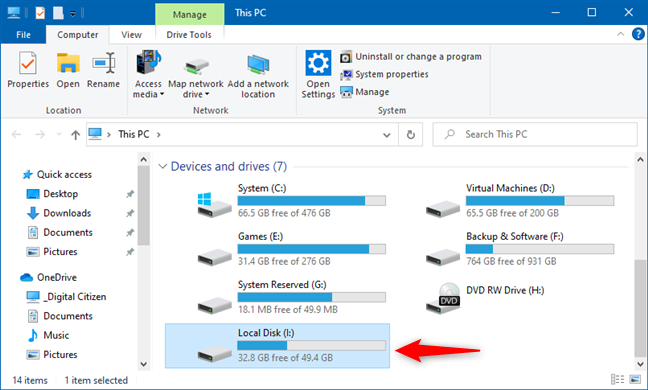
Open File Explorer and click on the new partition to open it.
A partition from a VHD file shown in File Explorer
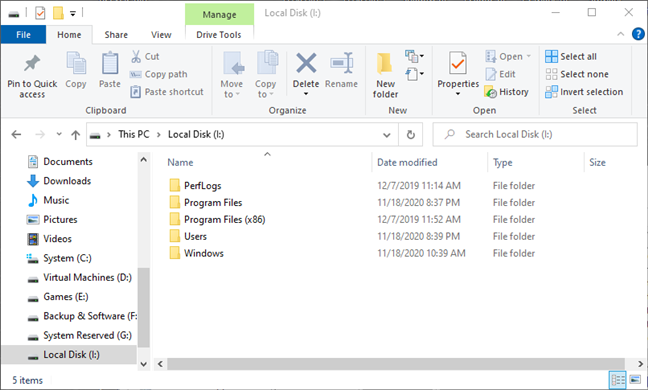
Now, you can easily manipulate the desired files from the attached VHD file.
Browsing a VHD file
How do I permanently attach a VHD?
If your question is “How do I permanently attach a VHD?”, here’s what you should do:
Open the Task Scheduler and click or tap on Create Task in the Actions panel.
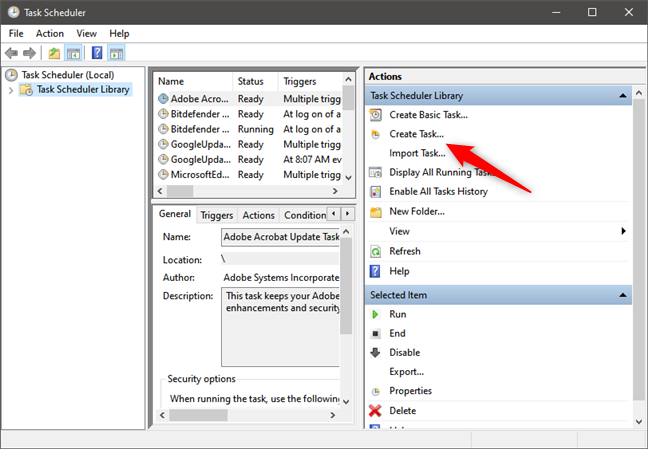
How to permanently attach a VHD: Create Task in Task Scheduler
In the General tab of the Create Task window, type a name for the VHD permanently mount task. Then, select the “Run whether user is logged on or not” and “Run with highest privileges” options, and choose Windows 10 in the “Configure for” dropdown list.
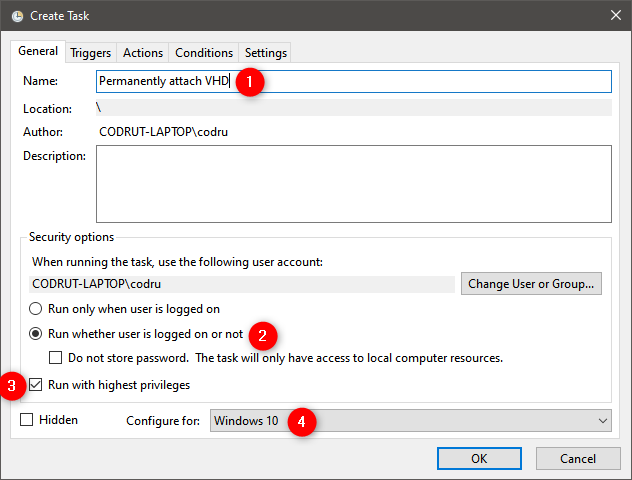
How to permanently attach a VHD: General settings for the task
In the Triggers tab, click or tap on New.
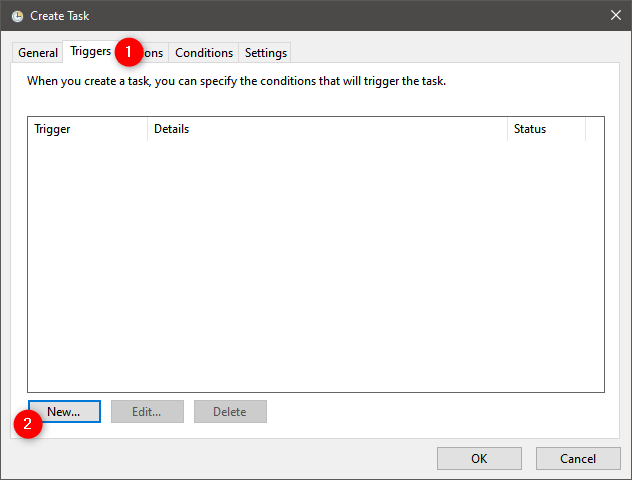
How to permanently attach a VHD: Triggers for the task
This opens the New Trigger window. In it, select “At startup” from the “Begin the task” list at the top. Then, click or tap the OK button.
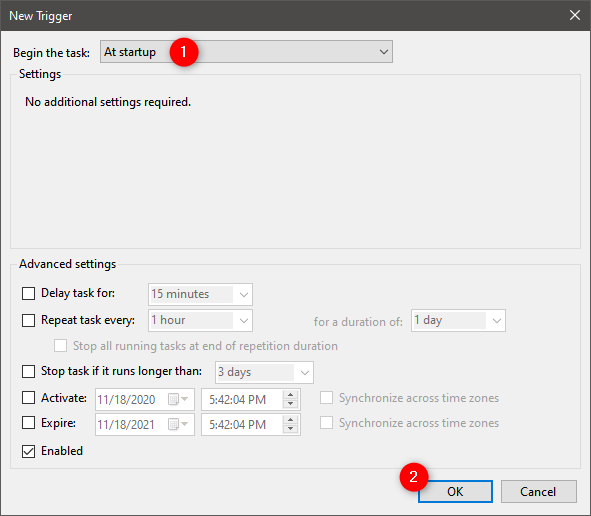
How to permanently attach a VHD: Trigger is At startup
Move on to the Actions tab from the “Create Task” window. On it, click or tap New.
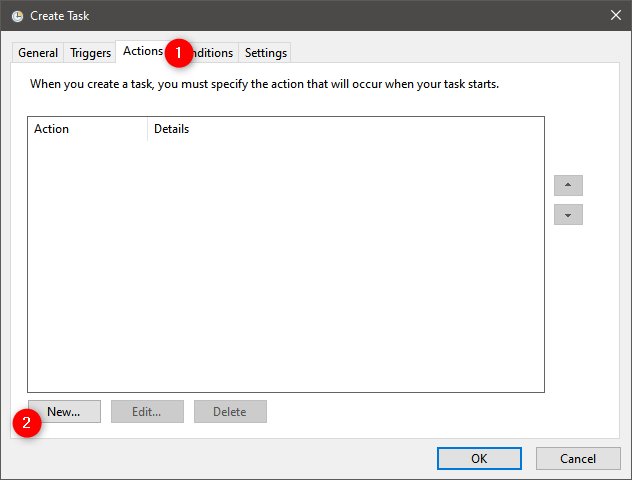
How to permanently attach a VHD: Actions for the task
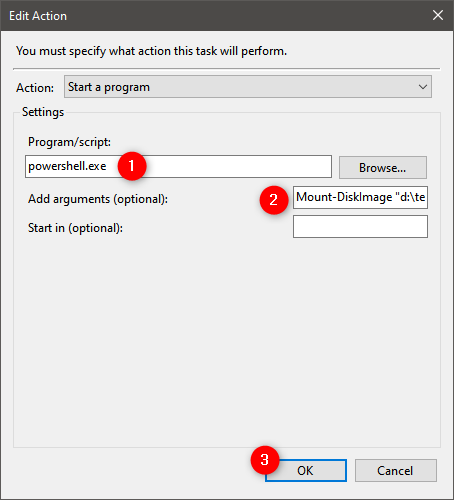
In the “New Action” window, type powershell.exe in the Program/script field. Then, in the “Add arguments (optional)” text field, type this command: Mount-DiskImage “Path to the VHD file”.
Obviously, change the “Path to the VHD file” with the real path to the VHD file that you want to mount permanently. Once you’re done, press OK.
How to permanently attach a VHD: Use PowerShell to run Mount-DiskImage
Press OK once more to save the “permanently mount VHD” task.
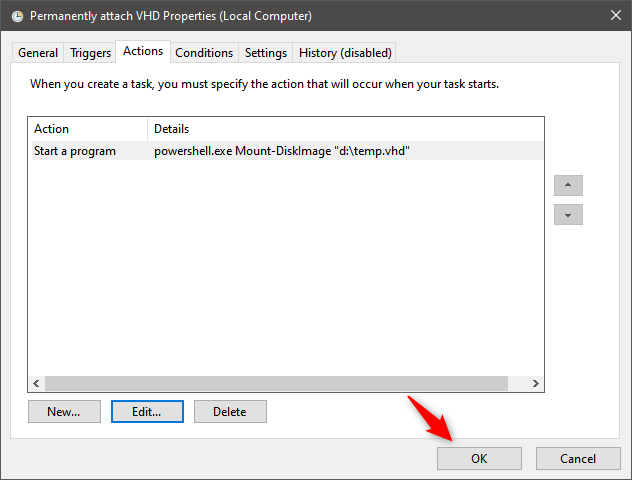
How to permanently attach a VHD: Saving the task in Task Scheduler
The final step is to enter the Password of your Windows 10 user account. Type it and press OK.
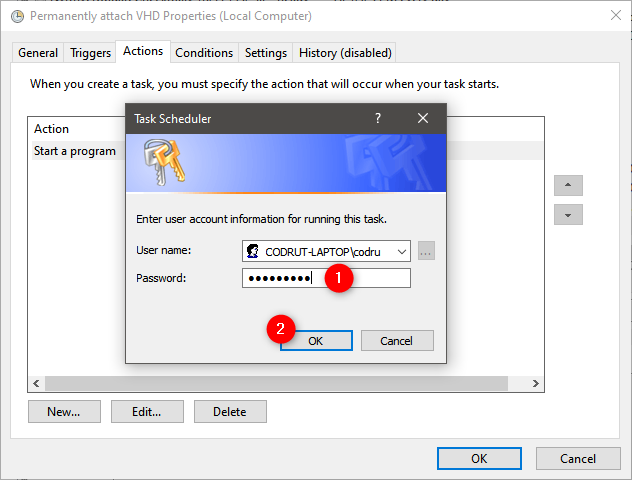
Entering the password of the user account
The attached VHD file is available to use for as long as you want, even if you restart your Windows 10 PC. If you decide you no longer need to access it, you can detach the VHD file (unmount VHD) by following the steps in the next section of this tutorial.
How to detach a VHD image using Disk Management (unmount VHD)
After you are done working with the mounted virtual image, you might want to unmount it. Open Computer Management and select Disk Management again. Then, right-click or press-and-hold on the attached VHD and choose the “Detach VHD” option.
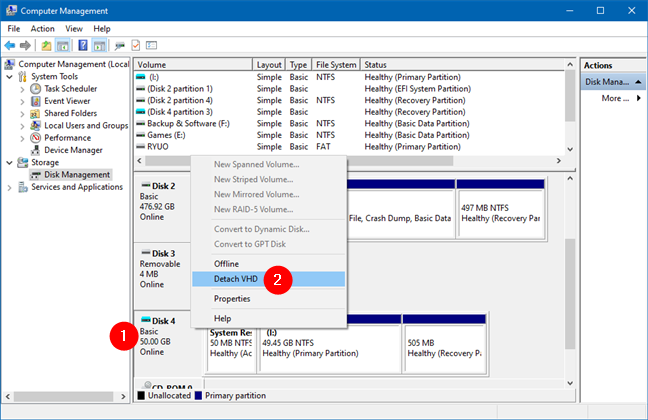
Unmount VHD in Windows: Detach VHD
Click or tap on the OK button to finish.
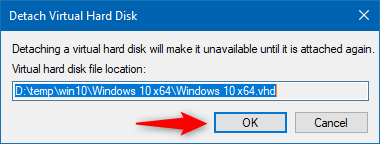
Detach Virtual Hard Disk
You should now see that the disk and all its partitions have been removed from the Disk Management window.
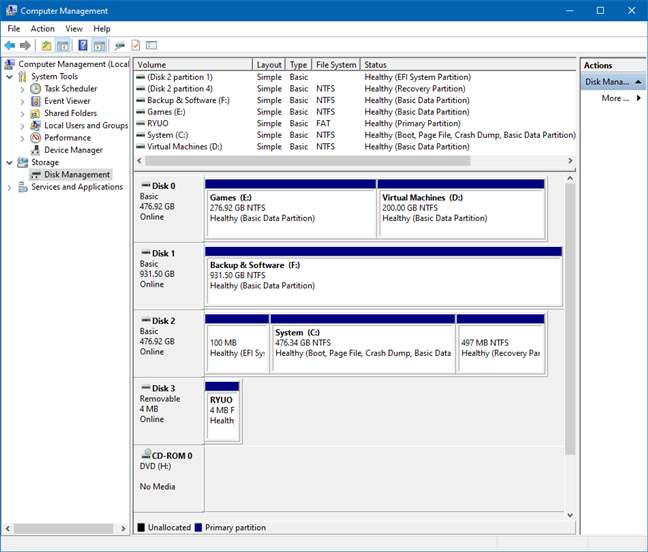
The VHD file has been detached (unmounted)
The next time you open File Explorer, you will notice that the detached VHD partitions are no longer shown there either.
How do you use VHD files in Windows 10?
There are times when you need a single file or folder from a VHD file or system image created by Windows Backup. Using the Disk Management utility, you can easily mount the VHD file and copy the files and folders you need. Also, this allows you to add folders and files to any image. Depending on the usage scenario – this feature can be useful. In the end, you’ve seen that using Disk Management to mount and unmount VHD files is not complicated at all. If you have any other tips to share, let us know in a comment.