When we want to tweak different aspects of Windows, we prefer to use the built-in tools provided by the operating system. All modern versions of Windows and especially Windows 10, provide some great tools you can use. One such tool is the underrated Disk Cleanup, which allows you to free up space on your partitions and safely remove system files that you no longer need. Let's see how it works and why it is one of the best tools for cleaning up storage space, in all versions of Windows:
How Disk Cleanup works in Windows
Disk Cleanup or cleanmgr.exe is one of the best Windows programs for removing unnecessary files and freeing up storage space. It is not as invasive as many third-party tools that promise the same thing. Those tools may remove files that are required by specific apps to run well, and they also tend to dig deep into the Windows Registry and remove entries that may be useful to the operating system. Instead, Disk Cleanup only removes files that are 100% safe to remove, and do not negatively affect the functioning of Windows, or any of your installed apps.
When analyzing your disk space, Disk Cleanup looks for temporary files that can be removed, for the files that you have already moved to the Recycle Bin (signaling that you do not need them anymore), a variety of system files that Windows can run without, offline web pages, setup log files and so on. If you want to reduce the number of unnecessary files on your HDD or SSD, we recommend that you use Disk Cleanup.
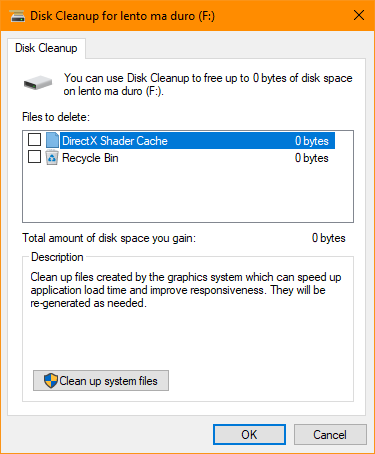
One thing that you should remember about this tool is that it works best when used on the partition where Windows is installed. If you use it on other partitions, it only removes the files and folders that are found in the Recycle Bin. Therefore, using it on partitions other than the "C:" drive is not efficient.
The Disk Cleanup tool is located on the disk, in the following folder: "C:WindowsSystem32".
How to clean up unnecessary files from Windows
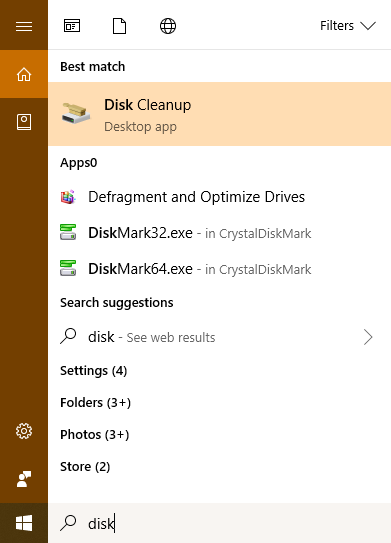
First, you have to open Disk Cleanup. You can find all the methods for doing that, in this tutorial: 11 ways to start Disk Cleanup, in Windows (all versions). One fast method to do it is to use the search feature. In the appropriate search field for your version of Windows, type the word "disk." Then, click or tap the Disk Cleanup search result.
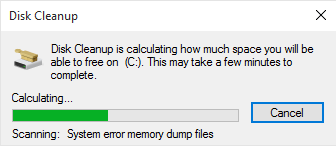
If you have only one partition on your Windows computer or device, Disk Cleanup starts by automatically scanning for files that you can delete to free up space.
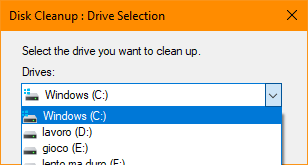
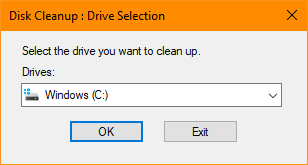
If your Windows device has two or more partitions, you are asked to select the drive that you want to clean up. Click or tap the Drives drop-down box and select the desired drive. Then, press OK.
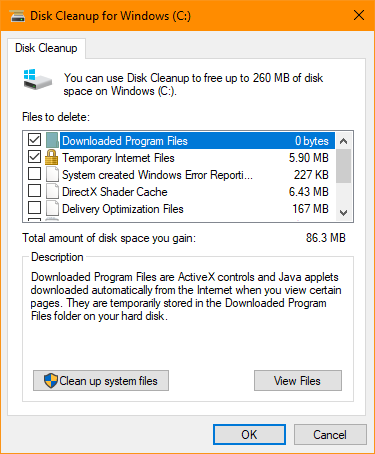
Wait for Disk Cleanup to analyze the selected drive and display what files can be cleaned up. A progress bar is shown during this process which generally takes less than a minute to perform, on a computer with an SSD drive, and a few minutes on one with an HDD. When done, Disk Cleanup shows what can be freed up. In the "Files to delete" section, you see different types of files that can be deleted. This includes items such as Downloaded Program Files, Temporary Internet Files, Delivery Optimization Files, Recycle Bin, System error files, Temporary files and others. For each category of items, you see how much space they occupy at the moment. Select a category to see its description and what kind of files it includes.
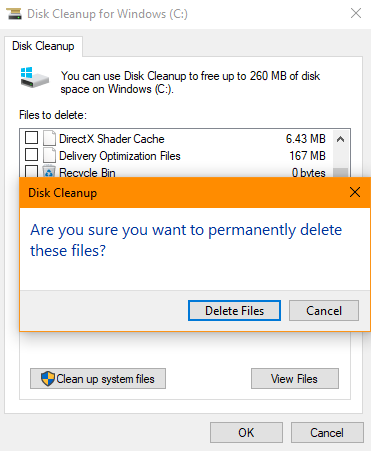
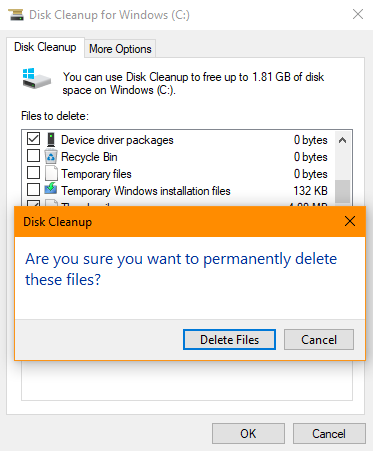
Decide which files to delete by selecting the appropriate categories. When you are done selecting everything you want to be deleted, click or tap OK. A confirmation message is shown. Press "Delete Files," and the cleanup process starts.
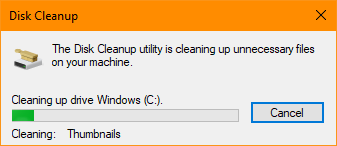
Disk Cleanup shows a progress bar similar to the one below.
When the cleanup is done, Disk Cleanup closes itself automatically. If you want to free space on another drive (if available), you need to start the tool again and select that drive for analysis and cleanup.
How to delete unneeded system files from Windows
Disk Cleanup provides a lesser-known option that also allows you to clean system files like previous Windows installations, Windows Defender files, Windows Update files, and Windows upgrade log files that you might no longer need. These files are not shown when performing a standard analysis. Also, such files cannot be cleaned up unless you log in as an administrator or you can provide the administrator password when requested.
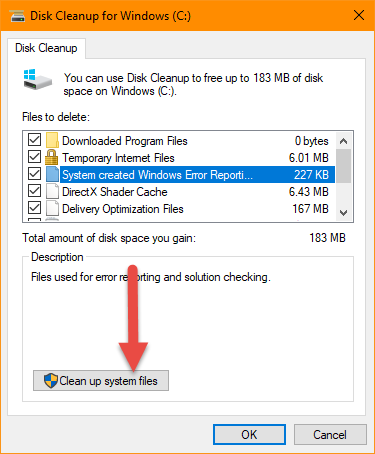
First, run Disk Cleanup, select the drive that you want to clean up (if you have more than one partition) and perform a standard analysis, as shown in the previous section. Then click or tap "Clean up system files."
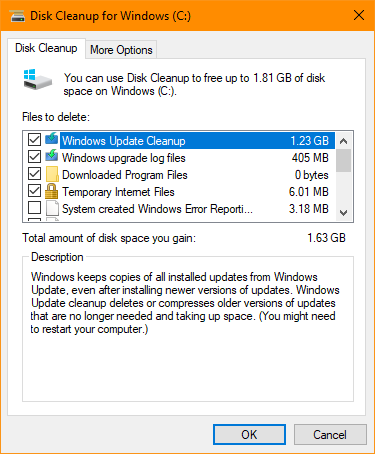
You are asked again to select the drive you want to analyze if more than one drive is available on your Windows computer or device. Select it and click or tap OK. If you have only one drive, the analysis is started automatically. When the analysis is done, you will notice two differences: the "Files to delete" list is larger, and you also have an additional tab called "More Options." We will tell you about this additional tab in the next section of this tutorial. For now, let's stick to the "Files to delete" list. This list now includes many types of system files that can be safely deleted.
For example, Disk Cleanup can delete quite a few Windows Update files that are no longer needed, device driver packages that are no longer useful, files that were used to upgrade to the latest version of Windows, and so on.
Select the types of files you want to delete, click or tap OK and confirm your choice by pressing Delete Files.
The cleanup process starts, and you are shown a progress bar. The cleanup of system files takes a lot longer than the cleanup of temporary files. Therefore, arm yourself with some patience. When the cleanup is done, Disk Cleanup closes itself automatically.
How to remove programs that you do not use
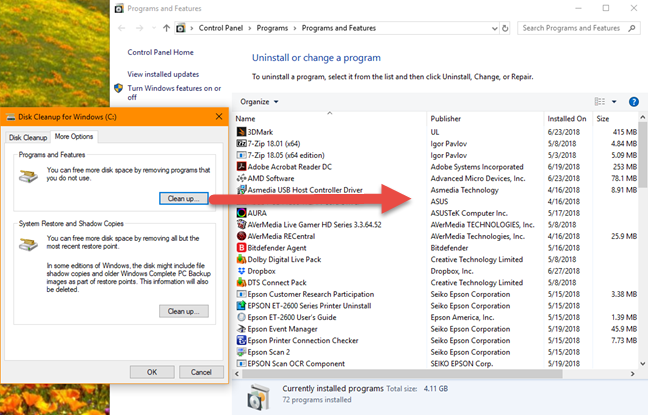
When you ask Disk Cleanup to analyze and clean system files, an additional tab is displayed, named More Options. This tab has additional tools that can be used to free up even more space. First, if you click or tap the Clean up button from the Programs and Features category, the Programs and Features window is shown, from which you can manually uninstall desktop apps you no longer use.
How to remove System Restore snapshots
In the More Options tab, there is another Clean up button found in the section named System and Restore and Shadow Copies. When you click or tap on it, you can clean up all System Restore points except the most recent. You are asked to confirm that you want to delete all but the most recent restore point. Click or tap Delete and, during the next system reboot, those files are cleaned up, before your login.

If you want to do some work before manually restarting Windows, close the Disk Cleanup window. The cleanup was scheduled the moment you pressed Delete.
How to view the files that you are about to delete with Disk Cleanup
For some of the categories of files that can be deleted, Disk Cleanup allows you to view the files that can be deleted. Click or tap the View files button if it shows up and Windows opens File Explorer or Windows Explorer, depending on the version of Windows that you are using, straight at the folder where the selected files are found.
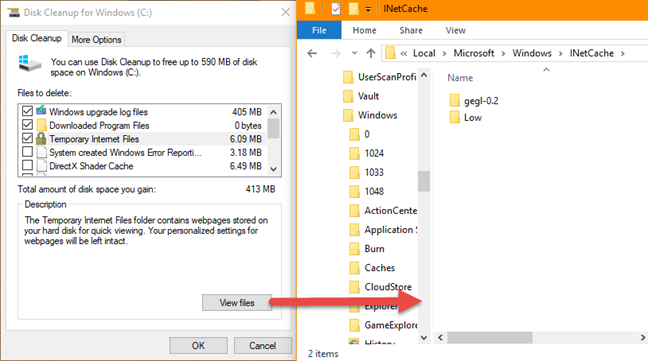
Browse those files and then decide if you want Disk Cleanup to delete them.
Conclusion
Disk Cleanup is an excellent yet underrated Windows tool for freeing up space on your disk. You do not need any third party solutions that are likely to screw something up. Disk Cleanup works well, it is powerful, and it does not ruin your Windows installation. Do not hesitate to use it more often. You will love it using it.