Both Windows 11 and Windows 10 come with predefined sets of features and components. You can customize Windows by removing the features you’re not using and by adding the ones you need but aren’t installed by default. Moreover, if you remove unwanted components, you can theoretically save a bit of space on your hard drive. This tutorial teaches you how to add and remove Windows features in Windows 11 and Windows 10. The process is pretty straightforward, so let’s get started:
How to open Windows Features
Although opening Windows Features is quite similar in Windows 11 and Windows 10, the visuals are slightly different. For that reason, we’re going to show you how to get to them first in Windows 11 and then in Windows 10:
How to open Windows Features in Windows 11
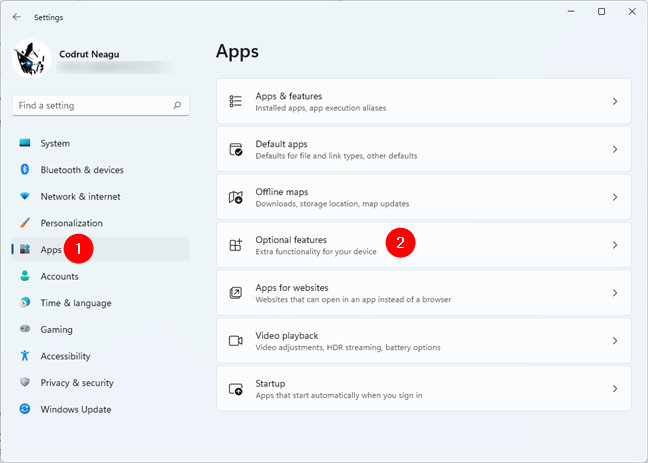
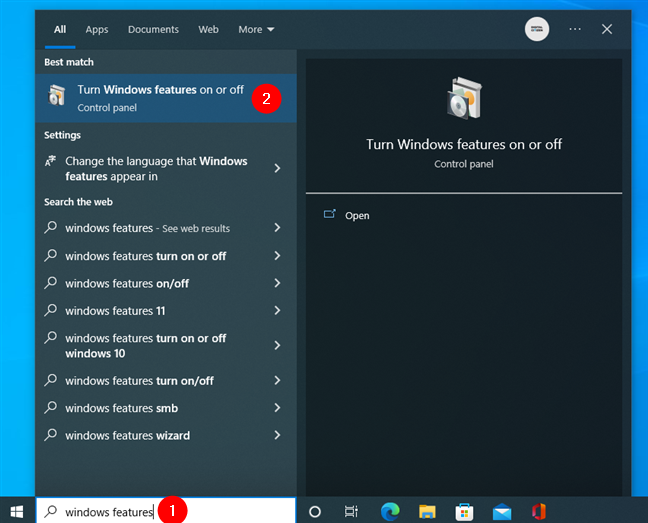
If you’re using Windows 11, click or tap the Search button on the taskbar that looks like a magnifying glass, and type “windows features” in the search field. Once the results are in, click or tap on “Turn Windows features on or off.”
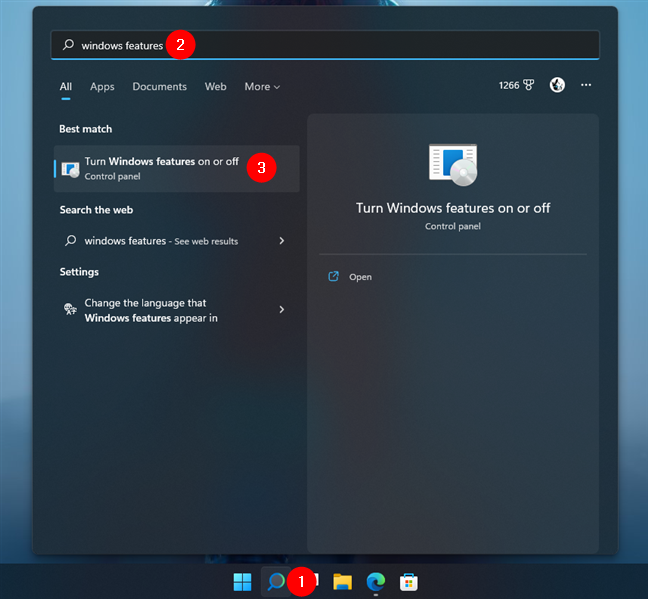
Search for windows features in Windows 11
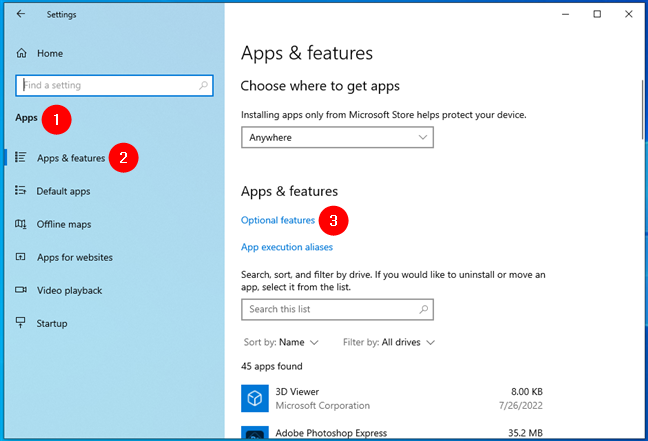
Alternatively, you can also access Windows Features using the Settings app. Open it (Windows + I), select Apps on the left sidebar, and click or tap on Optional features on the right.
TIP: The Optional features settings from Windows 11 and Windows 10 allow you to add other extra functionality for your device. If you want to learn how to install new features or remove the ones you don’t need, check this other guide that we just published: How to add or remove optional features in Windows 11 and Windows 10.
Access Optional features in Windows 11
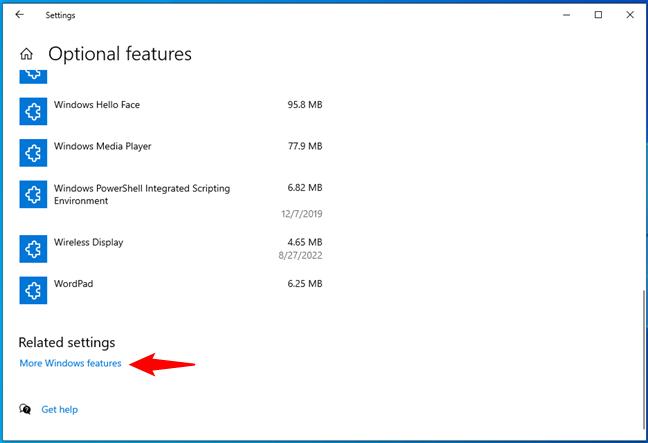
On the Optional features page, scroll down to the Related settings section at the bottom, and click or tap on More Windows features.
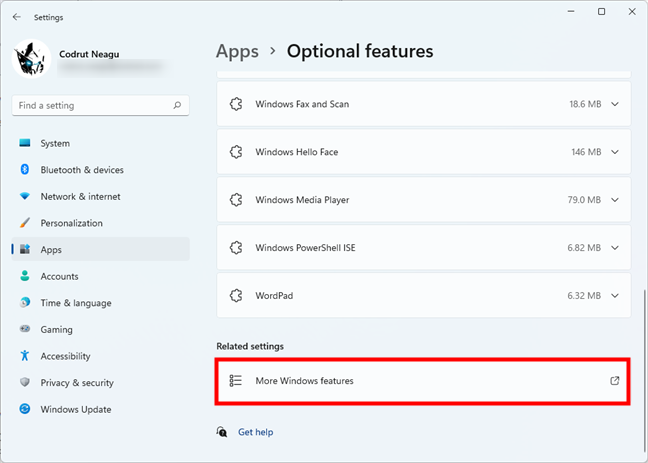
The More Windows features link in Optional features
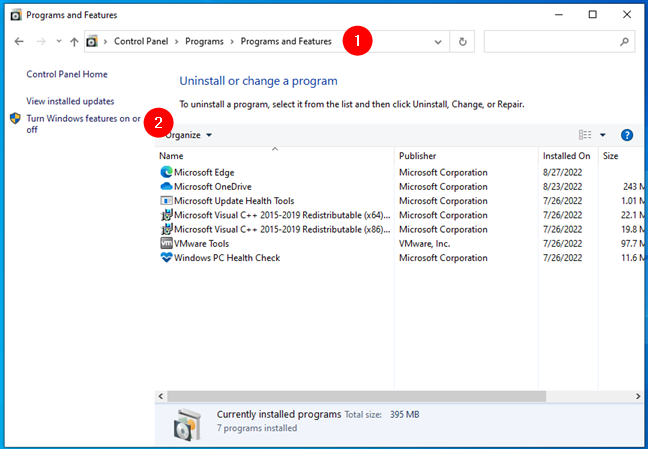
And last but not least, a third method of getting to the Windows Features in Windows 11 is using the Control Panel. In it, go to Programs > Programs and Features and click or tap the “Turn Windows features on or off” option on the left.
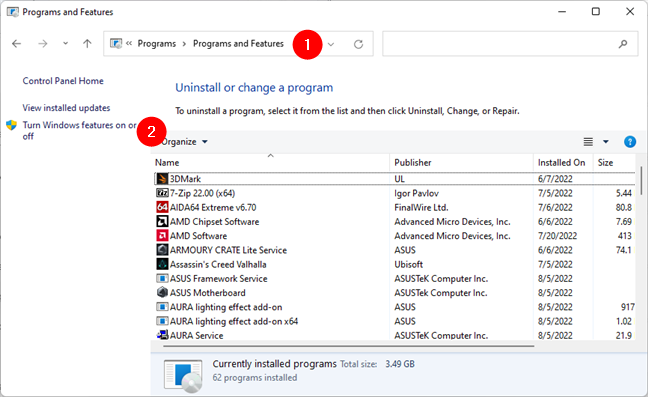
Click or tap on Turn Windows features on or off
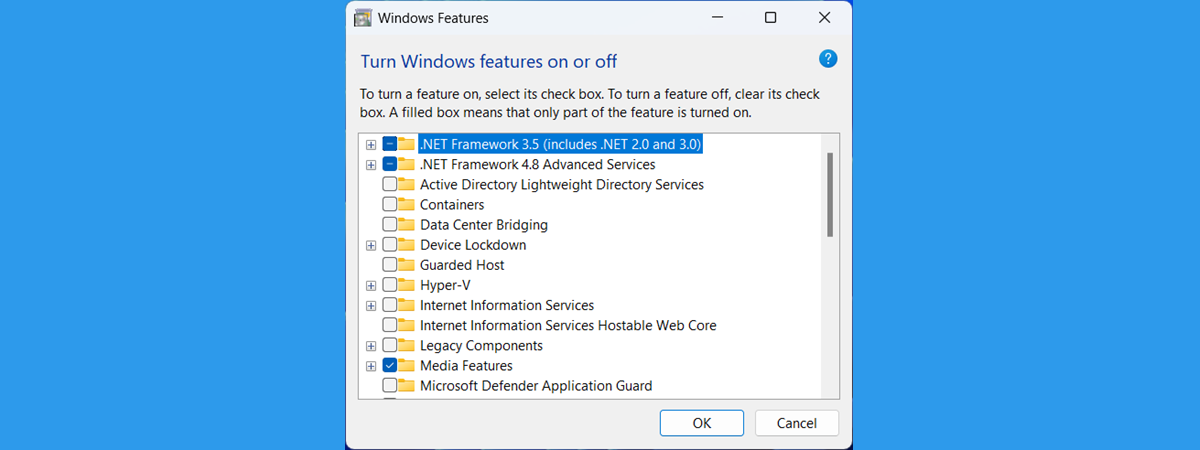
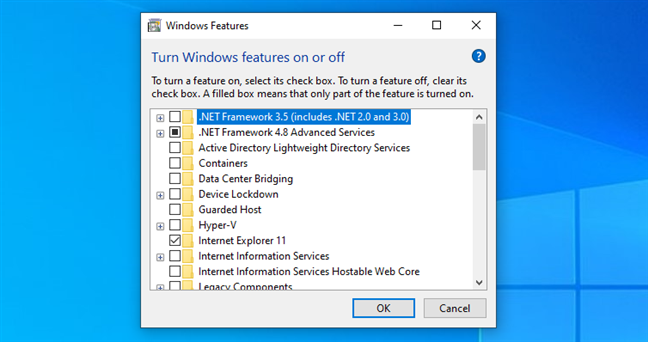
The Windows Features window opens, displaying a list of features you can add or remove according to your preferences.
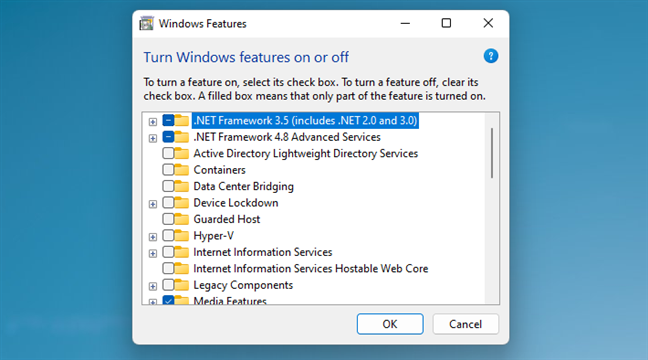
The Windows Features from Windows 11
The checked entries are already installed on your computer or device, while those unchecked are not.
How to open Windows Features in Windows 10
In Windows 10, click or tap the search field in your taskbar, and enter “windows features.” Click or tap the “Turn Windows features on or off” option from the list.
Type windows features in the taskbar’s search field
If you prefer, you can also choose the long way. Open the Settings app (Windows + I) and head to Apps > Apps & features > Optional features.
Access Optional features in Windows 10
Then scroll to the Related settings section and click or tap on the “More Windows features” link.
Open More Windows features in Windows 10
A third alternative method to access Windows Features in Windows 10 is provided by the Control Panel. Open it, navigate to Programs > Programs and Features, and click or tap “Turn Windows features on or off” on the left of the window.
Turn Windows features on or off in Windows 10
Windows 10 then launches the Windows Features window. It shows you a list of features available to install or remove.
Windows Features and components available in Windows 10
The features with checkmarks are already installed, while those unselected are not.
NOTE: From here on, both the steps and the interface used to install or remove features and components are identical in Windows 11 and Windows 10. In consequence, we decided to use screenshots from Windows 11.
How to add Windows features or components
The Windows Features window lists all the features or components available for Windows. To view more information about a feature, hover on top of it with your mouse or tap on it, and a brief description appears. However, if you want even more details about each component, read: What are those Windows features that you can add or remove?.

A brief description is available for every Windows feature
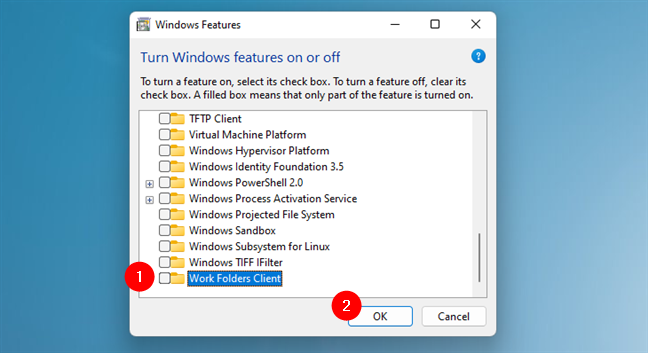
To add features to Windows 10 or Windows 11, check their boxes in the Windows Features window, and then click or tap OK.
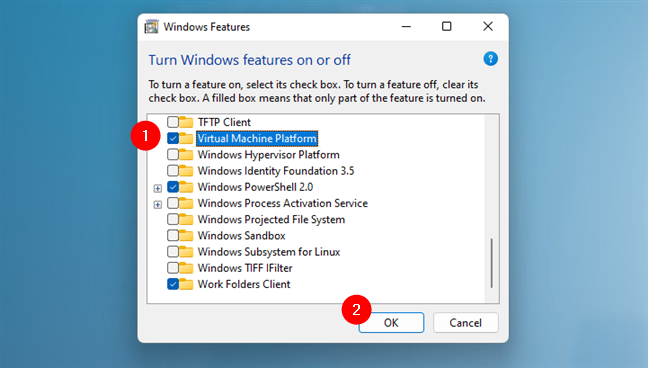
Adding the Virtual Machine Platform component
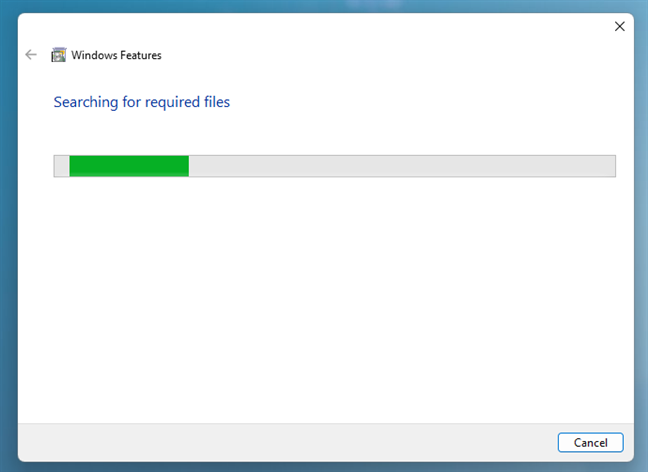
You must wait while Windows searches for the files required to install the selected feature.

A loading screen informs you of the progress
NOTE: For certain features, Windows might need to download some files from Windows Update to successfully add the requested components.
Once Windows finds the required files, it starts installing the optional feature, letting you know it’s “Applying changes.”
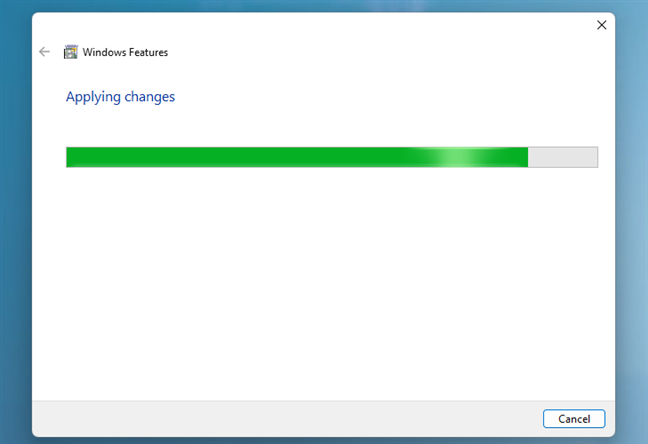
Wait while your changes are being applied
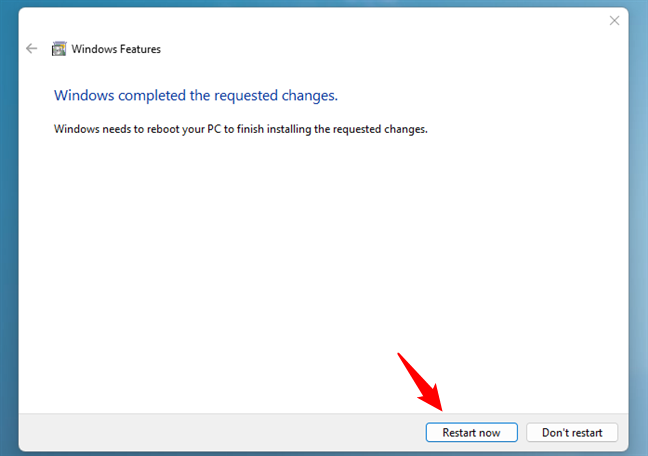
For certain components, like “Virtual Machine Platform,” rebooting your Windows computer or device is required to finish installing your changes. Click or tap “Restart now,” and remember that the reboot may take extra time to configure the added components.

Reboot to finish installing your changes
Other features, like “Windows Projected File System,” do not require a restart. Once your changes are completed, press Close to finish the process.
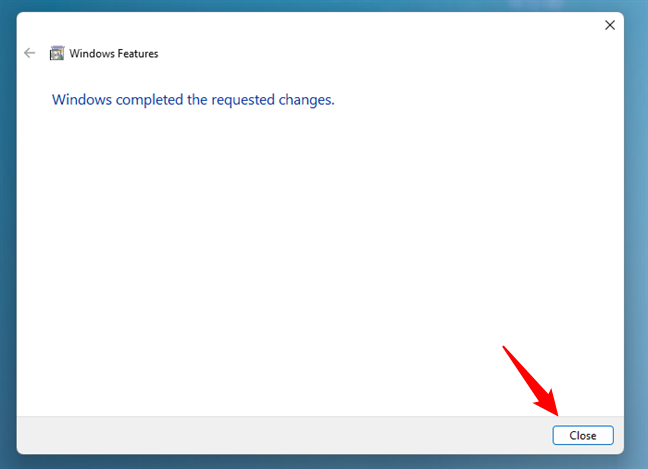
Press Close to finish completing the installation of new components
Windows now includes the feature(s) you selected for installation.
How to remove Windows features or components
Once you decide which components you want to be removed, uncheck the box next to them to uninstall unnecessary Windows features. When you uncheck certain features, like Internet Explorer 11, from Windows, you might get a warning that turning them off might affect other Windows features, programs, or default settings. If that happens, you’ll need to confirm again that you want to uninstall that certain feature.

Windows warns you about the consequences of disabling certain features
You might think that the “Go online to learn more” link might provide more specific info about the component you are disabling, but clicking or tapping on it takes you to a generic Windows help page offering more information about Windows.

The Windows help page provides generic tips and info
Either way, once you unchecked the features or components you want to remove, click or tap the OK button from the Windows Features window.
Press OK to apply your changes
A loading screen keeps you updated on the progress, letting you know your system is “Searching for required files” first.
Windows is searching for the required files
You then have to wait while the changes you requested are being applied.

Wait for Windows to apply the changes
After removing certain features, Windows may inform you that it needs to restart your computer or device to apply the requested changes. Press Restart now and wait for the reboot to be performed. Keep in mind that this restart takes longer than usual because Windows needs to spend additional time configuring itself according to your instructions.
Restart your Windows PC to apply the changes
Other components may be removed without a system restart. If that is the case for the features you chose to get rid of, you are informed that “Windows completed the requested changes.” Click or tap Close, and you are done.

Press Close to exit Windows Features
TIP: If you are interested in purging your Windows computer or device of more unnecessary software, you can also read: Windows 11 and Windows 10 bloatware list (2022 update).
What Windows features or components did you add or remove?
We at Digital Citizen use certain optional features that are not installed by default in either Windows 11 or Windows 10. For example, Windows Sandbox and the Windows Subsystem for Linux. That’s why we add them to almost all our computers. On the other hand, there are features that we don’t usually need, like Internet Explorer, which we uninstall. What about you? What Windows components did you add or remove from your system? Let us know in the comments section below.