Windows Media Player 12 allows computers with built-in CD and/or DVD burners to quickly and easily create audio CDs, data CDs and Data DVDs. This functionality makes creating mix CDs and copying audio CDs for playback in car stereos and other CD players incredibly simple. Alternately, Windows Media Player 12 can burn data CDs for playback in devices that support.mp3 and.wma playback. Windows Media Player 12 can also burn pictures, songs and videos onto Data DVDs. Read on how to find out how to burn CDs and DVDs with Windows Media Player 12.
Note: Windows Media Player 12 does not support burning of VCDs or DVD-Video (i.e. discs for video playback when inserted into a DVD player). In order to burn standalone video DVDs, you will have to purchase or download third-party software.
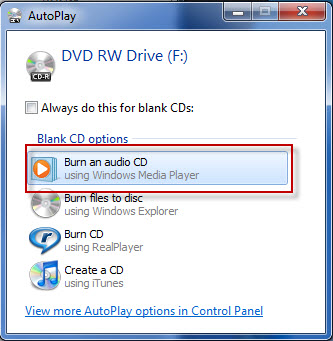
With Windows Media Player 12, you can burn mixes or entire CDs onto a CD-R, CD-RW or DVD. To begin, insert a blank CD or DVD into your disc drive. If the autoplay window pops up, choose 'Burn an audio CD'.
Otherwise, simply open Windows Media Player 12.
Step 1: Creating a Burn List
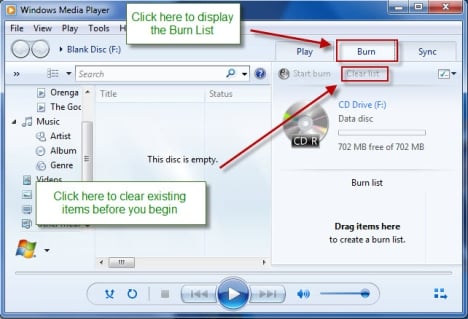
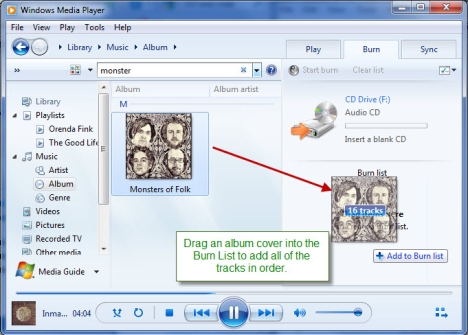
When you insert a blank disc, the Burn List should appear automatically. If it does not, click the Burn tab in the top-right. If there are items left over from the last time you were playing files, click 'Clear List' to start fresh.
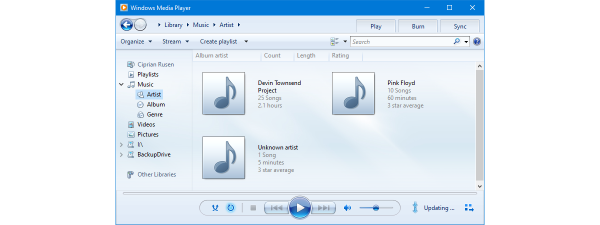
To add songs to your Burn List, locate them in your Library. The easiest way to add songs is to drag and drop the album into the Burn List. Don't worry - this won't delete them from your Library.
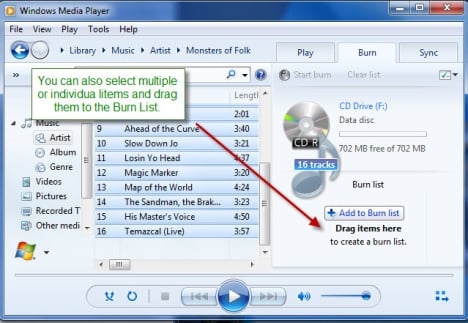
You can also select each track individually and drag it to add it to the Burn List or choose multiple tracks and drag them into the Burn List.
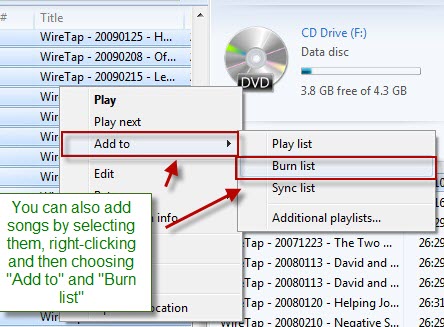
Lastly, you can also right-click a song or group of songs and click 'Add to' and choose 'Burn List'.
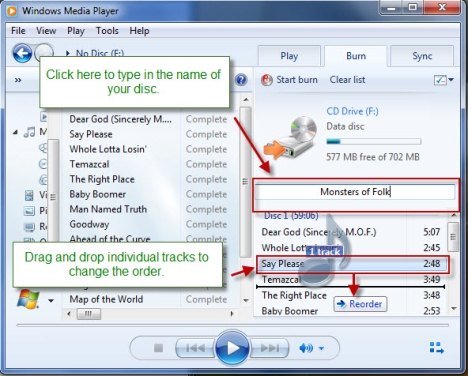
Click the text that reads 'Burn List' to name your disc. This will show up on CD players that support CD text. You can also drag and drop songs in your Burn List to reorder them.
Step 2: Choosing a Disc Type
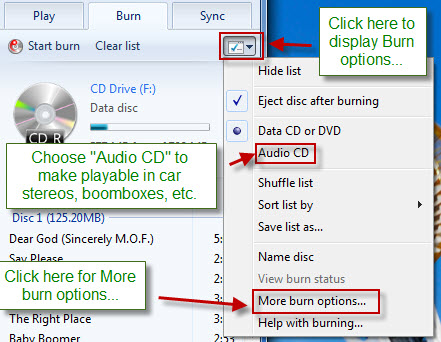
With Windows Media Player 12, there are three different types of discs you can burn:
- Audio CD - Audio CDs hold roughly 80 minutes of music regardless of file size in terms of megabytes. For example, it doesn't matter if your Burn List consists of 1 MB songs encoded at 96 Kbps or 3 MB songs encoded at 196 Kbps - all that matters is how long the songs are. Audio CDs are readable by computers and are playable in any CD player, regardless of which format the files were in before you burned the CD. For example, if you burn.wma files onto an audio CD, the disc will be playable in CDs and stereos even if they do not support digital audio files.
- Data CD - Data CDs are readable by computers and CD players that support playback of digital audio files. These can hold significantly more songs than an audio CD, but the songs will not be playable on standard CD players. Data CDs tend to hold about 700 MB worth of data, regardless of the length of the song.
- Data DVD - Data DVDs are readable by DVD players that support playback of digital audio files. You can also burn images and video files onto a DVD. However, these will not be readable by standard DVD players. Data DVDs are primarily intended to be readable by computers. Most DVDs hold about 4 GB of data, regardless of length.
To choose which type of disc to burn, click the 'Burn options' icon in the upper-right hand corner and choose it from the drop-down menu. You may also want to adjust some of the burn options by clicking 'More burn options'.
Step 3: Choose Burn Options
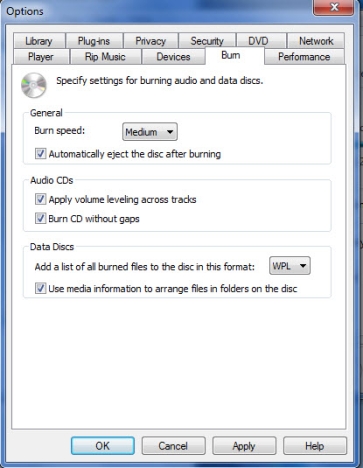
In the 'Burn Options' window, there are a number of options:
- Burn Speed - This changes how fast your disc is burned and will not affect the end product. We recommend choosing a slower burn speed, regardless of how fast your burner is. This takes a bit longer, but helps prevents skips and failed burns (which essentially waste a disc). Slower burn speeds are best for playback in car stereos or older devices with lesser skip protection capabilities.
- Automatically eject the disc after burning - This is self-explanatory.
- Apply volume leveling across tracks - This option attempts to normalize the volume levels so each track is about the same volume. This is useful when making mix CDs pulled from several different albums. This only applies to audio CDs.
- Burn CD without gaps - By default, most burners will insert 1 to 2 seconds of silence between each song. Check this to omit these gaps. When selecting this option, keep in mind that not all burners support this feature. Gapless burning also increases the chances of skips and failed burns.
- Add a list of all burned files to the disc in this format - Choose from.wpl or.m3u. In supported CD players, this will allow the device to read and display the track information, such as artist and album name. This only applies to data CDs.
- Use media information to arrange files in folders on the disc - This option will arrange the songs into folders, similarly to how they are in your Library. This only affects data CDs and is convenient when burning data CDs with many, many songs, as it saves you from hitting skip over and over. However, note, that your CD player must support folder navigation for this to be a benefit.
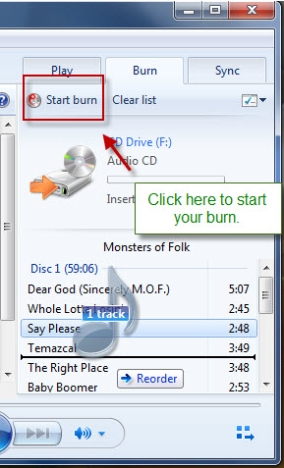
Step 4: Burn Your Disc
Once you're satisfied with your settings, click Apply and OK. Next, click 'Start burn' to begin.
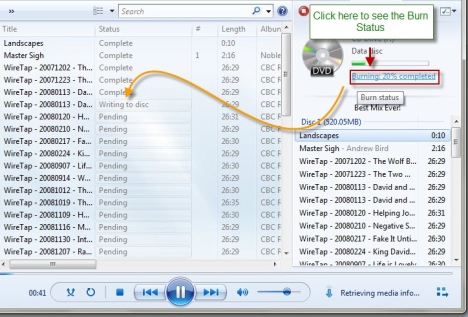
When the burn begins, the status will be displayed at the top of the Burn List. Click the blue underlined text to see the status of each individual track.
And that's it! Once your burn is completed, you'll be able to use your audio CD, data CD or data DVD in any compatible computer or device.
Conclusion
As you can see, Windows Media Player 12 makes burning discs incredibly easy. The discs you burn with Windows Media Player 12 can be played back in car stereos and standard CD players as well as disc players that support.mp3 and.wma playback. Once you choose your burn settings, you can burn discs with just a few clicks using any song from your Library.