The Windows 10 workgroup is a simple way to link together a small number of computers and devices, which makes it ideal for home networks, as well as small offices and businesses. If you want to facilitate sharing resources (files, printers, etc.) with other devices on the same network, make sure they are part of the same workgroup in Windows 10. Continue reading to get answers to questions like "What is a workgroup?" and learn more about the workgroup name or how to change workgroup in Windows 10:
What is a workgroup? How is it different from a network domain?
Computers on a network can be part of either a workgroup or a domain, and that changes how resources are managed on the network. Workgroups are small peer-to-peer local area networks, where each computer has its own set of rules and settings, managed by the administrator of that device, and a unique computer name in that workgroup. To easily access another computer from the same network and share resources with it, both computers must be part of the same workgroup. Since every computer in a workgroup handles security separately, one option is to have a user account defined on the computer you want to access. Alternatively, users can set their devices to share resources with everyone in their workgroup. If you need some help with that, read How to share folders, files, and libraries with the network in Windows.
In contrast, domains are used in big networks, which include servers alongside desktop computers, laptops, network printers, and many other devices. In network domains, everything is managed and configured by the network administrator(s). The domain has a standard set of rules and settings that apply to all network computers and devices. To access a computer from a domain, you don't need a user account defined on that specific computer. You need a user account created for that domain, assigned to you by the network administrator. Therefore, you can log to any computer from the domain, using the same domain user account. Domains are a better fit for enterprise networks, while home, school, and small business networks can work very well using a workgroup.
When you install Windows 10, the workgroup is created by default, and it is named WORKGROUP.
The workgroup name cannot use the following characters: / [ ] " : ; | > < + = , ? * (slash, backslash, square brackets, quotation marks, colon, semicolon, pipe, less-than, greater-than, plus, equals, comma, question mark, and asterisk). The workgroup name can't have more than 15 characters; Windows does not allow you to insert more than that. However, the workgroup name can include spaces in Windows 10.
NOTE: Computers running Windows 10 Home are in a workgroup by default, but can't join a domain.
How to view the Windows 10 workgroup
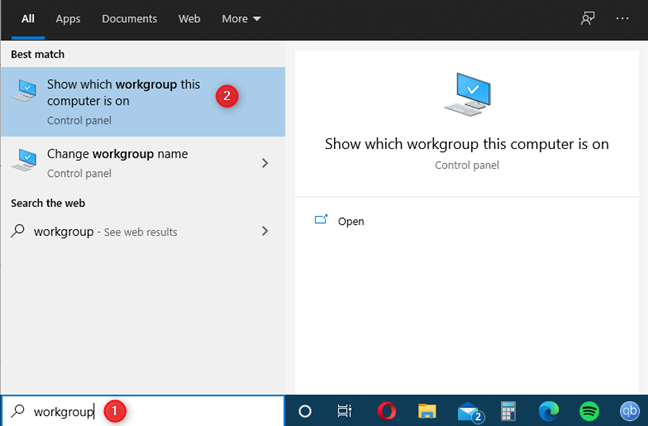
To view your existing Windows 10 workgroup, search for "workgroup" in your taskbar's Search field, and then click or tap on "Show which workgroup this computer is on."
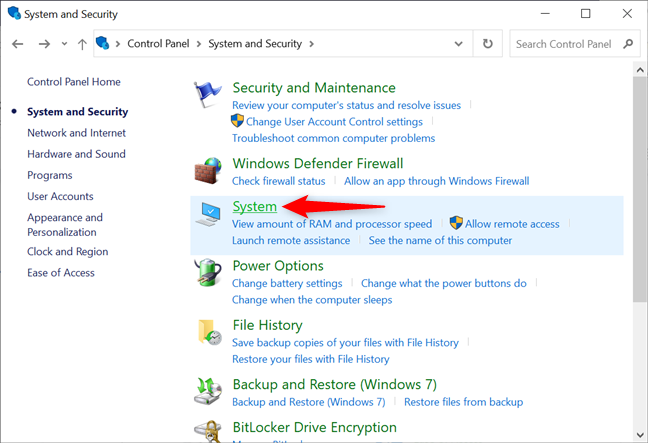
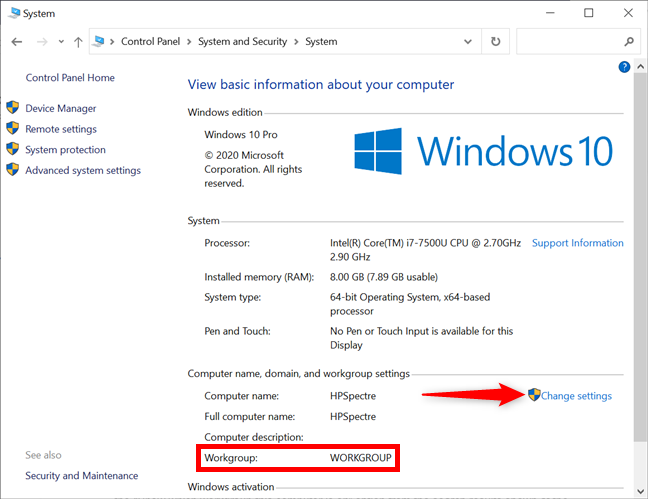
An alternative is to use the old-school way and open the Control Panel. Then, click or tap on "System and Security," and go to System.
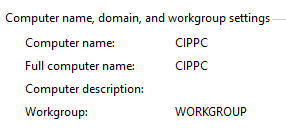
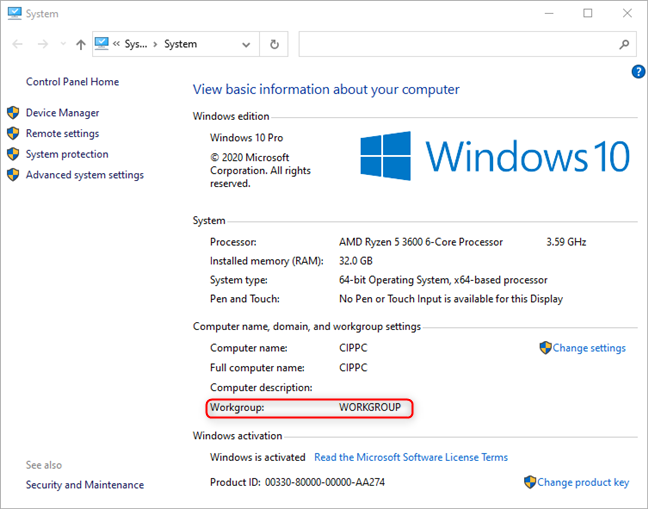
Next, you can "View basic information about your computer." In the "Computer name, domain, and workgroup settings" section, the Windows 10 workgroup of your device is displayed next to the Workgroup entry.
How to change workgroup in Windows 10 from System Properties
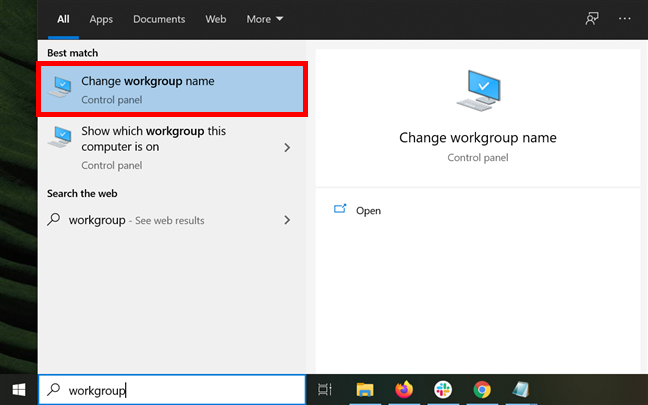
To change workgroup in Windows 10, you must first access its settings. The fastest way is to type "workgroup" in the taskbar's Search bar, and then click or tap on "Change workgroup name."
An alternative is to use the "View basic information about your computer" window from the Control Panel. Where you see the existing workgroup, press on Change settings on the right.
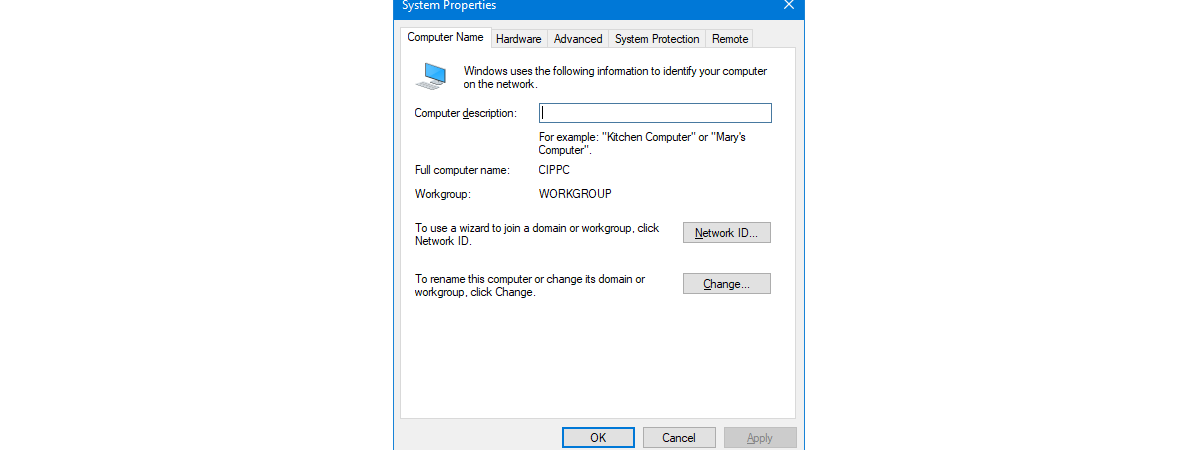
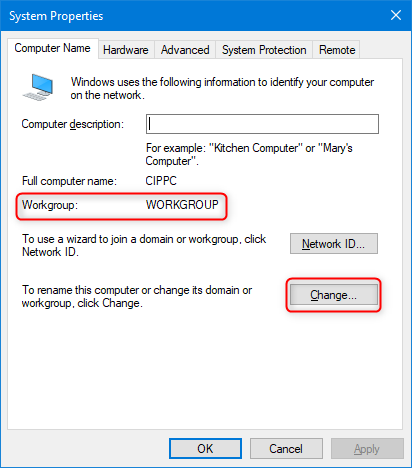
The System Properties window opens, where you see your current Windows 10 workgroup in the appropriate section of the Computer Name tab. To modify the workgroup you're in, all you have to do is change the workgroup name. Click or tap on Change.
This opens the "Computer Name/Domain Changes" window. You can see the Workgroup field at the bottom - in our case, the name is the default WORKGROUP.
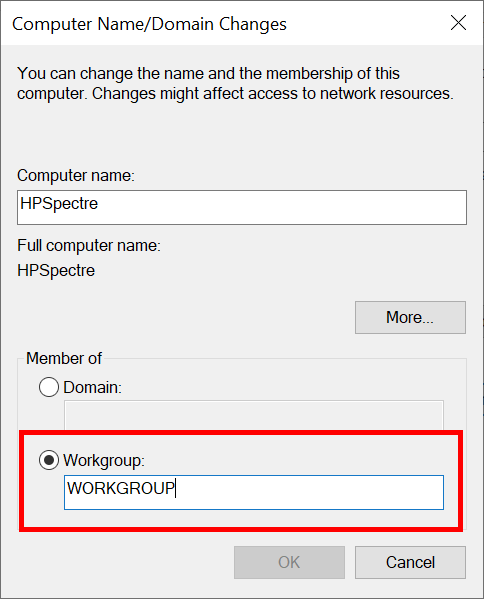
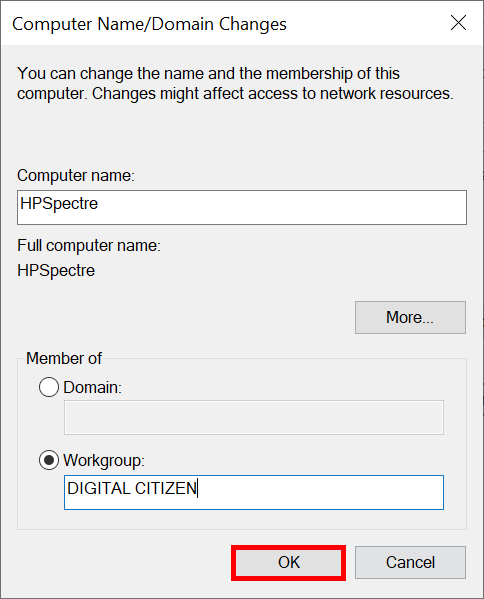
Type the name of the workgroup you want to join instead, and click or tap OK.
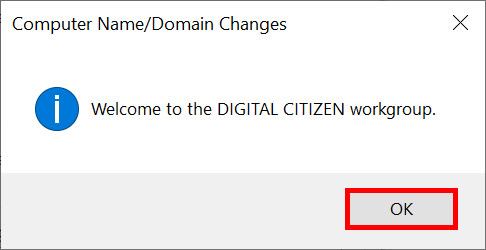
It might take a few seconds, and a pop-up welcomes you to the new workgroup. Click or tap OK.
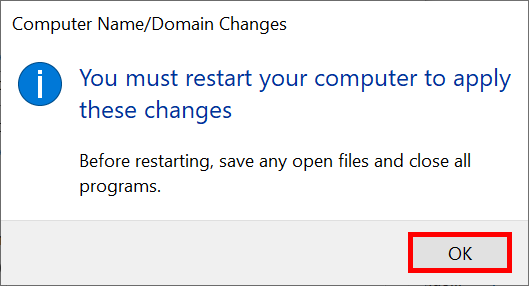
Another pop-up window lets you know that your device requires a restart in order for the changes to be applied. Press OK again.
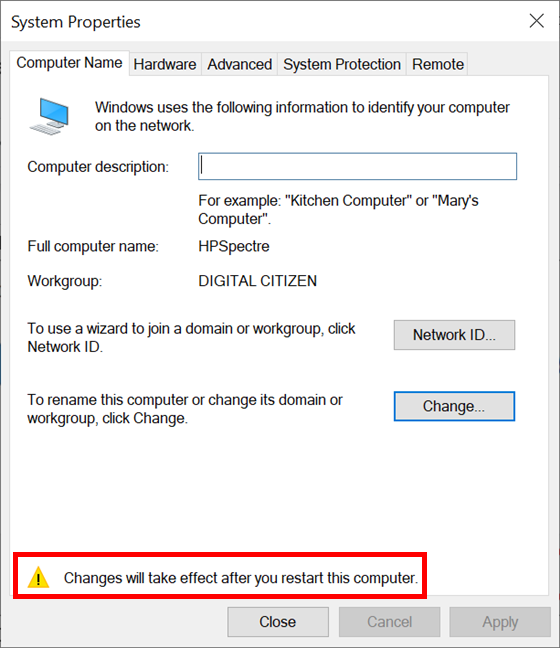
You are returned to the System Properties window. At the bottom, you can see a note, reminding you that the computer must be restarted in order for the workgroup change to take effect. Click or tap Close.
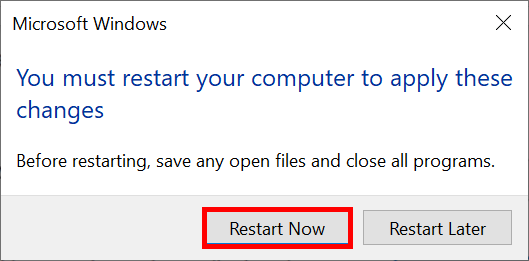
Windows 10 asks if you want to restart your computer now or later. Before you click or tap Restart Now, save your work and close any open apps or files.
After the restart, your computer joins the new workgroup. It is now able to interact with other computers and devices that are part of the same workgroup.
How to change the workgroup in Windows 10 from Command Prompt
Some users prefer using a command-line environment to change the Windows 10 workgroup. If you're one of them, open CMD as administrator and run the following command:
wmic computersystem where name="%computername%" call joindomainorworkgroup name="Workgroup_Name"
Replace Workgroup_Name with the name of the workgroup you want to join or create, as seen below.
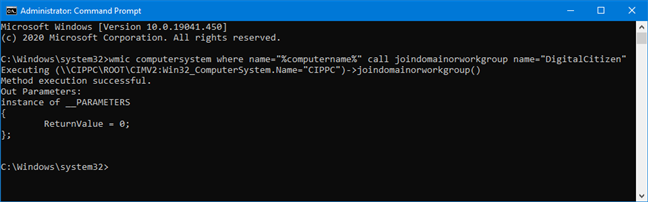
The new workgroup name replaces the old one. Close Command Prompt, restart your computer, and the change is applied.
NOTE: When you insert a new name, remember the restrictions regarding workgroup names discussed in the first section of this tutorial.
How to change workgroup in Windows 10 from PowerShell
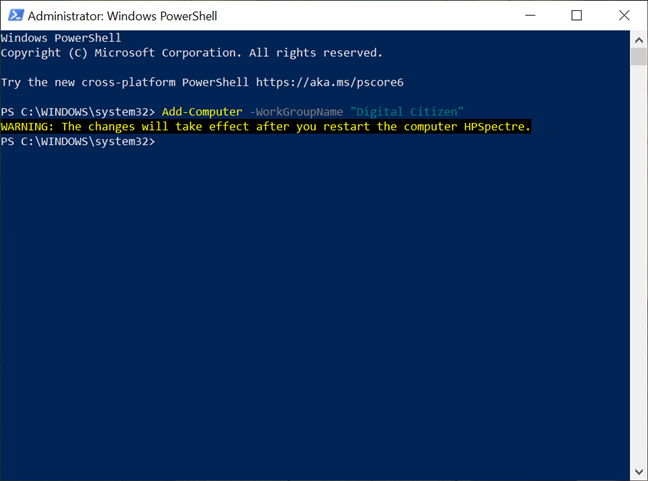
If you're a fan of PowerShell, you can use this tool as well to change the Windows 10 workgroup. First, launch PowerShell as administrator. Second, enter the following command: Add-Computer -WorkGroupName "Workgroup_Name"
Replace Workgroup_Name with the name of the workgroup you want to join or create, as you can see in the next image.
NOTE: Don't forget about the restrictions regarding workgroup names, discussed in the first section of this tutorial, when you insert the new name.
Did you succeed in changing the workgroup in Windows 10?
Changing the workgroup in Windows 10 is not complicated. Having a different workgroup on the computers that make up your network is the root cause of many networking issues, so be sure you have the same workgroup on your macOS devices also. With a simple change, most problems can be solved, and you can easily share files, internet access, printers, libraries, and any connected resource. Before you close this tutorial, let us know if everything worked well when changing the workgroup. Comment below and let's discuss.