All modern Windows operating systems allow users to create their own custom power plans and use one of the default plans as the starting point. The procedure for creating them is not very complex and it allows you to configure in detail all the settings that are related to power plans. Here's how to create your own power plan in Windows 7, Windows 8.1 and Windows 10:
How To Open The Create Power Plan Window
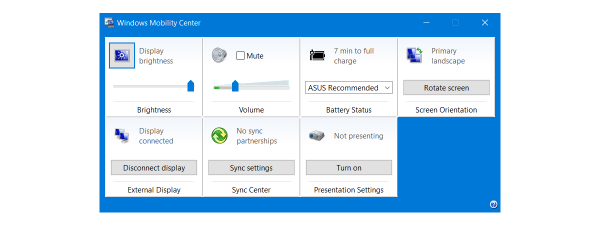
In order to create your own power plan, first you have to open the Power Options window. If you don't know how to do this, read this article: What Power Plans Are & How To Switch Between Them In Windows.
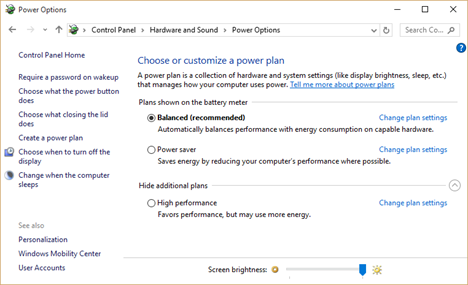
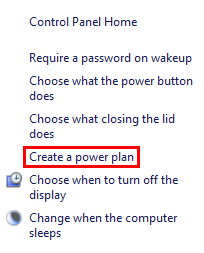
In the Power Plan window, click or tap the Create a power plan link in the menu to the left side of the window.
The Create Power Plan window will open.
How To Create Your Own Basic Power Plan
The new power plan is based on one of the default Windows plans: Power Saver, Balanced or High Performance. Therefore, the first step is to choose the power plan you want used as the basis for the new one. To learn more about the differences between each default power plan, don't hesitate to read this article: What Power Plans Are & How To Switch Between Them In Windows.
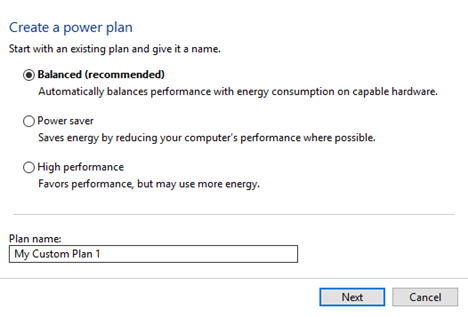
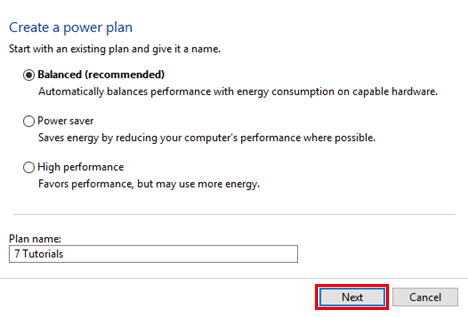
Next, set a name for the new power plan, in the Plan name field.
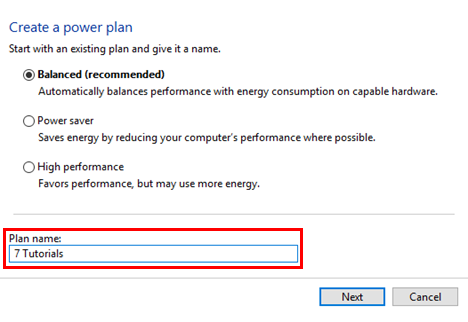
Then, press Next to edit the basic settings of the plan.
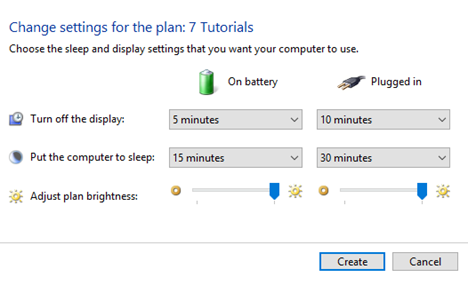
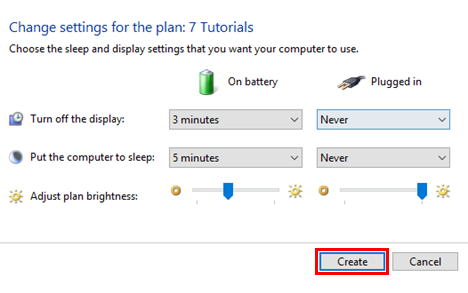
The default values for all the settings of the new plan are those from the base plan you have chosen and you can change them any way you want.
This is how the Edit Plan Settings windows looks like in both Windows 8.1 and Windows 10.
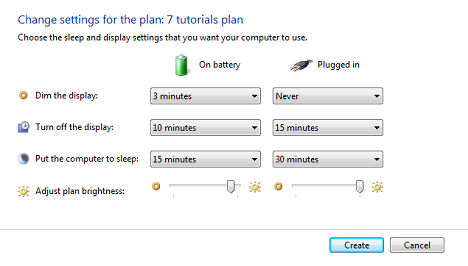
If you are using Windows 7 you will also have a setting named Dim the display. This option is not available in Windows 8.1 and Windows 10 because the display will dim 15 seconds before it is turned off.
When you have finished customizing the basic power plan settings, press the Create button.
Now you have a brand new power plan that is automatically set as active.
How To Configure Advanced Settings For The New Power Plan
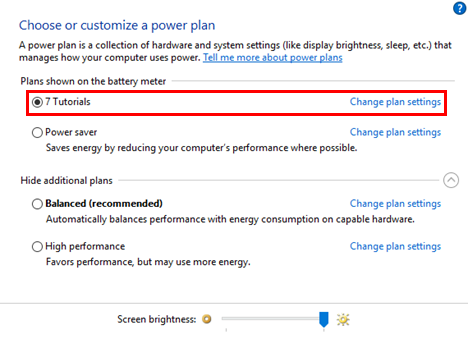
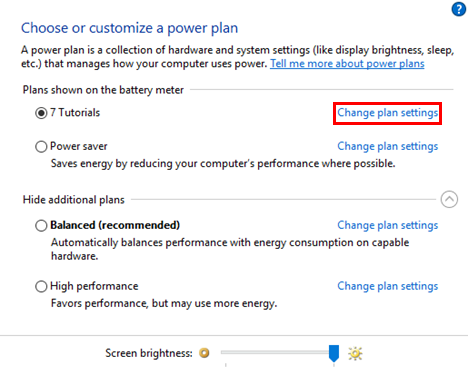
Editing your new power plan is done just like when you edit the default plans existing in Windows. In the Power Options window, click or tap the Change plan settings link corresponding to the power plan you created.
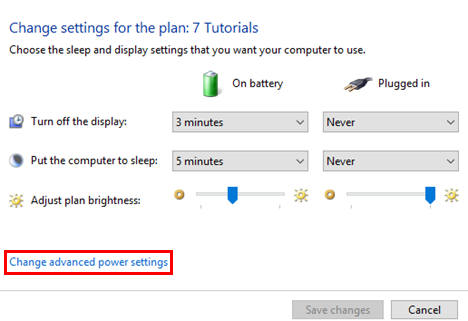
The Edit Plan Settings window is opened. To get to the advanced configuration settings, click or tap the Change advanced power settings link at the bottom of the window.
Then, configure each item, as shown in this guide: 13 Ways To Save Power By Tweaking Power Plans In Windows. When done, save the changes to your new power plan, by pressing the Save changes button.
How To Delete Your Own Power Plan
You can only delete a power plan that you have created. You cannot delete any of the default plans existing in Windows. To delete a custom power plan, you first have to choose another power plan as the active one. If you don't know how to do that, please read this article: What Power Plans Are & How To Switch Between Them In Windows.
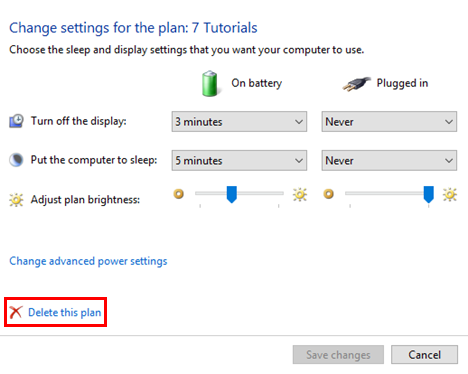
After you select another power plan, click or tap the Change plan settings link for the plan you want to delete. In the Edit Plan Settings window click or tap the Delete this plan link.
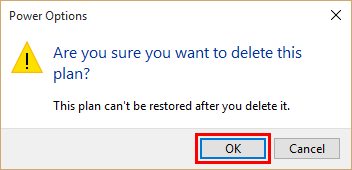
A pop-up dialog will show up on your screen, asking you if you really want to delete the created power plan. Here, press the OK button.
The selected power plan is deleted and you cannot use it anymore.
Conclusion
Now you know how to create a power plan, don't hesitate to use it to create your own power plans with settings that better meet your needs. Experiment with the available settings and, if you have any questions, don't hesitate to ask for help. For more articles on power plans, check out some of our related guides and if you have any suggestions, questions or problems, do not hesitate to use the comments form below.