Your mouse cursor plays a vital role when using your computer, and you should be completely comfortable with its appearance. Maybe you want a larger cursor, easy to find in a text without straining your eyes, or perhaps you are bored with the same old pointer that you have been using for what feels like forever. Whatever the case, this tutorial shows you how to customize mouse cursors on your Windows 11 or Windows 10 computer or device:
NOTE: We wrote this tutorial using the initial release of Windows 11 (version 21H2 build 22000), as well as Windows 10 (version 21H2 build 19044). If you’re using an older version of Windows 10, you might have to install the latest updates to get access to all the features presented.
What’s a mouse cursor in Windows?
A mouse cursor is an indicator used to depict on your display either the current position for user interaction or the movements of your pointing device. In Windows 11 and Windows 10, you can replace the currently used icons with entirely different ones, and you can also change the cursor’s thickness, adjust the size and color of its pointers, etc.
Windows uses the “.ani” (animated cursor) and “.cur” (cursor) extensions for the files that store mouse cursors. Built-in Windows 10 cursor files are usually around 9 to 10KB in size each, while animated mouse cursors can be as large as 500 to 600KB.
Built-in Windows 11 cursors
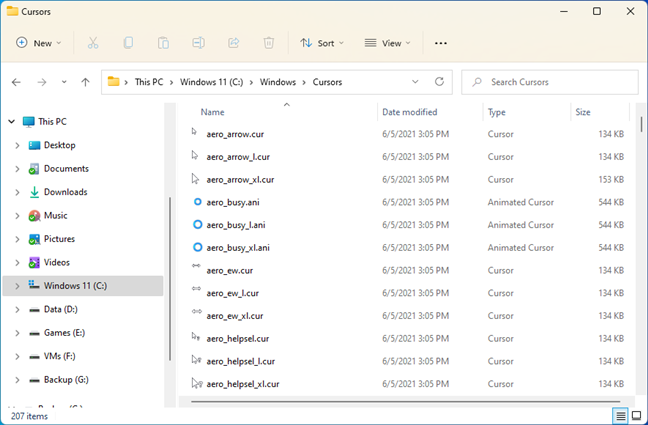
The default folder for these files is “C:\Windows\Cursors.” If none of the available options are to your liking, you might decide to download a new mouse cursor scheme. In that case, you should extract the new cursor scheme in its own subfolder under this default folder: “C:\Windows\Cursors.”
TIP: You’ll find some useful help on installing mouse cursor schemes, here: How to install custom mouse cursors in Windows.
New mouse cursor schemes are often way more entertaining than what Windows 11 or Windows 10 offers. Still, keep in mind that, should you choose to install animated cursors, they can take up to four times more storage space (approximately 2MB). By the way, here are the best free custom cursors for Windows we’ve found on the internet, if that’s what you’re looking for.
You’ve probably landed on this webpage while looking for answers to one of these two questions: “How do I enable custom cursors?” or “How do I customize my cursor?”. Although the steps to do that are not exactly intuitive, they’re simple enough for anyone to follow. Here’s what you need to do to change your mouse cursors scheme and how to enable custom cursors in Windows 11 or Windows 10:
How to change the mouse pointer scheme used by Windows 11 or Windows 10
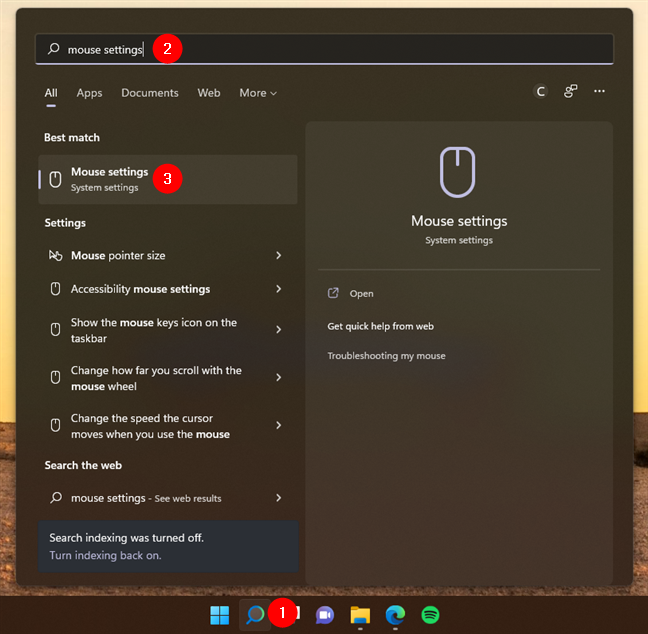
In order to change the mouse pointer scheme and replace the current ones, you’ll first have to get to the mouse settings from Windows. If you’re using Windows 11, click or tap the Search button next to the Start Menu and type “mouse settings.” If you’re using Windows 10, simply start typing the same expression - “mouse settings” - in the search box to the right of the Start button. Then, once the search results show up, in either operating system, click or tap on Mouse settings.
Access the Mouse settings in Windows 11
This opens the Settings app and automatically takes you to the Mouse page. In Windows 11, it’s found in the Bluetooth & devices category of settings, while in Windows 10, it’s located in the Devices category. Next, if you’re using Windows 11, click or tap the “Additional mouse settings” link from the Related settings section at the bottom of the window. If you’re using Windows 10, press the similarly named “Additional mouse options” link also found at the bottom of the window.
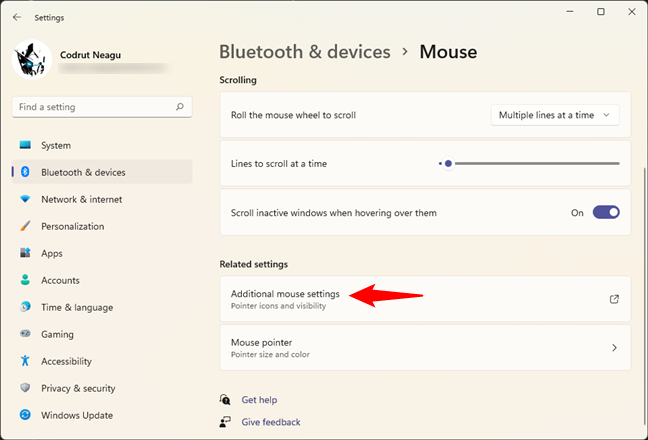
Press on Additional mouse settings or options
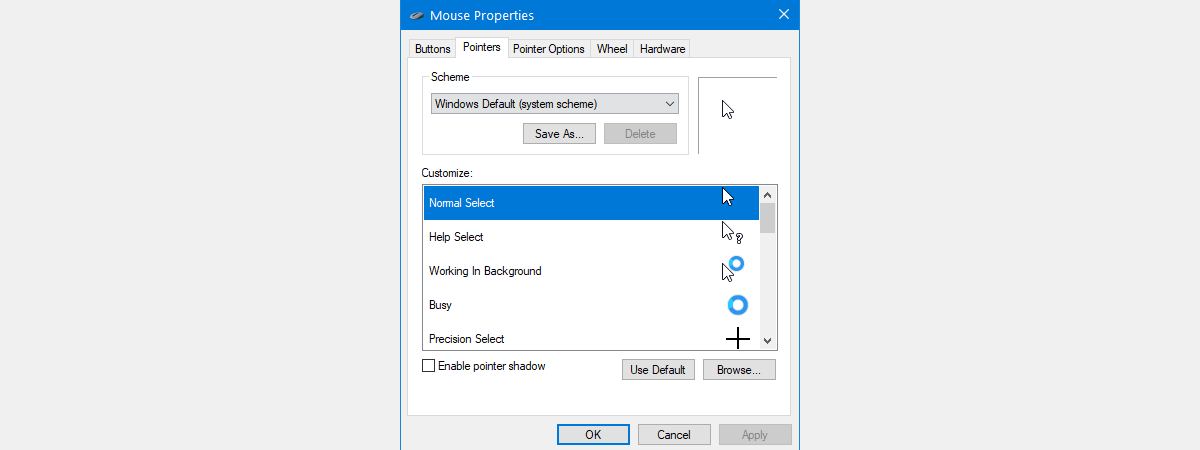
An old-looking (Windows 7-style) window called Mouse Properties will open up. In it, select the Pointers tab. Then, you should see some familiar shapes in the Windows Default list of mouse cursors.
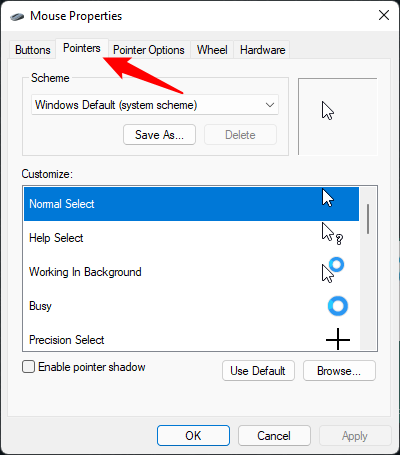
The Mouse Properties window
In the Scheme section, press the arrow to reveal a drop-down menu with all the pre-installed pointer schemes. There are twelve system schemes in total. For a preview of a scheme, select it from the menu, and you can see all its mouse cursors by scrolling in the Customize section.
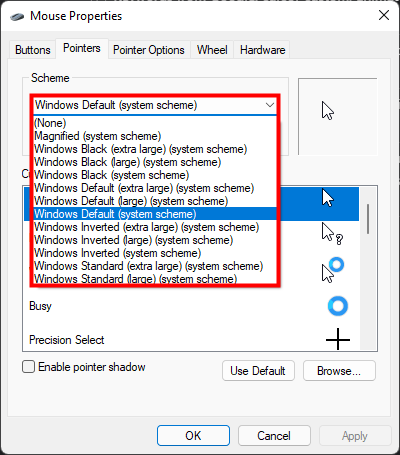
Open the drop-down menu by pressing the arrow
You can also choose to “Enable pointer shadow” by checking the corresponding box under the Customize section.
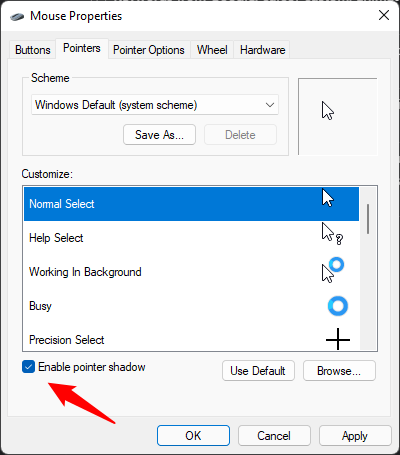
Enable a shadow under your cursor
Once you have found the mouse cursors scheme you like, press on either Apply or OK.
How to customize your cursor in Windows
If you can’t find a scheme to your liking, you can mix and match the existing cursors, including any custom cursors or animated cursors you installed, to create your own scheme. First, go to the Pointers tab of the Mouse Properties window by following the instructions in the previous section of this tutorial. Then, in the Customize list, click or tap the entry you want to replace and press Browse.
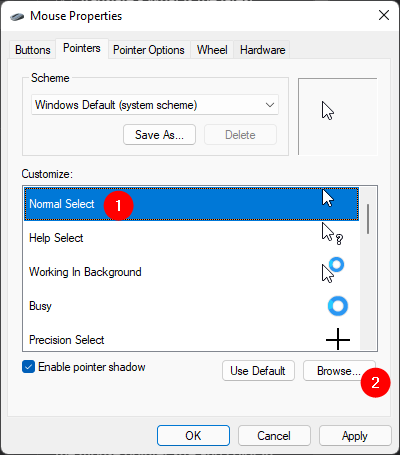
Select a mouse cursor and press Browse to replace it
This opens the “C:\Windows\Cursors” folder, which stores all the available cursors. Scroll through the thumbnails until you find what you’re looking for. Note that, if you’ve also installed some custom cursors or animated mouse cursors downloaded from the internet, you should find them in their own subfolders.
Also, while some cursor thumbnails might look similar, clicking or tapping on them displays them in the Preview section from the lower-left corner, allowing you to take a better look. When you are happy with your choice, click or tap Open.
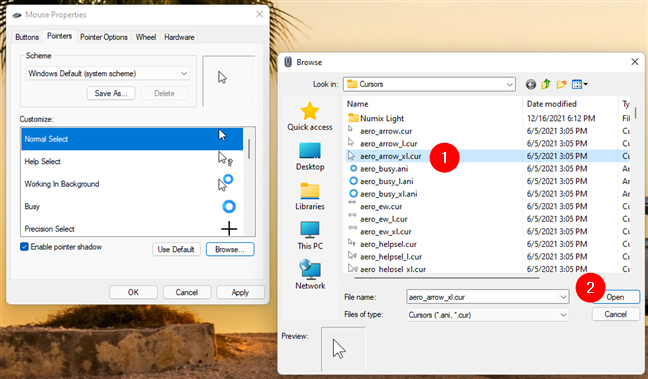
Find the custom cursor you want to use and press Open
You can start from a scheme close to what you want to use and just replace whatever cursors you don’t like. If you change your mind, click or tap the Use Default button, followed by either OK or Apply, and the scheme resets to its original set of cursors, discarding all the custom cursors you’ve selected.
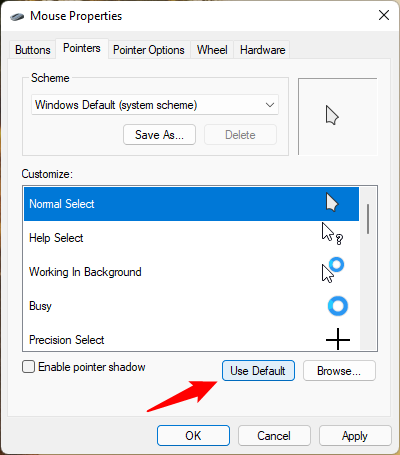
Press Use Default to reset the scheme
Choosing even one custom mouse cursor to replace the default one from a scheme causes Windows to treat your changes as an entirely new scheme. To save this scheme for future use, click or tap the Save As button in the Scheme section, give your scheme a name, and then press OK.
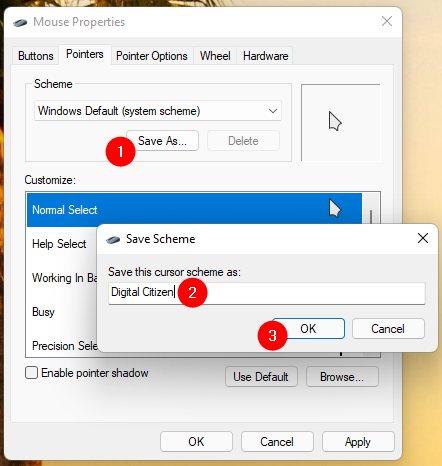
Name your custom cursors scheme
TIP: Any custom cursor scheme you create can be deleted by selecting it and pressing the Delete button from the Scheme section. On the other hand, system schemes can not be deleted.
Bonus: How to change the pointer size and color in Windows
Although using custom cursors is nice, there are situations in which you might prefer just to adjust the pointer size and color instead. It’s what you want if you’re having trouble seeing the mouse cursor. Both Windows 11 and Windows 10 offer a vast array of colors and plenty of increased sizes to choose from. If that sounds interesting, we’ve got you covered in this separate tutorial: How to change the mouse pointer size and color.
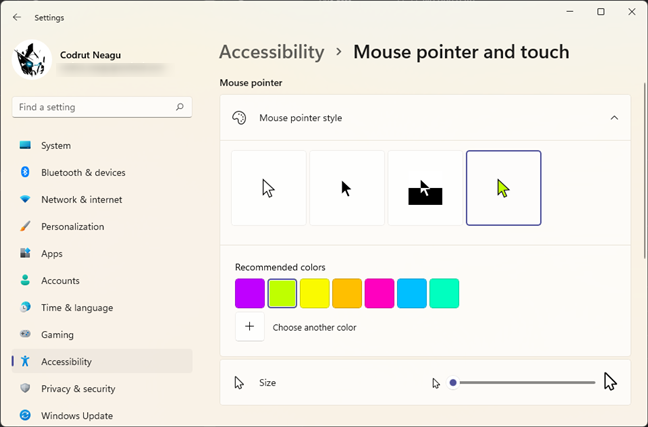
Adjust the mouse pointer style, size, and color
But, because these settings are part of the Accessibility (or Ease of access) settings, designed to help people with various impairments, they aren’t applied to custom cursors downloaded from the internet. If you enable any of these settings, your mouse pointer automatically switches to the default one in Windows, albeit with the style, color, and size you specified.
What does your mouse pointer look like?
The mouse pointer is one of the things you always see when you’re using your Windows computer or device, so you shouldn’t neglect it. Customizing it according to your preferences can make you more productive while offering you an enjoyable user experience. Before closing this tutorial, tell us: Which mouse pointers did you choose to use, and why did you decide to change the default ones?