BitLocker Drive Encryption is one of the most used encryption solutions for Windows. It's a security tool found in Windows 10 Pro and Enterprise editions that helps protect your data from unauthorized access. It does that by allowing you to encrypt system partitions, as well as other partitions you may have on your drives. In this tutorial, we're going to guide you through the process of encrypting system partitions with BitLocker:
What you need to be able to BitLocker-encrypt a system partition
For starters, you should know that you can use BitLocker Drive Encryption in Windows 10 only if you use a Pro or Enterprise edition of this operating system. Additionally, you should also be aware of the fact that, to encrypt your system drive, you should have a TPM chip installed on your computer or device.
If you don't have a TPM chip, BitLocker is still available, but to use it, you also have to change a few settings in Windows 10. This guide provides you with more information: How to enable BitLocker encryption without a TPM chip in Windows.
The next sections of this tutorial show you how to encrypt a Windows 10 system partition. However, note that you can take the same steps to enable BitLocker for any other partition you may have, not just for your system drive.
Step 1. Open the BitLocker Drive Encryption panel
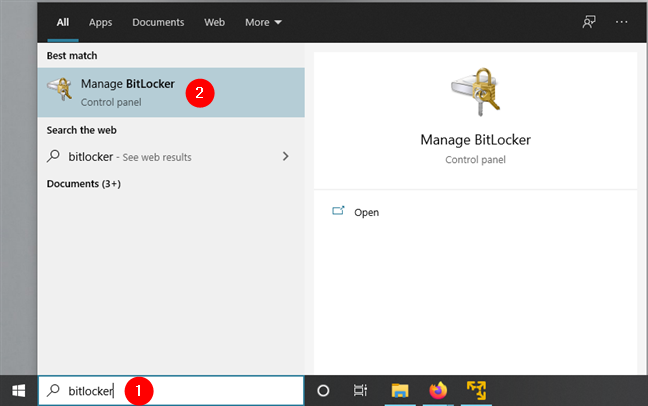
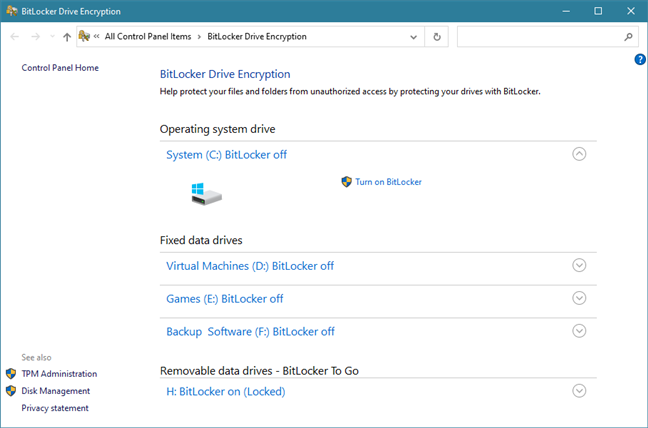
In Windows 10, BitLocker's settings are available only in the Control Panel. Although there are several ways to get to the BitLocker Drive Encryption window, the fastest one is to search for bitlocker. To do that, press the Windows key and start typing bitlocker. Once the list of search results is populated, click or tap on Manage BitLocker.
In the next screenshot, you can see what the BitLocker Drive Encryption panel looks like. For each drive, you're shown its drive letter, label, and the BitLocker encryption status: On or Off.
Now let's see how to encrypt the Windows 10 system partition using BitLocker:
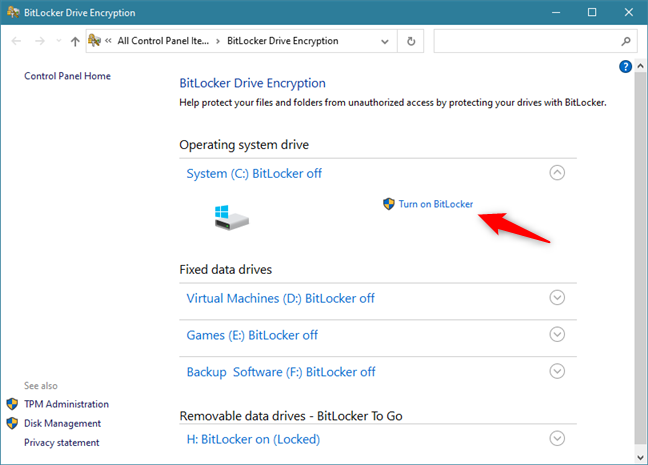
Step 2. Enable BitLocker encryption for the system partition
Click or tap on the "Turn on BitLocker" button next to your system partition. Usually, that's the C: drive.
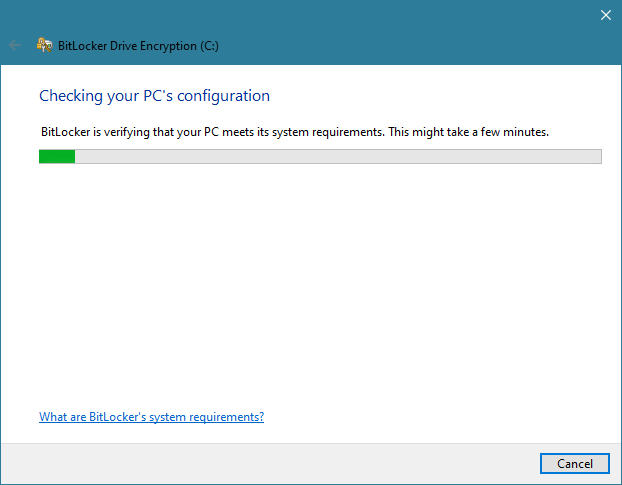
Then, the BitLocker Drive Encryption wizard opens. Wait for a moment or two until it finishes checking whether your PC meets the system requirements for using BitLocker.
The next part of the BitLocker encryption wizard differs depending on whether you have a TPM chip on your computer or not:
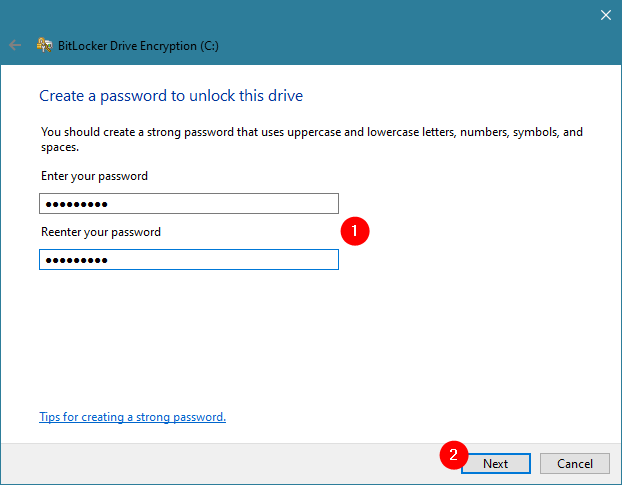
If your Windows 10 PC does not have a TPM chip, you're asked to choose how you want to unlock your system partition at startup. You can opt to enter a password or insert a USB flash drive each time you boot.
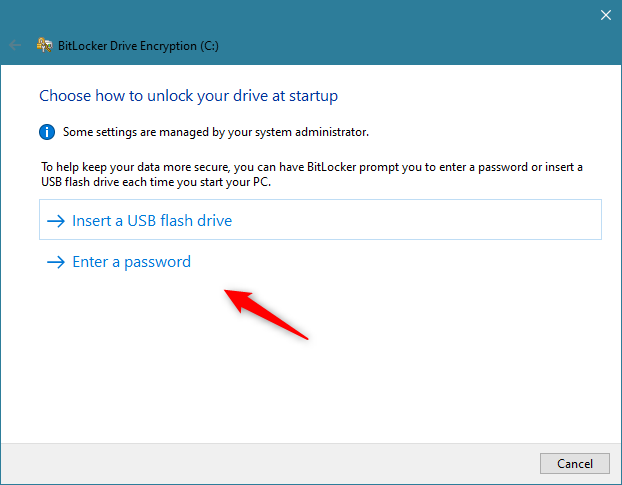
Plug a USB flash drive or enter a password, but choose wisely. Without that USB flash drive or password, you won't be able to access the encrypted partition or boot to Windows 10. Therefore, make sure you keep the USB flash drive safe or remember the password you set. Once done, press Next.
If your Windows 10 PC has a TPM chip, the previous step is handled automatically by it. In other words, the BitLocker password is stored on the TPM chip, so you don't have to create a USB drive or a password to unlock the encrypted system partition.
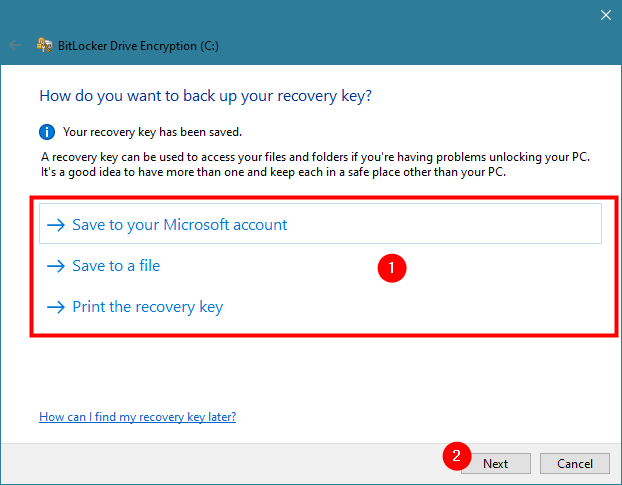
Regardless of whether you have a TPM chip or not, on the next step, you are asked where you want to back up the recovery key. This key is used when you have problems unlocking the encrypted drive. Choose the option you prefer and then press Next.
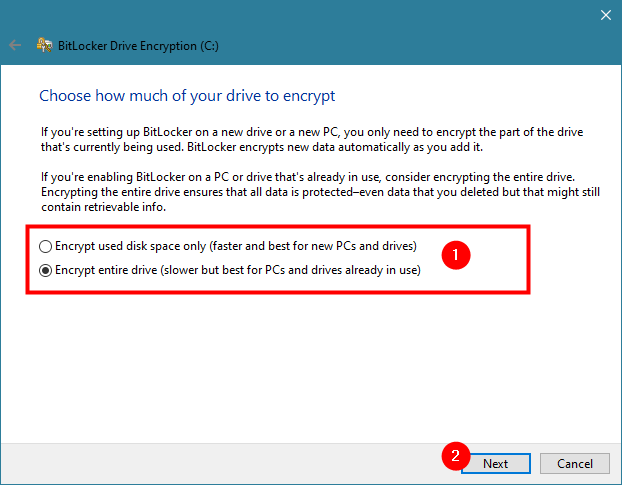
You are asked how much of your system partition you want to encrypt. If you have a newer computer with a fresh installation of Windows 10, it might be better to choose the first option: "Encrypt used disk space only." If your computer has been used for a while, it is best to encrypt the whole drive. The second option makes the encryption process take longer, though. Pick the option that works best for you and press Next.
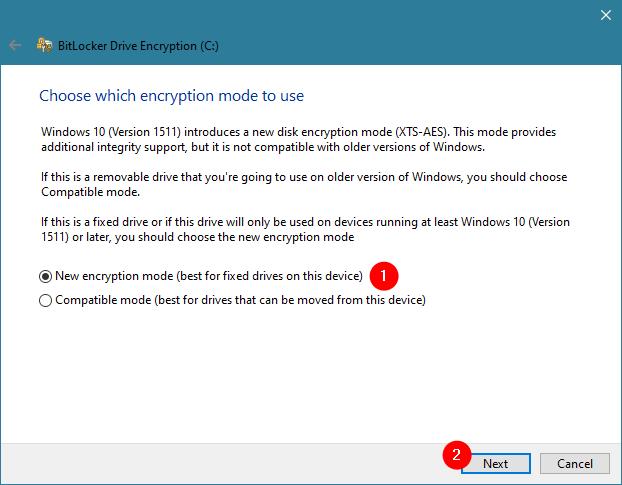
Windows 10 introduces a new encryption mode: XTS-AES. While this mode provides additional integrity support for your data, it is not compatible with older versions of Windows, like Windows 8.1 or Windows 7.
Because you're encrypting your system partition, you probably don't intend to move the drive on which it's found, so use the "New encryption mode" that is more secure. Don't forget to press Next.
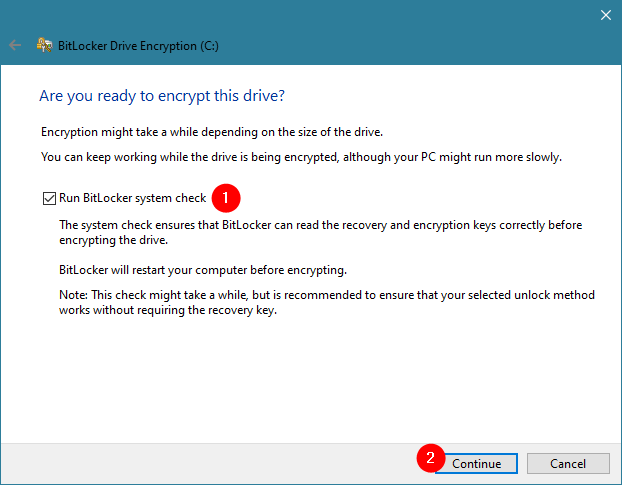
On the next step, enable the "Run BitLocker system check" option to make sure that BitLocker can "[...] read the recovery and encryption keys correctly [...]". Then, press Continue.
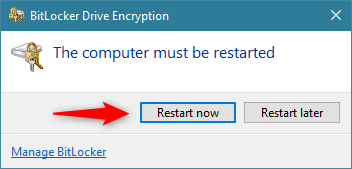
You are informed that BitLocker needs to restart your Windows 10 computer to be able to finish the encryption process. Click or tap on Restart now or choose Restart later if you still have work to do on your PC.
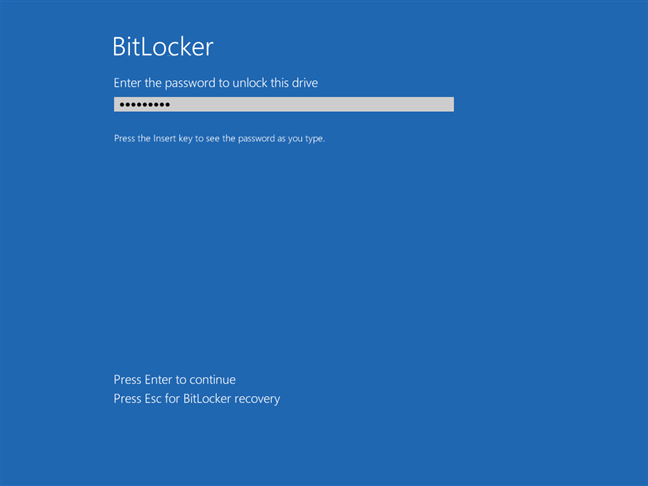
Step 3. Restart your Windows 10 PC to let BitLocker encrypt the system partition
After you reboot your Windows 10 PC, if it doesn't have a TPM chip, you must enter the password you have set earlier. If it has a TPM chip, your PC restarts as usual, without any interruptions.
After you sign in with your Windows 10 user account, BitLocker automatically starts encrypting the system partition. You can check that it does so in the system tray, where you should find a small BitLocker icon.
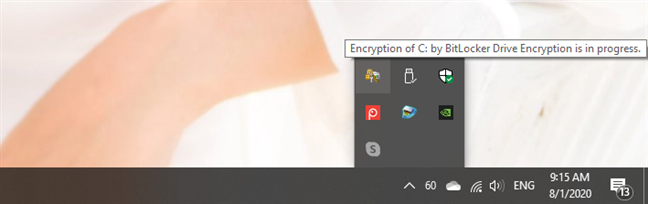
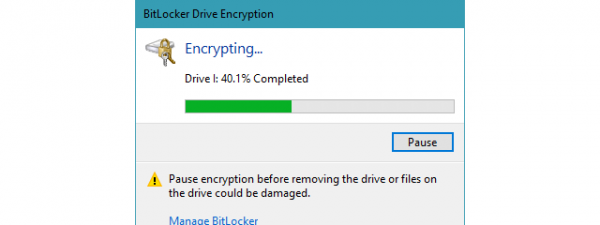
If you want more details on how the encryption process is carried out, double-click or double-tap on the BitLocker icon from the system tray. That opens up a small window where you get to see the progress made.
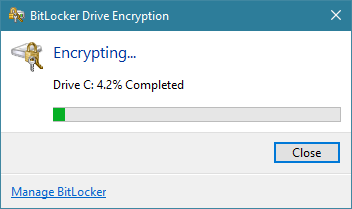
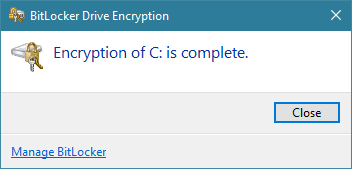
You can continue to use the computer while the system partition is encrypted by BitLocker in the background. When the process is over, you are informed by BitLocker that the "Encryption of C: is complete."
That's it! Now you have a BitLocker encrypted system partition that only you can access.
Are you using BitLocker to encrypt your Windows 10 system partitions?
If you have a TPM chip on your computer, it is easy to encrypt any drives on your Windows 10 PC, including the system partition. If you don't, then the process is slightly more complex and requires you to use a USB drive or a password to access your encrypted partitions. Fortunately, in Windows 10, it's easy for everyone to use this safety feature. Do you use BitLocker to protect your data? Comment below and let's discuss.