You may know what the Task Scheduler is and what it does. Maybe you also know how to create new scheduled tasks. But what about managing the existing scheduled tasks? Do you know how to run or stop scheduled tasks manually? Do you know how to disable, delete, export or import some scheduled tasks? Read on and find out the essential seven things that you can do with existing tasks from the Task Scheduler in Windows:
NOTE: You might want to first learn how to open the Task Scheduler and browse through the library of scheduled tasks.
1. Run an existing task in Task Scheduler
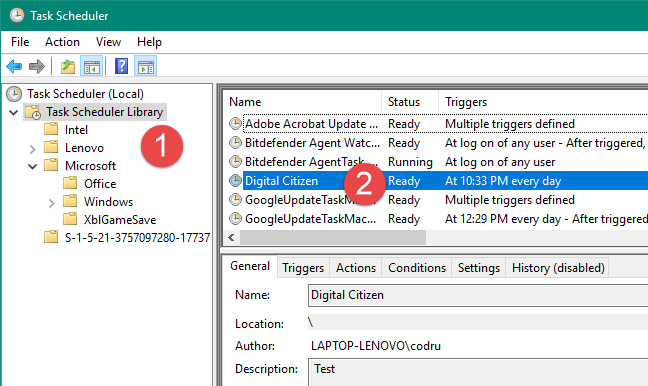
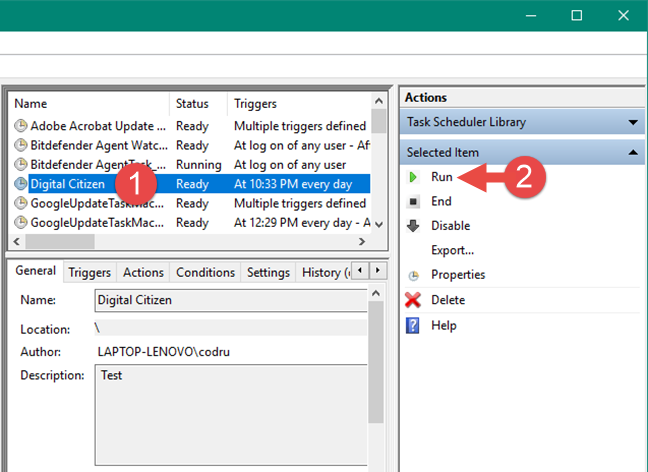
Task Scheduler allows you to run a task on demand, regardless of when it was set to run. Navigate through the folders of the Task Scheduler Library to find the task that you want to run.
Select the task and, in the panel on the right, under Selected Item, click or tap Run.
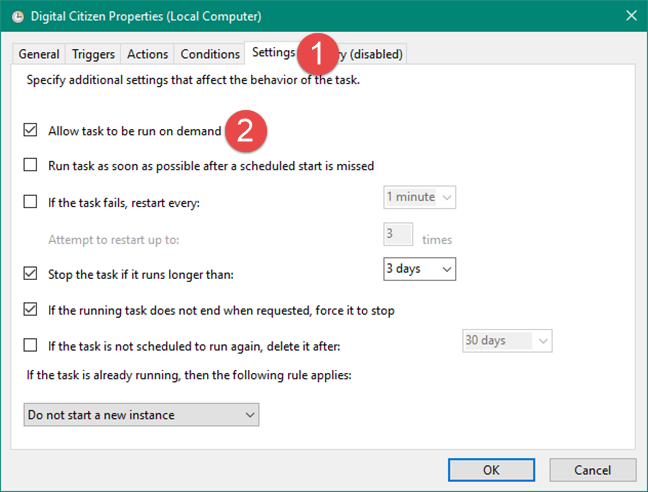
Note that you can run a task on demand only if it is enabled. If the task is disabled, the Run button is not visible. Also, the task cannot be run manually if the "Allow task to be run on demand" setting is not selected. In this case, the Run button is visible, but when you press it, you get a message like the one below: "To run this task on demand, open the task Properties dialog box and select the Allow task to be run on demand check box on the Settings tab."
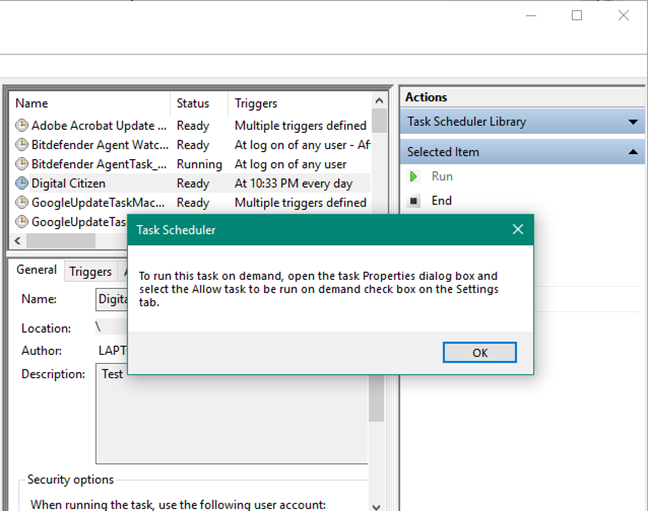
To run the task on demand, select it and click/tap Properties. Then, go to the Settings tab and check the "Allow task to be run on demand" checkbox.
If you also want to learn how to create new scheduled tasks in Task Scheduler, read: How to create basic tasks with Task Scheduler, in 5 steps and How to Create Advanced Tasks with the Task Scheduler.
2. End an existing task from Task Scheduler
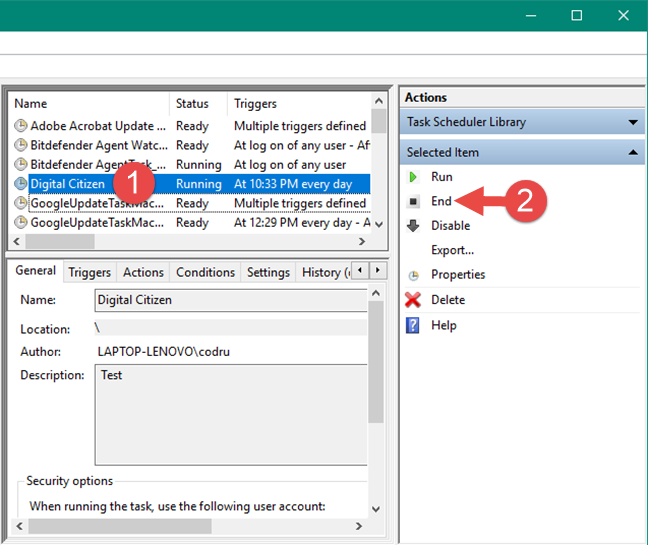
You can stop a running task from completing its actions by ending it. To do this, select the task and, under Selected Item, click or tap End.
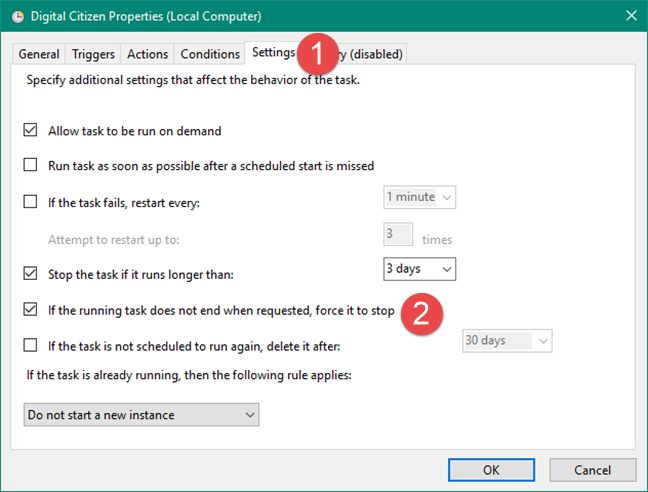
If your task has the option "If the running task does not stop when requested, force it to stop" enabled, the task is forced to end if it did not stop when you tried to end it. You can adjust this setting by editing the tasks' Properties: go to the Settings tab and check the box that says: "If the running task does not stop when requested, force it to stop."
3. Disable an existing task in Task Scheduler
To stop a task from running for a certain period, you can disable it. When a task is disabled, it is not run on schedule nor demand, but it remains in Task Library. Also, if it is running when you disable it, it keeps on running until it finishes its job.
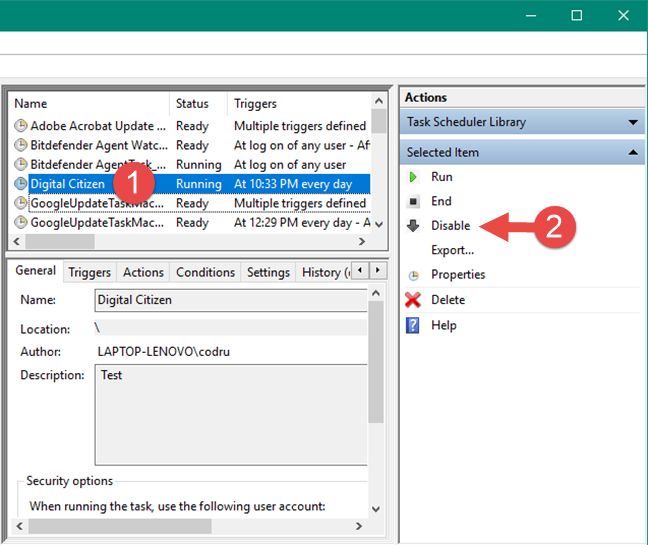
Select the task that you are interested in, and click or tap Disable in the Selected item panel.
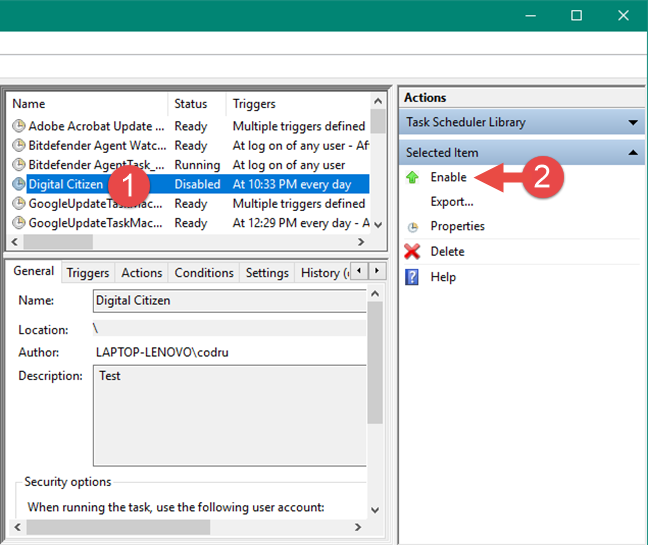
4. Enable an existing (disabled) task from the Task Scheduled
If a task is disabled, you can enable it. Once enabled, the task is run on schedule, and you can also run it on demand. Select the task that you want to enable and click or tap the Enable button in the Selected item panel.
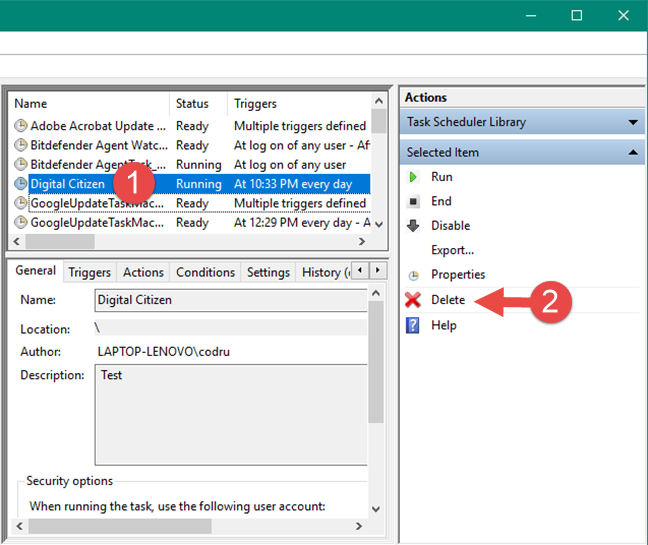
5. Delete an existing task from Task Scheduler
If you no longer want to run a task, you can delete it. This action completely removes the task from the Task Library. Pick the task to be deleted and, in the Selected Item click or tap Delete.
6. Export an existing task from the Task Scheduler
Task Scheduler allows you to export a task so it can be imported and used by other users or on other Windows computers.
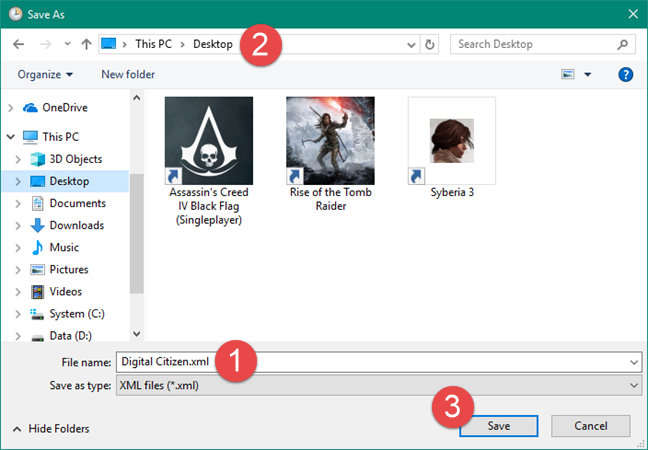
The task is exported into an XML file which contains all the properties of the task, triggers, actions, conditions, and settings. To export a task, select it and then click or tap the Export button.

Type the name for your exported task and select the location where you would like it stored. Then, click or tap Save.
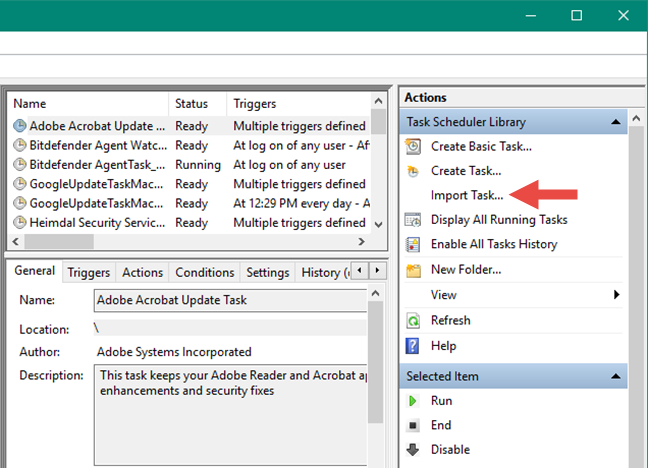
7. Import an existing task
To import a task, you need to know the location of the XML file where the task was exported. Click or tap the Import task button in the Actions panel to import it.
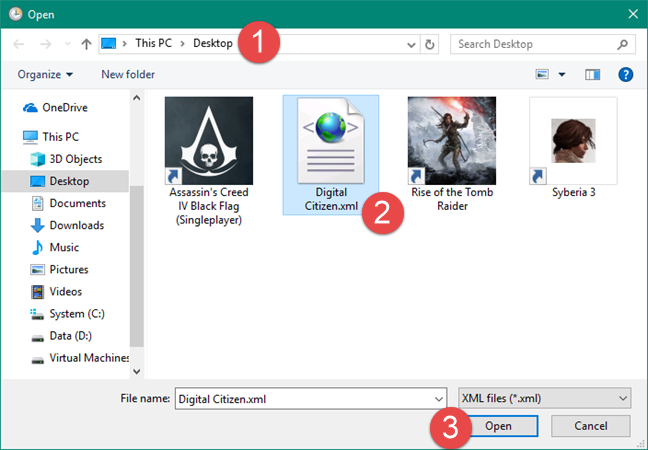
Select the XML file and click or tap Open.
The task is imported, and its properties are shown, allowing you to make additional changes, according to your preferences.
NOTE: The Task Scheduler does not offer an option to rename existing tasks. However, if you want to do so, you can use the Export and Import options to rename any of your scheduled tasks. For guidance on how to do that, read this article: How to rename a Windows task created with Task Scheduler.
Do you change existing tasks from the Task Scheduler often?
The Task Scheduler offers a wide variety of options for managing and editing tasks. Furthermore, if you are working with multiple devices, you might enjoy the option of exporting existing tasks and importing them on other devices. Are you changing existing tasks often, using the Task Scheduler? Use the comments section to share your thought experience with this tool.