You probably have some apps, programs, or other tools that you use often, and, as such, you want to have speedy access to them. An excellent way to make that happen is to pin those items to the taskbar. Furthermore, that's not everything that you can pin to it. You can also pin special shortcuts and items to the taskbar, such as File Explorer's "This PC", Network, and "Quick access" locations. You can even add taskbar shortcuts for Control Panel items, Administrative Tools, and other stuff. For all the ways in which you pin shortcuts to the taskbar, read on:
1. How to pin Start Menu shortcuts to the taskbar
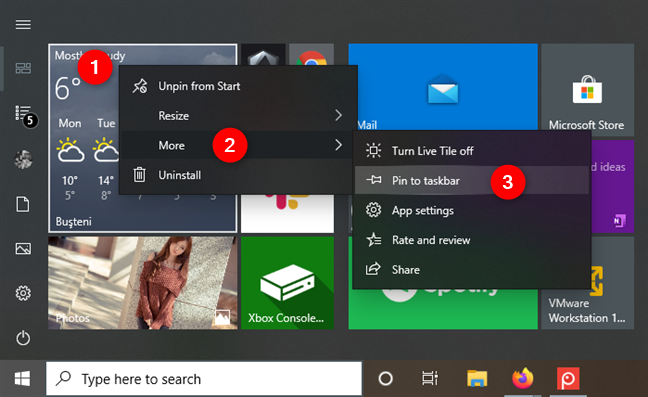
If you want to pin a shortcut from Start Menu's apps list to the Windows 10 taskbar, right-click or touch and hold on it, and then click or tap on the "Pin to taskbar" option from the More sub-menu.

You can also use the same procedure for the apps that have tiles or shortcuts on the Start Menu. Right-click or touch and hold on the app's tile or shortcut, select More in the contextual menu, and click or tap on "Pin to taskbar".
2. How to pin desktop shortcuts to the taskbar
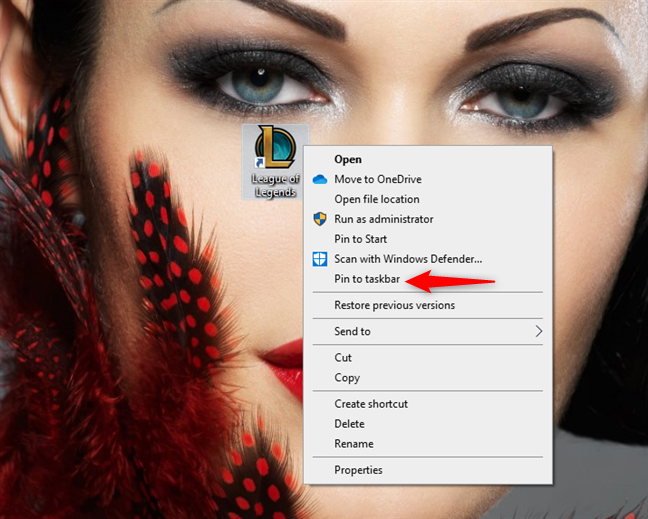
If you want to pin a desktop shortcut to the taskbar, right-click or touch and hold on it and then select "Pin to taskbar" in the contextual menu.
3. How to pin apps and programs shortcuts to the taskbar, using File Explorer
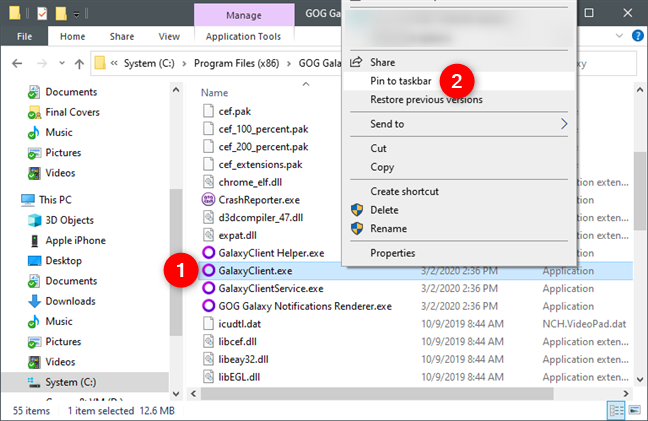
You can pin to the taskbar any executable from your Windows 10 computer or device. To do that, launch File Explorer and find the program or shortcut that you want to pin.
Right-click or touch and hold it and then select "Pin to taskbar" on the contextual menu.
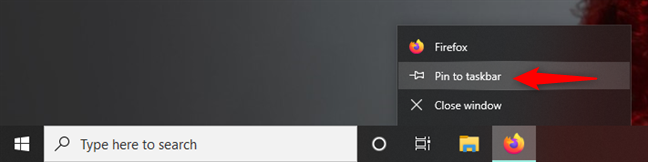
If you want to pin a shortcut to the taskbar for an app or program that's already running, right-click or touch and hold on its taskbar icon. Then, choose "Pin to taskbar" from the menu that pops up.
4. How to pin folder shortcuts to the taskbar
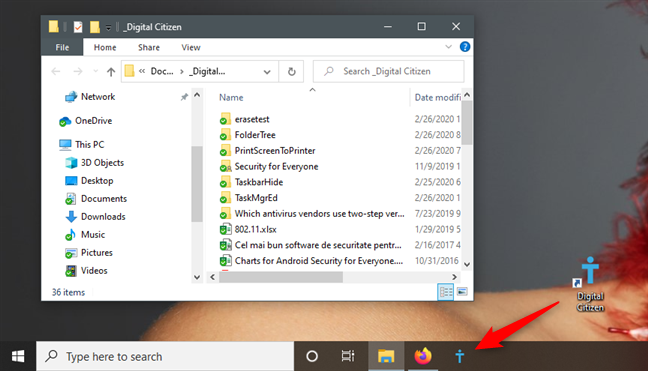
Although it's not as easy to pin folder shortcuts as it is to add regular shortcuts to the taskbar, you might want to do it for the folders you use most often. You can do that by first creating desktop shortcuts for those folders, and using the "Pin to taskbar" feature on them. We've explained all the required steps, here: How to pin any folder to the Windows taskbar, in 3 steps.
5. How to pin File Explorer's "This PC" to the taskbar
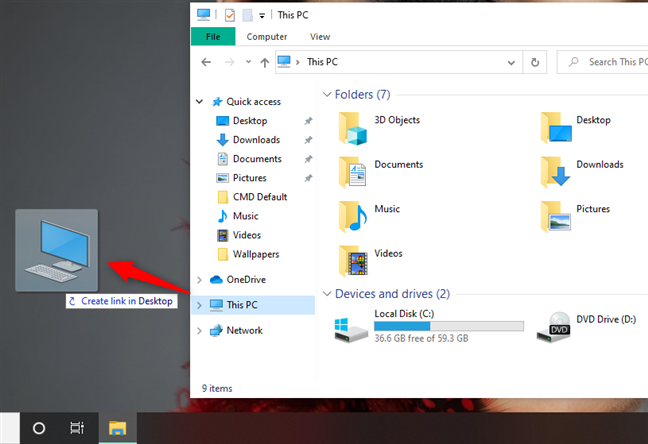
Open File Explorer and look at the left side of the window. Everyone's screen looks slightly different, depending on what's installed and how it's organized, but "This PC" should be on any Windows 10 computer or device. If you want to pin a shortcut to "This PC" to your taskbar, there are two things you must do. First, drag and drop "This PC" on your desktop to create a new link to it.
Secondly, drag and drop the "This PC" desktop shortcut on your taskbar. It's not straightforward, but it works.
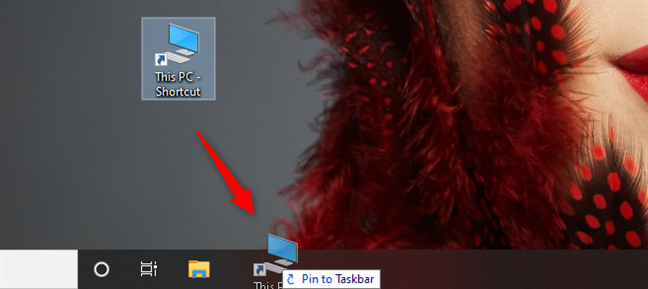
NOTE: If you try to drag-and-drop "This PC" directly on your taskbar, it's not pinned to the taskbar.
6. How to pin taskbar shortcuts to the Quick Access, OneDrive, Network, or Recycle Bin (special locations)
If you want to pin to the taskbar one of the special File Explorer items Quick access, OneDrive, Network, or Recycle Bin you must first create a special shortcut to them. Unfortunately, you can't drag and drop the new shortcut to the taskbar. Here's what you have to do:
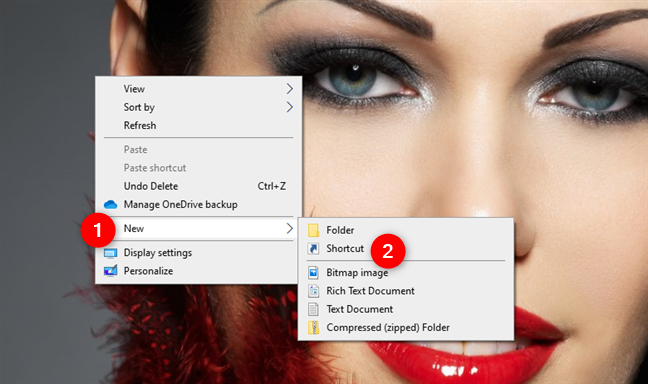
Right-click or tap and hold anywhere there's empty space on your desktop and select "New -> Shortcut."
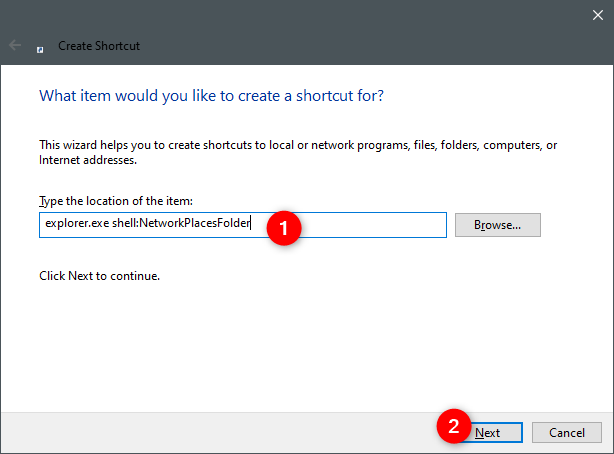
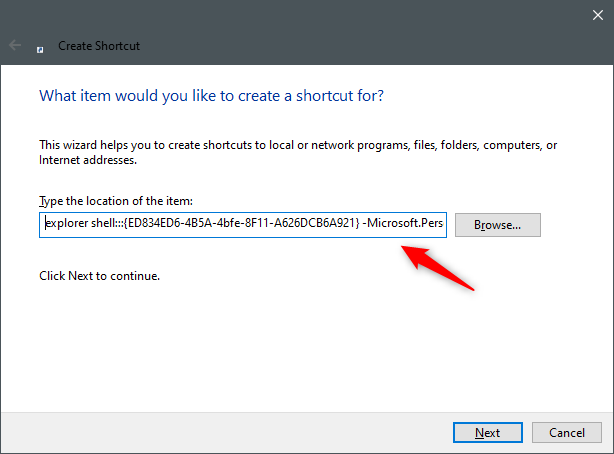
In the Create Shortcut wizard, type explorer.exe followed by a space (space is essential). Then, type one of the following texts, depending on where you want your new shortcut to point:
- Quick access: add shell:::{679f85cb-0220-4080-b29b-5540cc05aab6}
- OneDrive: add shell:OneDrive
- Network: add shell:NetworkPlacesFolder
- Recycle Bin: add shell:RecycleBinFolder
For example, if you want to create a shortcut for Network that you can pin to the taskbar, enter: explorer.exe shell:NetworkPlacesFolder.
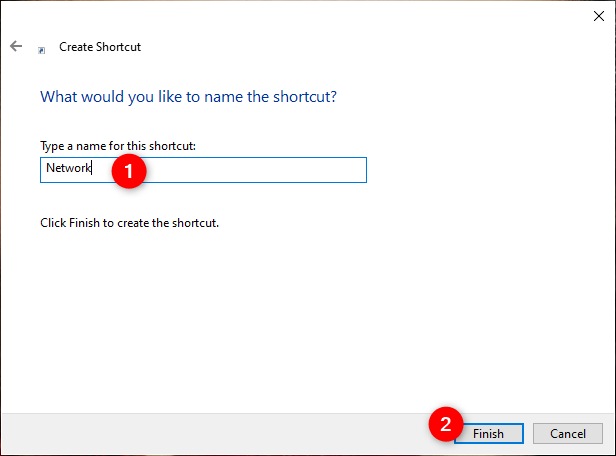
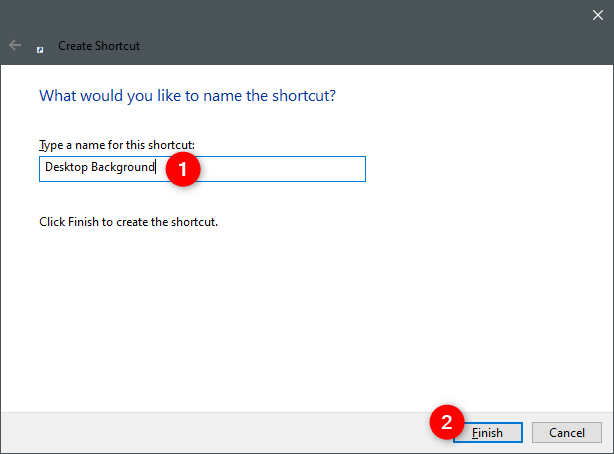
Name your shortcut whatever you wish, and click or tap on Finish.
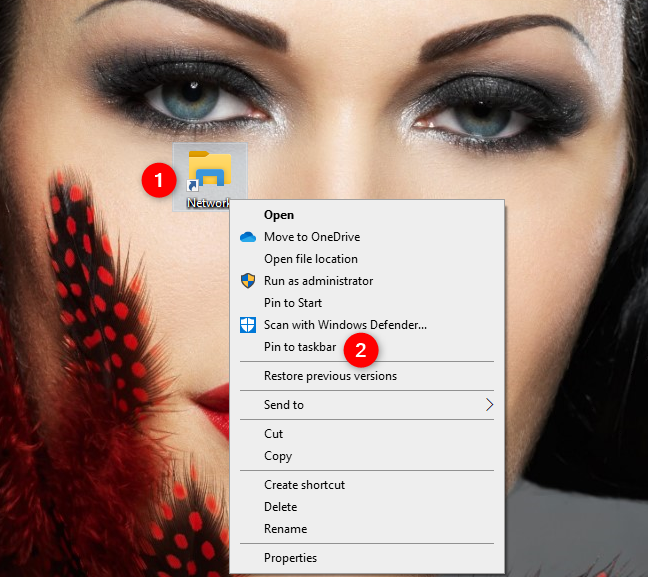
Your new shortcut is now created. This is the one you can drag to the taskbar or right-click (touch and hold) and choose "Pin to taskbar."
Note that most shortcuts you create and pin to the taskbar this way use by default the File Explorer icon. If you pin more items like this on the taskbar, you might end up with something like ten File Explorer icons one after another.
Although they open different things, they look the same, which is not helpful, is it? To overcome this mishap, before pinning the shortcuts to the taskbar, you should change their icons to something individual for each. So make sure you assign them new icons before pinning them to your taskbar.
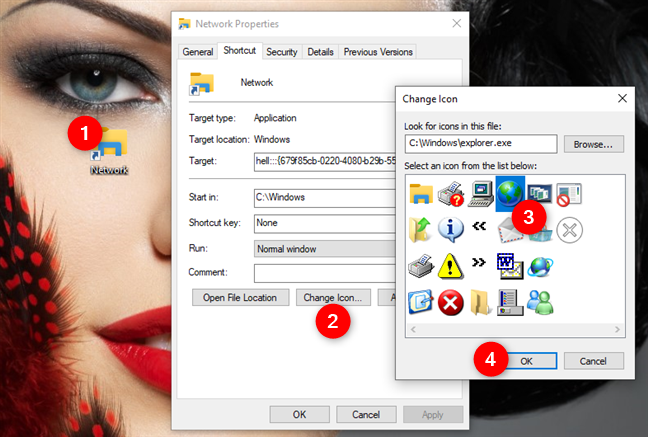
If you don't know how to change the icon of a shortcut, read this guide: How to change the icon of any shortcut in Windows.
7. How to pin the Control Panel to the taskbar
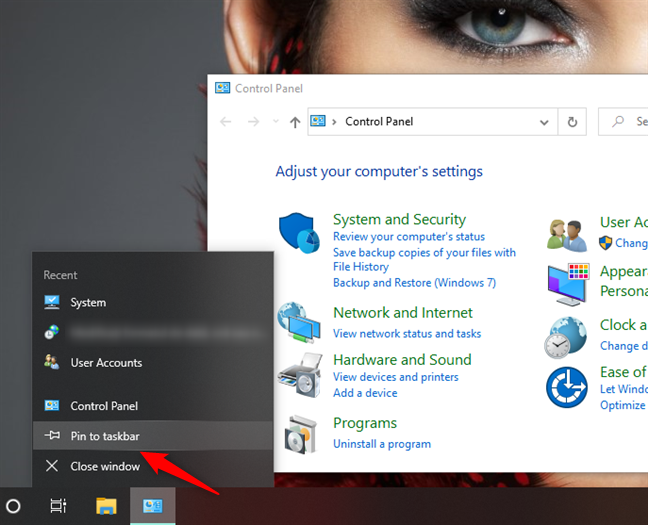
If you want to pin the entire Control Panel to the taskbar, open the Control Panel, and you should see its icon on your taskbar. Right-click (or tap and hold) Control Panel's icon and choose "Pin to taskbar."
8. How to pin items from the Control Panel to the taskbar
If you just want to pin a few individual Control Panel items, the procedure is just the same as we detailed in the 6th section of this article. You have to first create shortcuts to the Control Panel items. Only afterward you can pin them to your taskbar.
In the Create Shortcut wizard, type one of the following commands, depending on where you want your new shortcut to point:
- Add a Device wizard: type %windir%\System32\DevicePairingWizard.exe
- Add Hardware wizard: type %windir%\System32\hdwwiz.exe
- Add a Printer wizard: type rundll32.exe shell32.dll,SHHelpShortcuts_RunDLL AddPrinter
- Color and Appearance: type explorer shell:::{ED834ED6-4B5A-4bfe-8F11-A626DCB6A921} -Microsoft.PersonalizationpageColorization
- Desktop Background: type explorer shell:::{ED834ED6-4B5A-4bfe-8F11-A626DCB6A921} -Microsoft.PersonalizationpageWallpaper
- Device Manager: type devmgmt.msc
- File Explorer Options (General tab): type rundll32.exe shell32.dll,Options_RunDLL 0
- File Explorer Options (View tab): type rundll32.exe shell32.dll,Options_RunDLL 7
- File Explorer Options (Search tab): type rundll32.exe shell32.dll,Options_RunDLL 2
- Notification Area Icons: type explorer shell:::{05d7b0f4-2121-4eff-bf6b-ed3f69b894d9}
- Performance Options (Visual Effects): type %windir%\system32\SystemPropertiesPerformance.exe
- Performance Options (Data Execution Prevention): type %windir%\system32\SystemPropertiesDataExecutionPrevention.exe
- Personalization: type explorer shell:::{ED834ED6-4B5A-4bfe-8F11-A626DCB6A921}
- Presentation Settings: type %windir%\system32\PresentationSettings.exe
- System Icons: type explorer shell:::{05d7b0f4-2121-4eff-bf6b-ed3f69b894d9} SystemIcons,,0
- System Properties (Computer Name): type %windir%\System32\SystemPropertiesComputerName.exe
- System Properties (Hardware): type %windir%\System32\SystemPropertiesHardware.exe
- System Properties (Advanced): type %windir%\System32\SystemPropertiesAdvanced.exe
- System Properties (System Protection): type %windir%\System32\SystemPropertiesProtection.exe
- System Properties (Remote): type %windir%\System32\SystemPropertiesRemote.exe
- User Accounts (netplwiz): type netplwiz
- Windows Features: type %windir%\System32OptionalFeatures.exe
- Work Folders: type %windir%\System32WorkFolders.exe
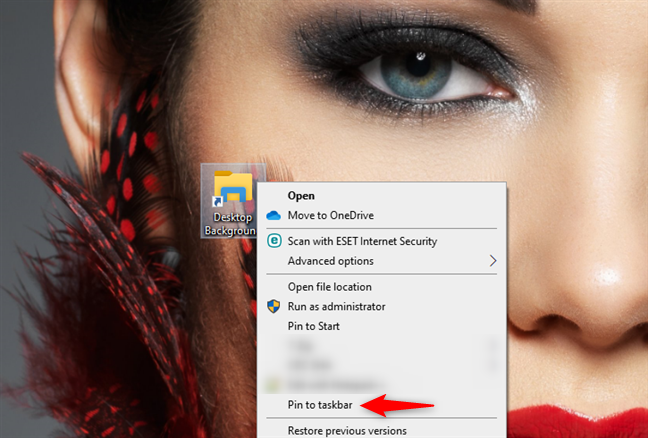
For example, if you want to create a shortcut for Desktop Background that you can pin to the taskbar, enter: explorer shell:::{ED834ED6-4B5A-4bfe-8F11-A626DCB6A921} -Microsoft.PersonalizationpageWallpaper.
Name your shortcut whatever you wish, and click or tap Finish.
After you create the shortcut, drag it on the taskbar or right-click (touch and hold) and choose "Pin to taskbar."
NOTE: Before pinning the shortcuts to the taskbar, you might want to change their icons to something easier to identify. Do that before you pin them to your taskbar. If you don't know how to change the icon of a shortcut, read: How to change the icon of any shortcut in Windows 10.
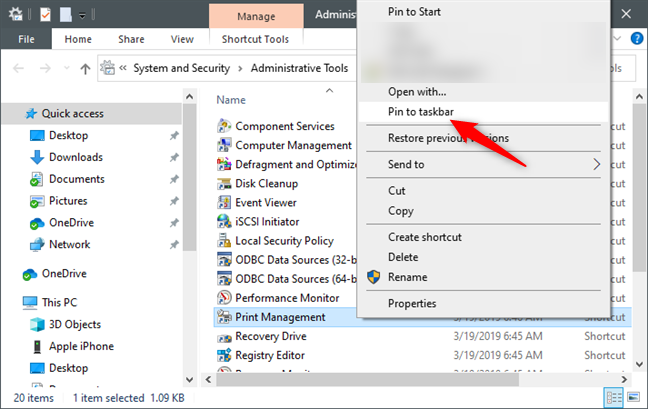
9. How to pin Administrative Tools shortcuts to the taskbar
Open Control Panel and go to "System and Security -> Administrative Tools." Everything in the Administrative Tools window is already a shortcut, so just right-click (or touch and hold) the one you want to pin to the taskbar and choose "Pin to taskbar."
That's all!
Did you add all the shortcuts you wanted to your taskbar?
Pinning most things in Windows 10 to the taskbar is easy. However, some components are not so simple and straightforward to pin, like the items from the File Explorer or Control Panel. However, even if it takes more clicks/taps and special shortcuts, in the end, you can set up your taskbar precisely the way you want it so that you have quick and easy access to the tools you use most. What do you have pinned to your taskbar? What would you recommend to others? Let us know in the comments.