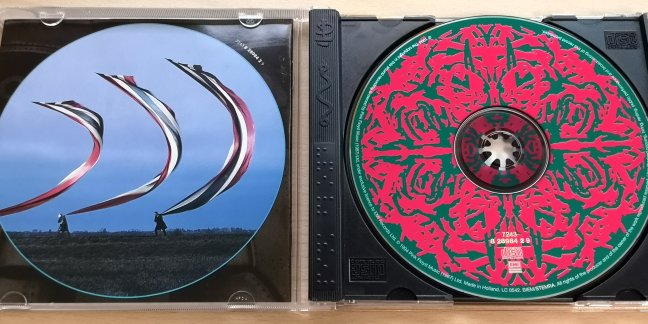
While dusting my home, I stumbled upon my audio CD collection with albums from awesome bands like Pink Floyd, Rush, and The Beatles. I got hit by nostalgia, and I decided that I wanted to rip some CDs and listen to excellent music, in a high-quality audio format. For those of you who do not know, ripping a CD means copying the songs from the CD to your computer's hard disk, or some other location, in a different format than the one in which they are stored on the CD. Here is how to quickly and reliably rip CDs, in Windows, with Windows Media Player:
Step 1. Take the audio CD and place it into your CD/DVD/Blu-Ray drive
You may have an old computer with Windows 7 laying around or a new one with Windows 10 that has a DVD or Blu-Ray drive. Take the audio CD that you want to rip, and place it into the CD/DVD or Blu-Ray drive of your computer.
You should hear the disc spinning, meaning that the drive is reading its contents.
Step 2. Start Windows Media Player and access the audio CD
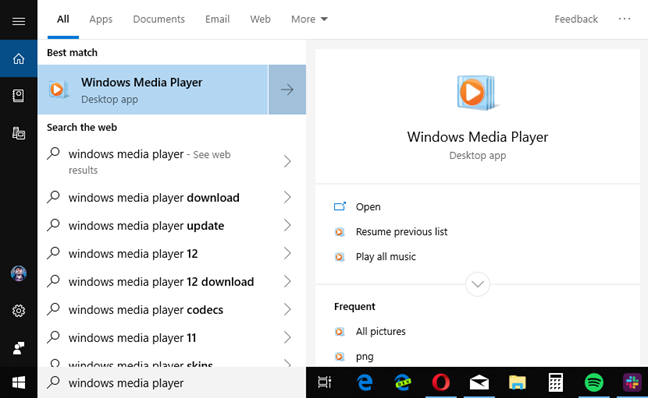
The next step is to start Windows Media Player. One quick way to do that is to use the search feature. Type "windows media player" in the search box, and click or tap the appropriate search result.
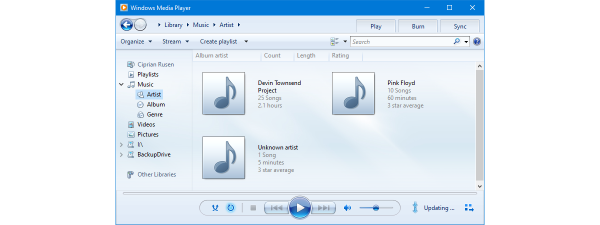
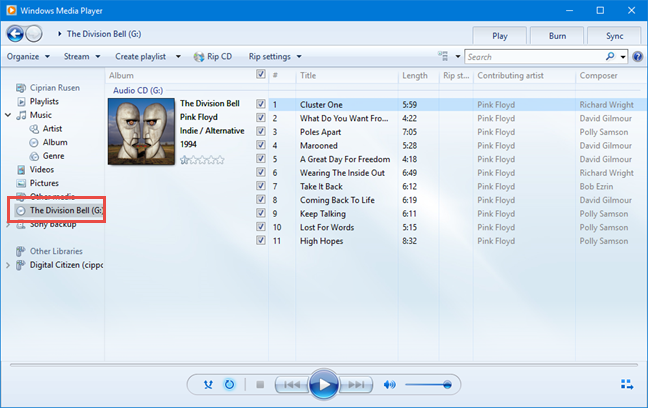
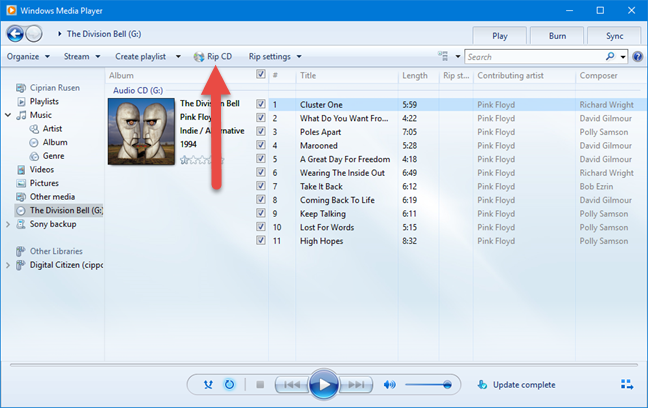
In the Windows Media Player app, click or tap on the name of the audio CD that you have plugged into your computer. In my case, I am going to rip an excellent album that made me fall in love with Pink Floyd: "The Division Bell." For each track, you should see its number, title, length, and contributing artist.
If you have an ancient audio CD with no information stored about the tracks on it, you can right-click anywhere on the list of tracks, and click "Find album info." Windows Media Player may be able to help and find the information that is missing. If it can't, you can edit the information yourself, type the title of each track, and so on.
Step 3. Choose the audio format for ripping the CD
By default, Windows Media Player rips your music using the MP3 format with low-quality audio settings. You may not want that. Click or tap the Rip settings button on the toolbar, go to Format and choose the audio format that you prefer.
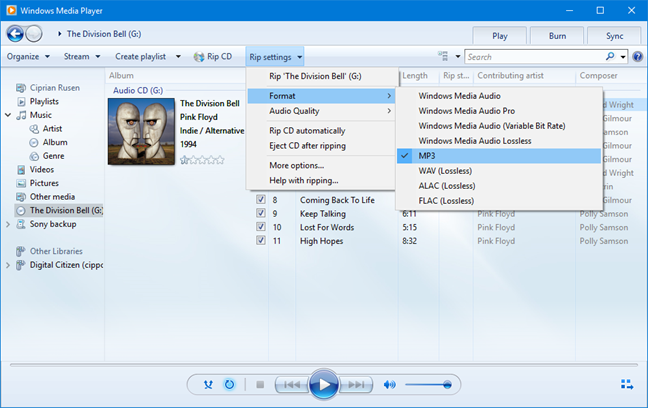
What is the best format to rip audio CDs? That is up to you. If you are an audiophile, you should choose FLAC(Lossless) because it provides the best possible audio quality. However, this format uses a lot of disk space. For most people, MP3 is going to be the best choice, also because it is compatible with plenty of devices, including car stereos.
NOTE: If you use Windows 7, the FLAC option is not going to be available as a ripping format in Windows Media Player. This format is available in Windows 10.
Step 4. Choose the audio quality you prefer
If you choose MP3 or a format other than FLAC, you should also set the audio quality. In Windows Media Player, click or tap Rip settings, followed by Audio Quality, and the quality you prefer. For MP3 audio tracks, we recommend choosing 320 Kbps, as it offers the best sound quality available for this format.
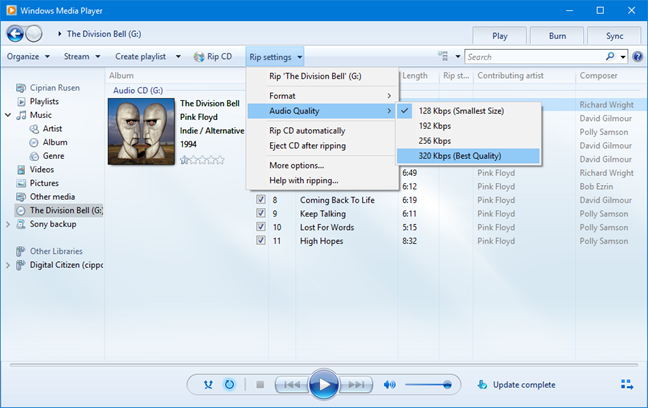
One thing to remember is that the higher the audio quality you choose, the better the music is going to sound when you listen to it. However, it is also going to occupy more storage space. Therefore, it is best that you choose the audio quality that strikes the best balance between sound quality and the storage space.
Step 5. Choose where to save the ripped audio and what file names to use
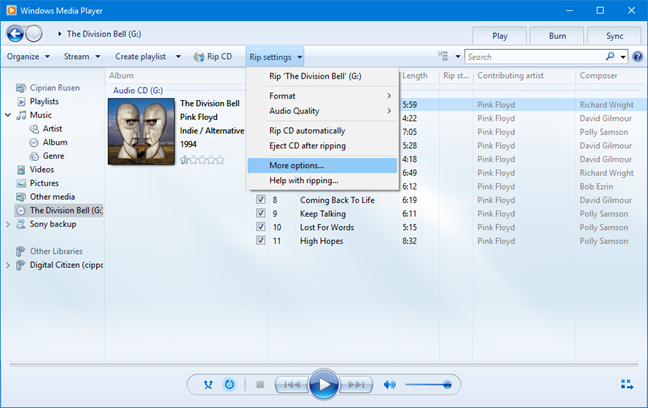
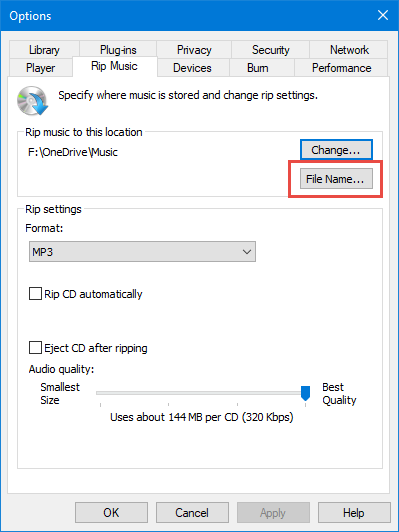
By default, Windows Media Player rips your audio CDs to the Music library. You may want to change the location of your ripped music. To do that, click or tap Rip settings, followed by More options.
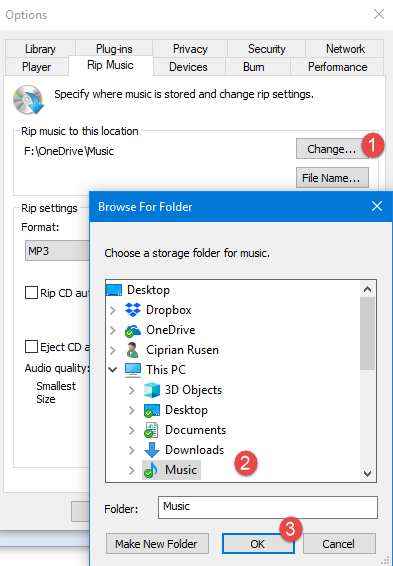
In the Options window, in the Rip Music tab, see the "Rip music to this location" field. It shows the location where all your music is going to be ripped. To change it, click or tap the Change button on the right, browse to the location you want, and click OK.
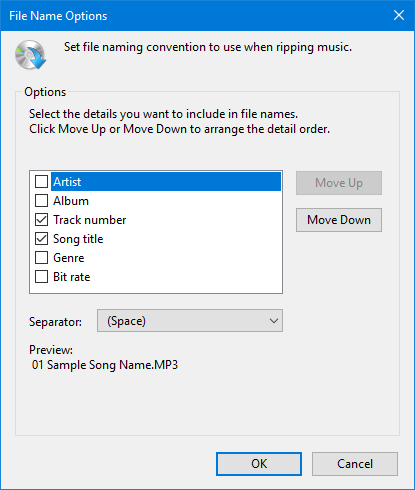
The default file name used for your ripped music is Track Number Song Title. For example, you may rip a track with the filename "11-High Hopes.mp3". If you want the file names to include things like the artist or the album name, and change the order of elements, click or tap the File Name button in the Options window.
Then, check the details that you want to include in file names: Artist, Album, Track Number, Song Title, Genre, and Bit rate. Then, use the Move Up and Move Down buttons on the right to change their order, and choose the separator that you want: space, dash, dot, underline or none. When you are done setting things, click or tap OK.
Click OK one more time, in the Options window.
Step 6. Rip the audio CD to your Windows computer
Now you have configured the ripping process according to your preferences. Click or tap the Rip CD button.
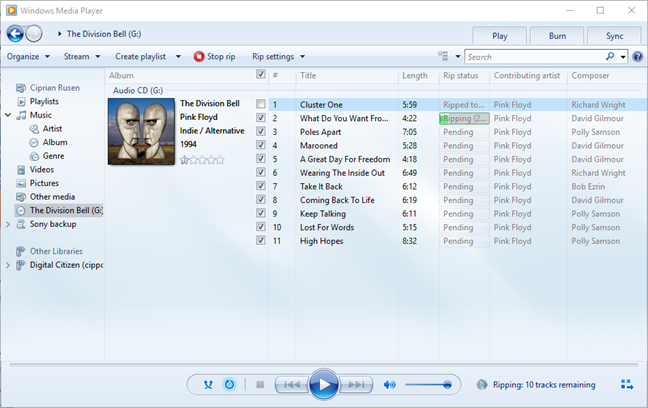
The ripping process starts and, for each track, you see the status. You can stop the ripping at any time, by clicking the Stop rip button.
In just a few minutes, all your audio tracks should be ripped and stored on your Windows computer, in the folder that you have set. Now it is time to listen to your music collection, at high-quality audio settings. Enjoy the nostalgia of the old days, when audio CDs were the way you listened to music. 🙂
"Looking beyond the embers of bridges glowing behind us
To a glimpse of how green it was on the other side"
What audio CD did you rip?
If you have an audio CD collection with music that you like, and you want to rip it to your computer, teenagers today are going to consider you old. 🙂 But that's OK. We are old too, and we love our music collection. Before closing this tutorial, tell us if everything worked well for you and, most of all, what audio CD did you rip? Was it an album of your favorite band? Comment below and let's share our musical memories. 🙂