Sharing folders from Mac OS X with Windows computers and devices, is a lot easier than it used to be. Thanks to OS X's built-in support for the Microsoft Server Message Block (SMB) Protocol, allowing read/write access to Windows computers can be done with just a few tweaks in System Preferences. After completing the steps in this tutorial, your Windows 7 and Windows 8 computers should be able to see your Mac on the local network. You'll be able to setup multiple shared folders, each with different read/write access. Let's see how it is done.
NOTE: Before you enable sharing, double check that your Mac is part of the same workgroup as your Windows computers and devices. This guide will help you out: How to Change the Workgroup in Mac OS X for Easy Networking. Also, if you want to know more about the protocol used to share items with Windows computers, read this Wikipedia entry: Microsoft Server Message Block (SMB) Protocol.
Setting Up OS X to Share with Windows 7
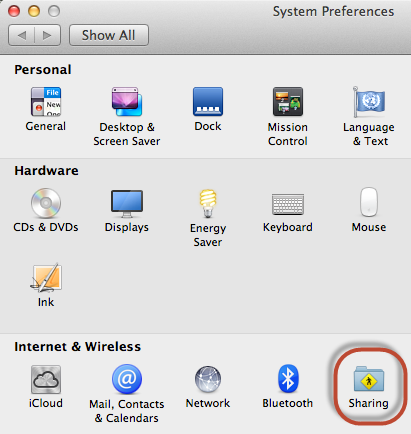
Begin by opening up the Sharing pane in System Preferences. You can find it in the Internet & Wireless section.
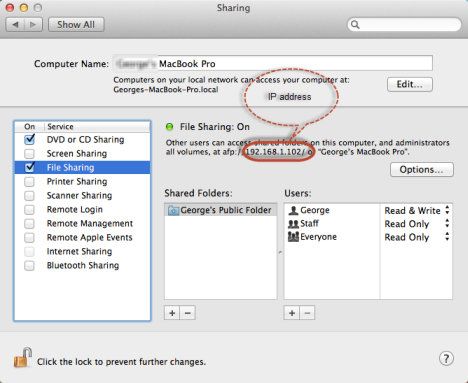
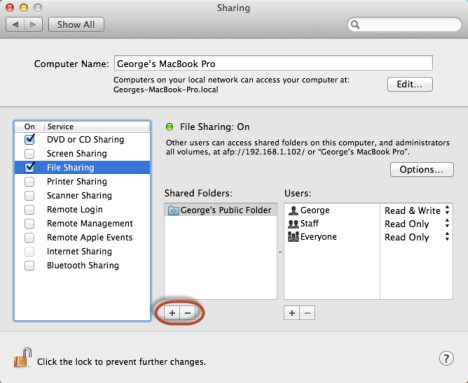
In the Sharing pane, check the box next to File Sharing. If you also want to enable also DVD or CD sharing, check the box for this service too.
When File Sharing activated and selected, OS X shows the IP address for your Mac. You can see it highlighted in the screenshot below. Next, click Options.
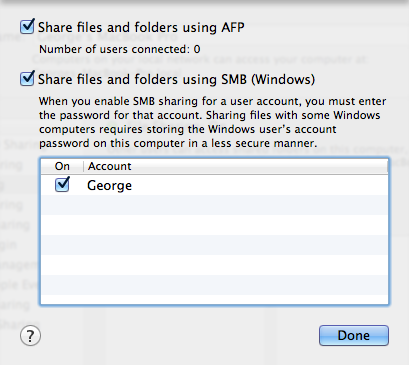
In the Options pane, check the box next to "Share files and folders using SMB (Windows)" and "Share files and folders using AFP".
You'll also want to select which user accounts will have sharing enabled. You will need to use these user accounts when connecting from Windows to your Mac's shared folders. If sharing is not enabled for a user account you won't be able to use its credentials to connect to the Mac's shared folders from Windows.
Click Done and you are back to the Sharing pane.
NOTE: At this point, OS X might ask you to enter your password, in order to enable file sharing. Do so, if that happens.
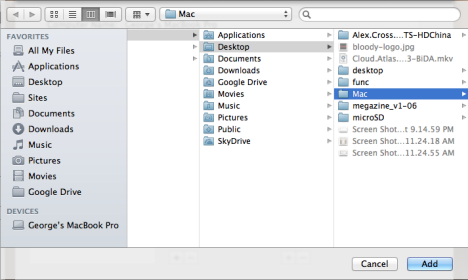
Click the '+' button to add a Shared Folder.
The Finder is opened. Browse to the folder you'd like to share with Windows computers and devices and click Add.
Once you have a Shared Folder added, you can set the read/write permissions. Go to the Users section and, in the right column, select the permissions you want to be assigned to each of the listed user accounts. You can choose Read & Write, Read Only, Write Only or No Access.

NOTE: The easiest route is to simply allow read/write access to Everyone. However, this should be done only on trusted networks.
Using this procedure, you can add multiple folders, each with different read/write permissions. This is useful if you'd like to set up a Write Only drop box (where multiple users can turn in assignments or documents into a single folder but other users cannot read them) or a Read Only folder for reference, for example.
When you are done adding shared folders and setting up their permissions, close the Sharing pane and System Preferences.
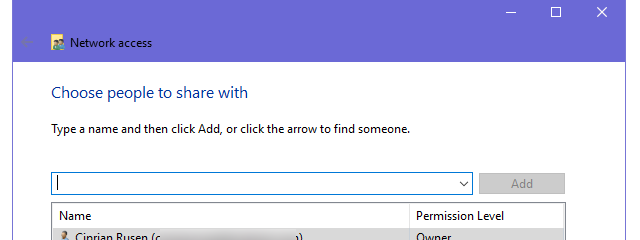
How to Access Your Mac's Shared Folders from Windows 7 or Windows 8
Once you've completed the above steps on your Mac, your Windows 7 and Windows 8 computers should pick up the shared folders under Network in Windows Explorer or File Explorer.
Let's see how accessing them works from Windows 8. For Windows 7 the procedure is identical. Only the looks of Windows Explorer are a bit different.
Open File Explorer and click or tap Network. There you will see the other computers on your network, including your Mac (if it is turned on).
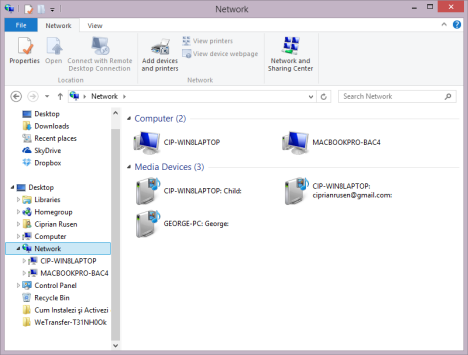
If you can't see the Mac, chances are you forgot to add it to the same workgroup as your Windows computers. Check this tutorial for help: How to Change the Workgroup in Mac OS X for Easy Networking.
Double click or tap the Mac. You are asked to enter the credentials of the user account sharing files and folders on the network. In the first text box, first type the name of the Mac, followed by "" and then the name of the user account existing on the Mac. Notice how the Domain entry changes to the name of the Mac. Then, enter the password that user account and click or tap OK.
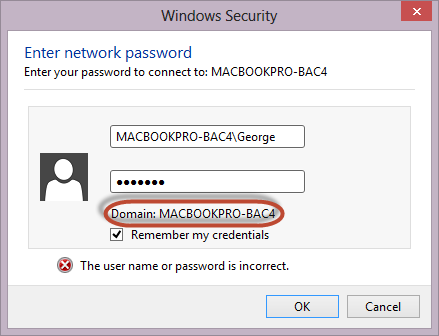
NOTE: If you don't type the Mac's computer name first, you won't be able to access its shared folders. Also, you can check the "Remember my credentials" box, if you don't want to always enter the user account and password.
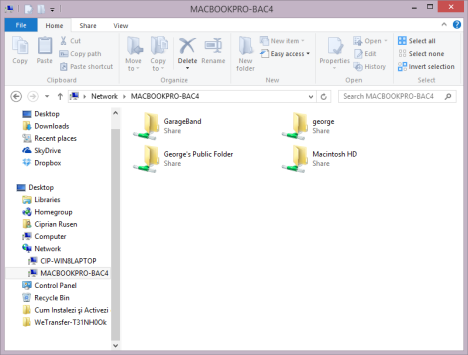
Then, the Mac's shared folders are displayed.
Mapping a Mac's Shared Folder as a Network Drive
If you are having trouble getting the Mac to show up in Network places, you'll need to map one of the folders as a network drive. For full instructions on mapping network drives, see our previous tutorial: How to Map Network Drives in Windows 7. For the folder name, use your Mac's IP address plus the name of the shared folder (i.e. "\192.168.1.6shared"). If the user account you configured on your Mac is different from your Windows login credentials, you'll have to check "Connect using different credentials".
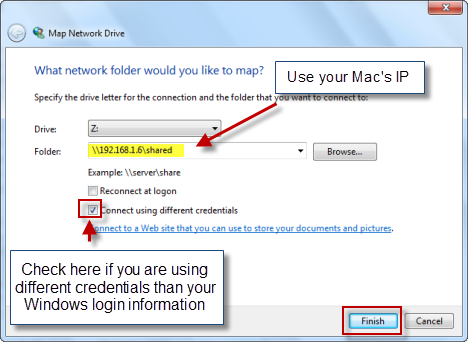
When you click Finish, you'll be asked to enter your username and password. Enter the details for the user you set up in the steps above. Remember to enter the Mac's computer name first, then "", then the user account.
Conclusion
As you can see, sharing Mac OS X folders with Windows 7 and Windows 8 is pretty much an "out-of-the-box" feature. All you have to do is open the door to Windows devices and choose which folders you'd like to share and which permissions to grant network users. The next step, of course, is to set up your Windows computers so that they can be accessed from your Mac. For complete instructions on sharing folders and devices between the Mac and Windows, read the articles recommended below. You will find them useful.