If you are the type of person that always has a camera ready for that perfect candid photo, Photo Gallery may become one of your favorite tools. It allows you to import and arrange your photos, do minor edits and share them with friends. It even has some advanced functions that allow you to combine multiple photos in interesting ways. However, in this tutorial, we will first demonstrate how to use Photo Gallery to import pictures and videos to your Windows computers and devices, from just about any digital device: digital cameras, smartphones and memory cards.
NOTE: It's worth noting that while most of this tutorial deals with images, Photo Gallery can handle importing videos as well as photos. You can use this application to import pictures and videos from all kinds of devices, not only digital cameras. The procedures detailed in this guide also apply to smartphones and memory cards.
How To Start The Import Photos And Videos Wizard From Photo Gallery
First, you need to start Photo Gallery.
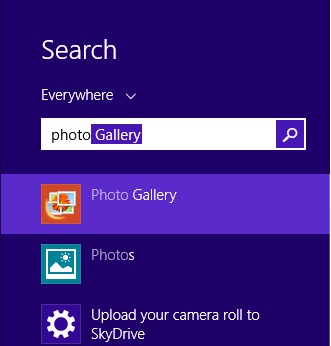
In Windows 8.1, you can open this application by typing "photo" while on the Start screen and selecting Photo Gallery from the list of search results.
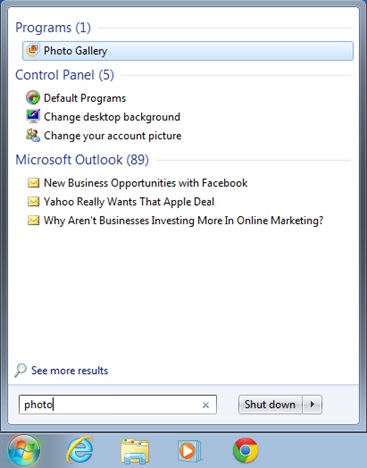
In Windows 7, click the Start button, type the word "photo" in the search box and click the Photo Gallery search result.
Once Photo Gallery opens, plug in your digital camera or smartphone via USB. After the device is detected and installed by Windows, you will see in Photo Gallery that the device is shown in a new category, named Devices.
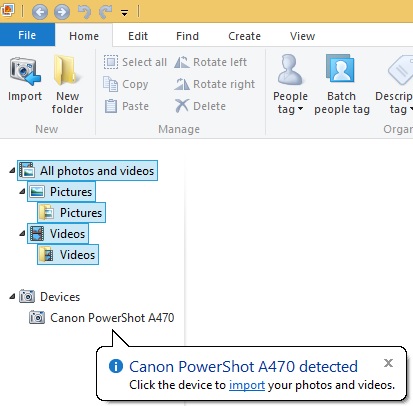
Click or tap the Import button located on the Home tab of the ribbon, in the New section. The Import Photos and Videos wizard is now shown. Select the device you are importing from and click or tap Import.
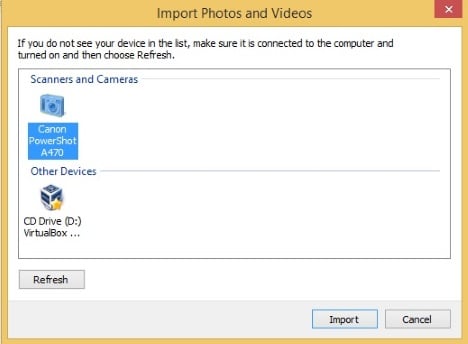
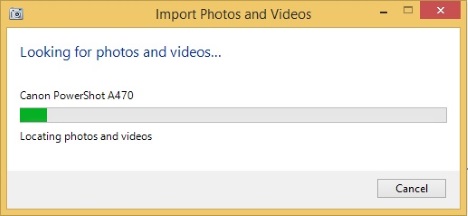
Alternatively, you can skip the previous steps by clicking or tapping the camera, in the Devices list. The Import Photos and Videos wizard checks your camera for photos and videos. Wait until the check is done. Depending on the volume of data on your device, this check will take several seconds or several minutes.
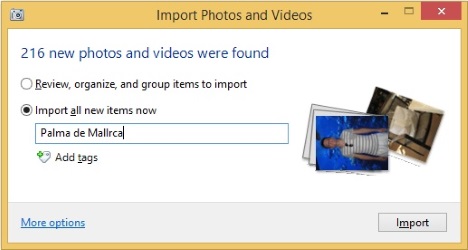
You are shown how many pictures and videos are found and you can choose how you want to continue with the import.
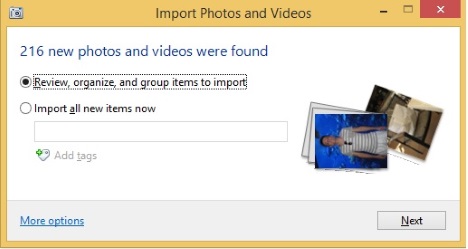
If you want to import all the pictures and videos from your device, read the next section. If you want to import only a group of pictures and videos, read the section following the next section.
How To Import All The Pictures From Your Device
Choose "Import all new items now". You also have the ability to enter a name as well as add tags for the pictures that you want to import. When done, click or tap Import.
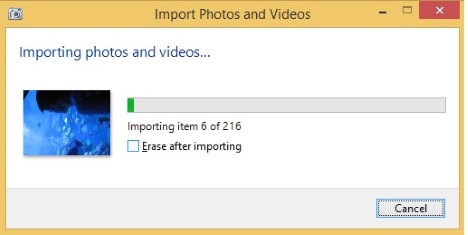
The import process is now started. At this point you have the option of erasing the files from the camera, after the import process is done, by clicking the checkbox labeled "Erase after importing".
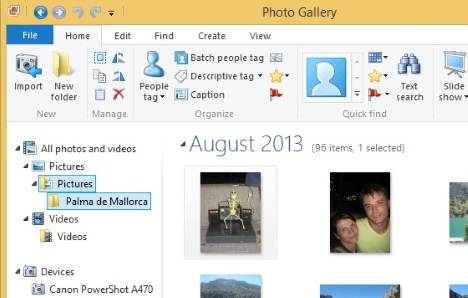
When the import is finished, Photo Gallery displays the pictures and the videos that it has imported. They are placed in a folder that has the name that you have typed before importing them.
How To Import A Limited Group Of Pictures From Your Device
You can also import a small selection of photos and videos. Select "Review, organize, and group items to import" and click or tap Next.

Now you are shown a list of groups. They are created based on the date and the hour when you took pictures and recorded videos. You can adjust the number of groups by moving the "Adjust groups" slider to the left or to the right. Photo Gallery uses a range that varies between 0.5 hours to 30 days to make a single group. For each group of pictures and videos you can enter a name and add tags, just like when importing all pictures and videos.
You can Select All groups to import them or you can click or tap Expand all and select only the pictures and videos that you want to import.
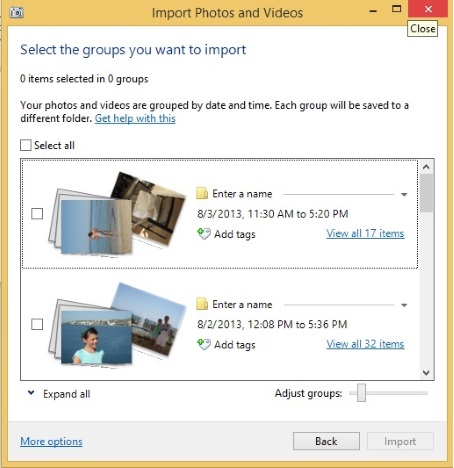
When you are done selecting what you want to import, enter a name and the appropriate tags and click or tap Import. At this point you have the option of erasing the files from the camera, after the import process is done, by clicking the checkbox labeled "Erase after importing".
When the import process is over, Photo Gallery opens and shows you the items that it has imported.
How To Import Pictures & Videos From Memory Cards
Much of this tutorial has dealt with importing pictures and videos from your digital camera. However, digital cameras store images on memory cards that you can directly plug into a computer that has a memory card reader. The procedure for importing pictures and videos from a memory card works the same in Photo Gallery. The only difference is that you are shown a different name for the device that you are using for the import process.
Conclusion
As you can see, Photo Gallery makes it easy for you to import pictures and videos to your Windows computer, from just about any device: digital cameras, smartphones, memory cards, etc. You can also use this application to view your pictures and videos, organize them and edit them. To learn how to perform such tasks, read the articles recommended below.