To remote access Windows 10 from Mac, you can use the Microsoft Remote Desktop 10 app. With it, computers running Windows 10 Professional or Enterprise can be controlled remotely through the Remote Desktop protocol. This allows a remote user using macOS to log in to the Windows 10 computer and control it as if he or she were sitting right in front of it. This tutorial illustrates the steps you need to take in order to connect via Remote Desktop from a Mac to Windows 10, using Microsoft Remote Desktop 10:
Step 1. Enable Remote Desktop on your Windows 10 device
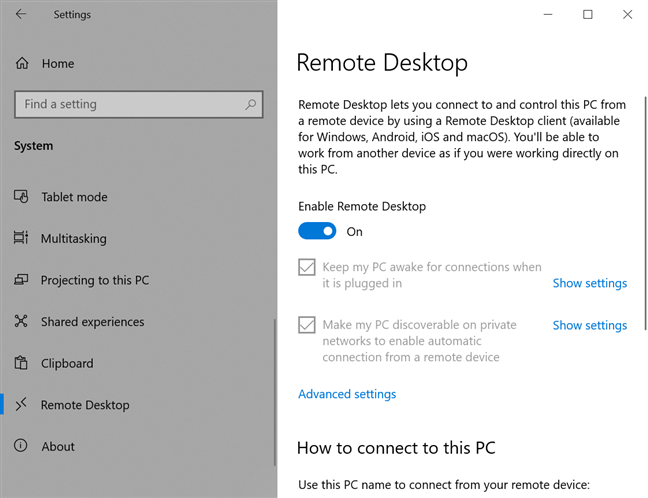
Windows 10 machines need Remote Desktop enabled to accept connections from other Windows computers, as well as macOS computers running the Microsoft Remote Desktop 10 app for Mac. If you're not sure how to turn on and configure the feature, read our tutorial on How to enable Remote Desktop in Windows 10 (or Windows 7).
To learn more about Remote Desktop and how it works, check out What Are Remote Desktop Connections?.
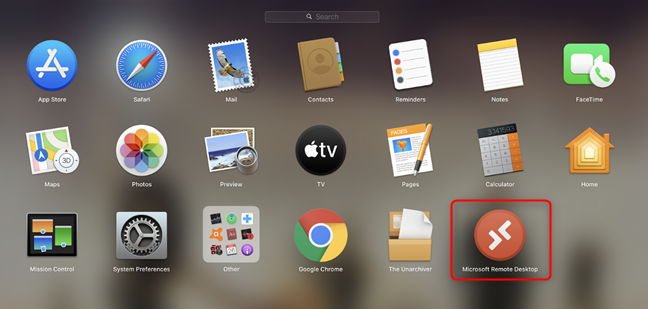
Step 2. Access the Microsoft Remote Desktop 10 app on your Mac
The Microsoft Remote Desktop 10 app is free and you can download it on your Mac from the App Store.
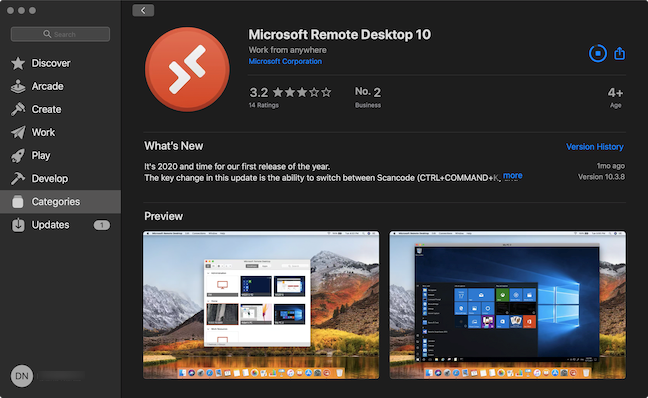
Once the download is complete, Open the app from the Apple Store. You can also press F4 on your keyboard to open the Applications folder, find the Microsoft Remote Desktop app, and click on it.
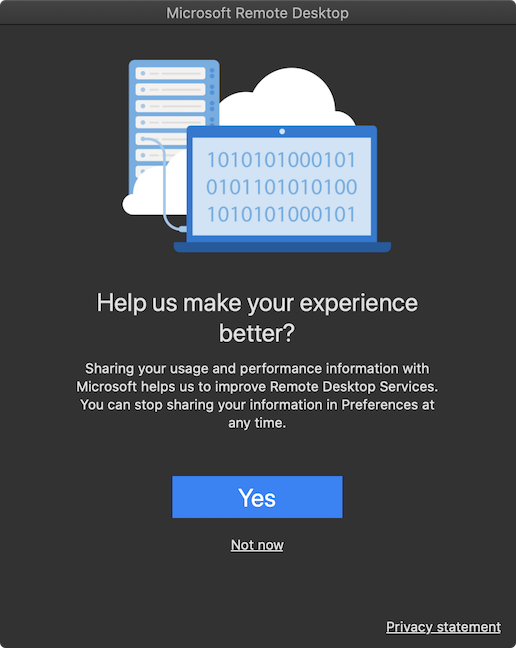
When you first open the app, you are prompted to share "your usage and performance information with Microsoft." Click Yes or Not now, depending on what you want.
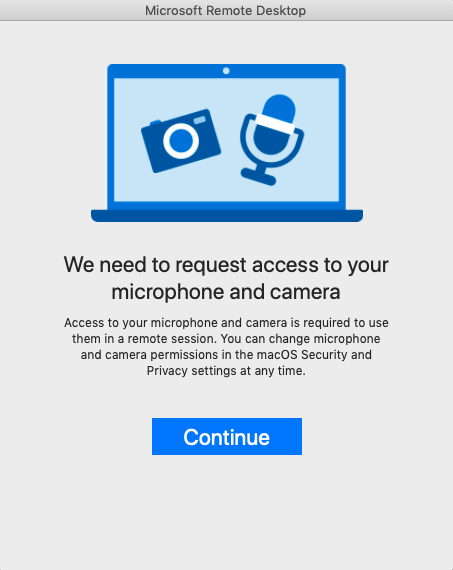
You also need to grant the app access to your Mac's microphone and camera. Click Continue.
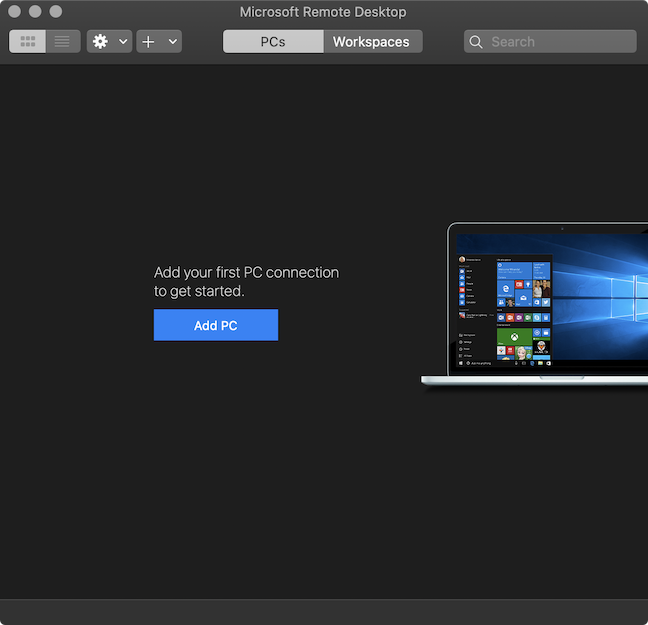
The app opens and you can start using it to connect from your Mac to a Windows 10 PC.
NOTE: In order to connect remotely to your computer from work, you might first need to connect through VPN to your company's network.
Step 3. Configure your Remote Desktop connection
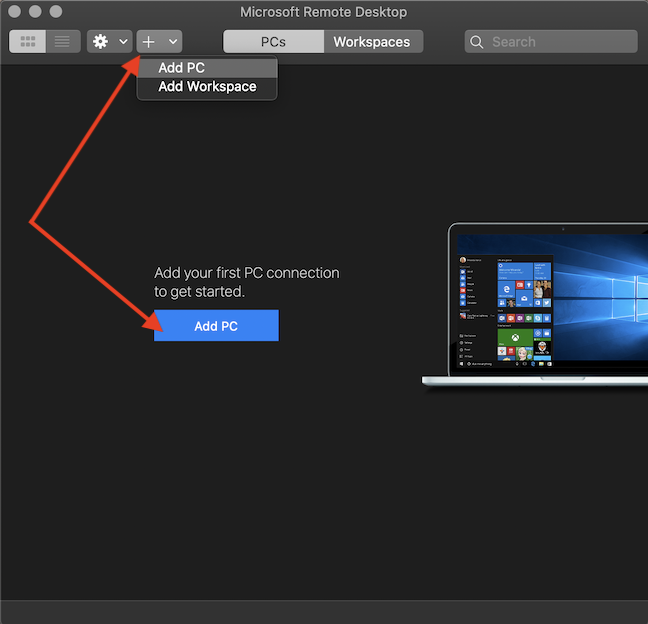
To use Microsoft Remote Desktop 10 to connect from your Mac to a Windows 10 PC, you first need to add that PC to the app. Click the Add PC button in the middle, or press on the + (plus sign) button on top and click on Add PC.
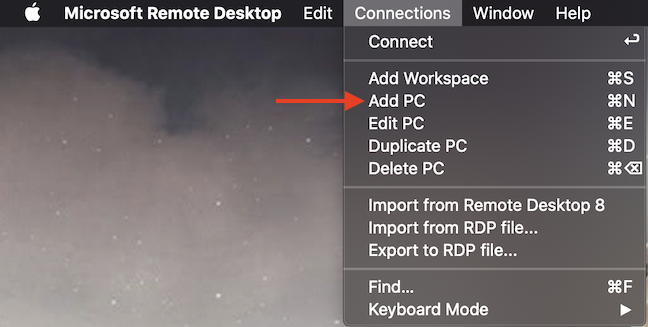
Alternatively, you can also access the app's Connections menu and click on Add PC.
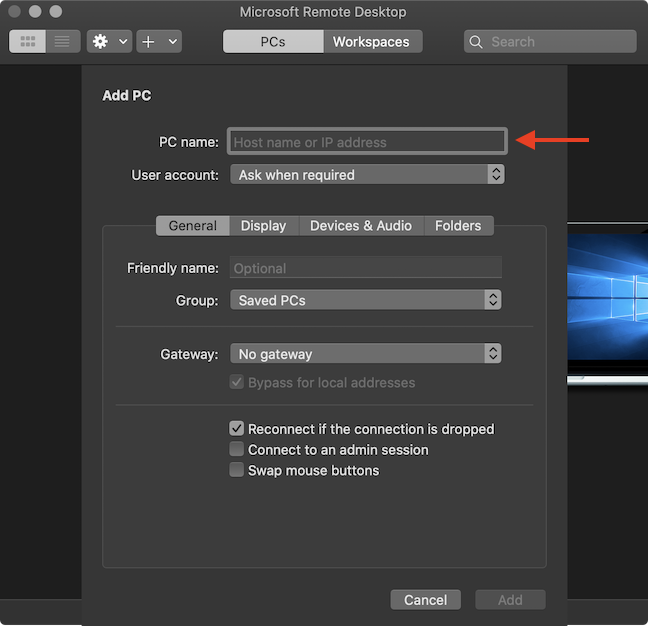
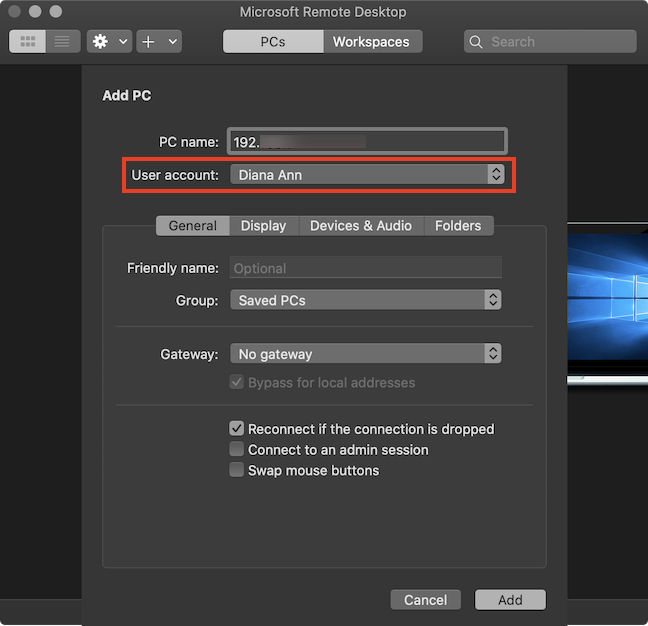
The Add PC window pops up. Use the PC name field to insert the "Host name or IP address" of the Windows 10 computer you want to connect to. To find out the IP address of your Windows 10 computer, check out 8 ways to find your IP address in Windows (all versions). If you want to connect using the computer's name, read What is the computer name and how to view it in Windows?.
Click the User account field to open a dropdown menu. With the default option, "Ask when required," you need to insert your Username and Password each time you connect to that PC. If you plan to use the same user account to connect remotely to that Windows 10 computer often, click on "Add User Account."
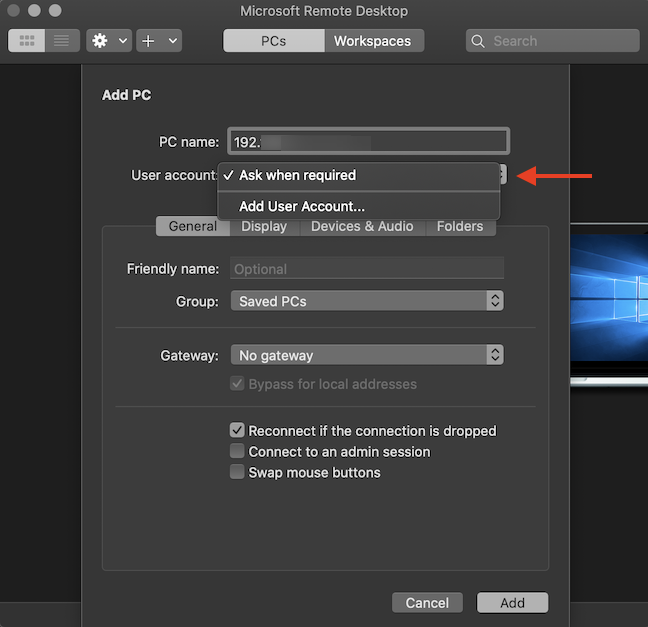
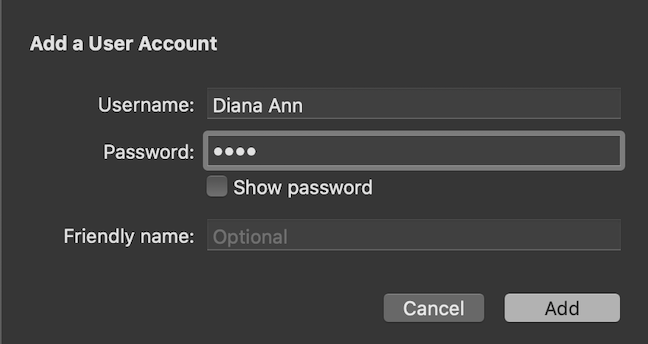
In the "Add a User Account" pop-up, insert the Username and Password for the Windows 10 account. Press Add to save your credentials and avoid having to insert them every time you remotely connect to Windows 10.
NOTE: You can also choose a Friendly name, if you add more User Accounts and need to differentiate between them.
The User Account you inserted is saved, and you can see it displayed in the corresponding field.
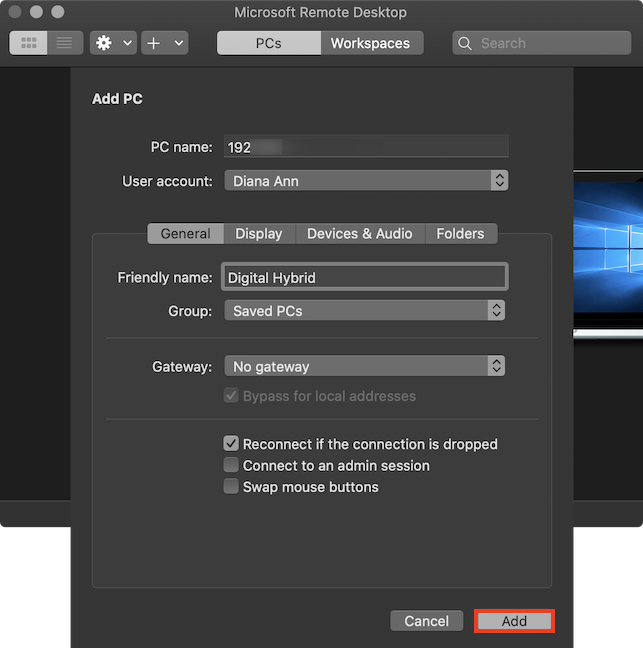
The lower part of the Add PC pane has four tabs with different settings for your remote connection. The pane opens in the General tab, where you can modify the following settings:
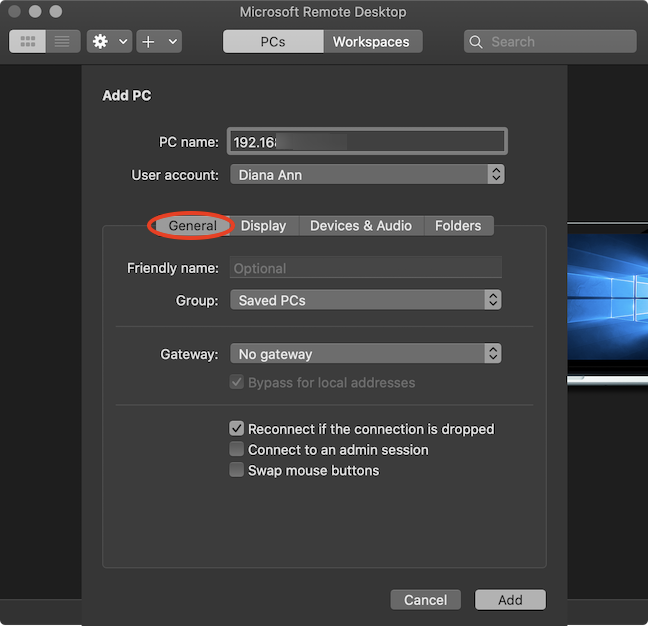
- Friendly name - Type a name for your Windows 10 remote desktop connection, to be used inside Microsoft Remote Desktop instead of the PC name or IP. If you add more devices, this can make it easier to differentiate between them.
- Group - Click this field to open a drop-down menu that lets you Add Group, and you can enter the name of a new group. If you add a lot of devices in the Microsoft Remote Desktop app, you can use this option to create different groups of computers for easy sorting.
- Gateway - Click this field to open a drop-down menu that lets you Add Gateway. Type a Gateway name and a User Account. This option allows you to connect through a Remote Desktop Gateway (used to allow secure connections using HTTPS from computers outside your corporate network). If you use a gateway, you can also choose to check the box underneath and enable the related setting "Bypass for local addresses."
- Reconnect if the connection is dropped - Check this box to connect automatically when your Remote Desktop connection is interrupted.
- Connect to an admin session - Check this box if you want to make sure you can always connect to a terminal server. Most users shouldn't need this option.
- Swap mouse buttons - Check this box to invert the mouse button functions. This option is useful if the remote Windows 10 PC is configured for left-handed use.
The options in the Display tab are pretty easy to figure out:
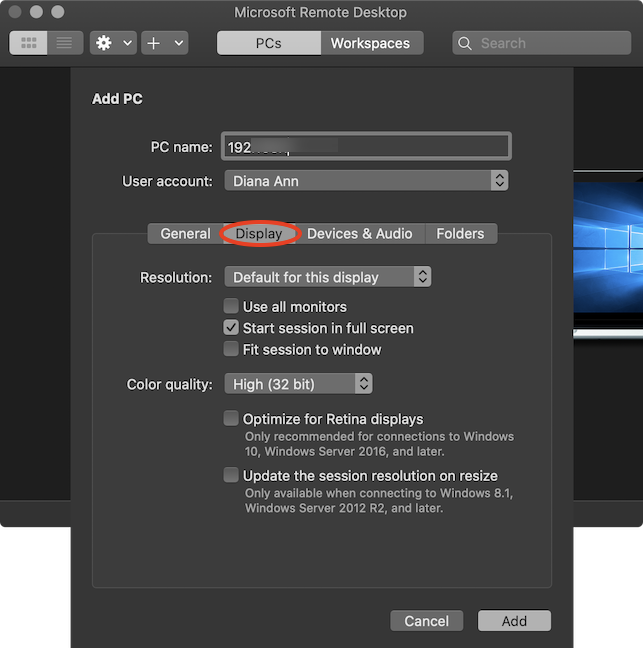
- Resolution - Click the field to open a dropdown menu. On top of "Default for this display," there are many other options to choose from to optimize the resolution of your remote connection. If you scroll to the bottom, you can even "Add Custom Resolution."
- Use all monitors - Check the box to configure the Remote Desktop connection to use support for multiple monitors.
- Start session in full screen - This box is checked by default. At the beginning of your session, Microsoft Remote Desktop uses your Mac's entire screen to display the screen in Windows 10.
- Fit session to window - Check the box if you want the session content resized to fit inside the window. This setting is important when the resolution of the remote device differs from the size of the local window.
- Color quality - Click the field to customize the color quality of your connection. You can choose between High (32 bit) and Medium (16 bit).
- Optimize for Retina displays - Check this box if you have a Retina display and you want to optimize the resolution of your remote connection. Keep in mind that enabling this automatically reverses the resolution to the "Default for this display" option and checks the "Fit session to window" box. These two options are greyed out and can not be modified while your connection is optimized for Retina displays.
- Update the session resolution on resize - Check this box if you want the resolution to be updated when you resize the session's window. This has the same effect as the previous option on the "Default for this display" setting and the "Fit session to window" box.
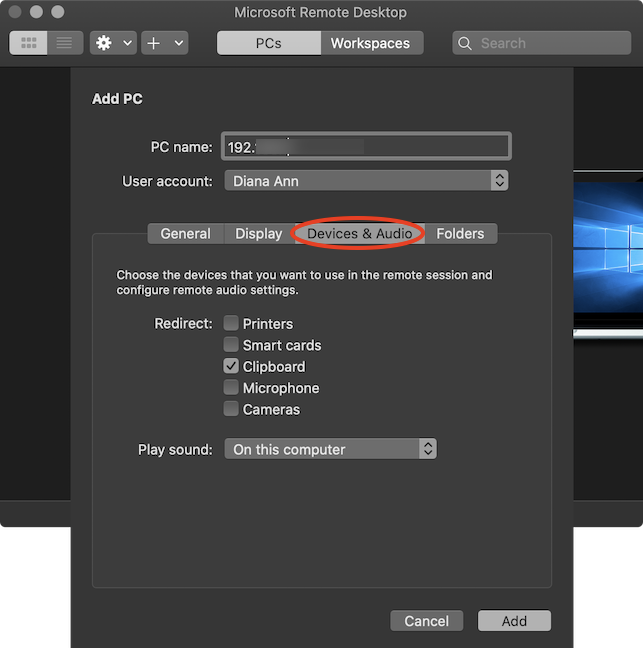
In the Devices & Audio tab, check the boxes to choose the corresponding devices that are to be used in the remote session. Clicking the Play Sound field reveals a drop-down menu with three options: Never, the default "On this computer," and "On the remote PC."
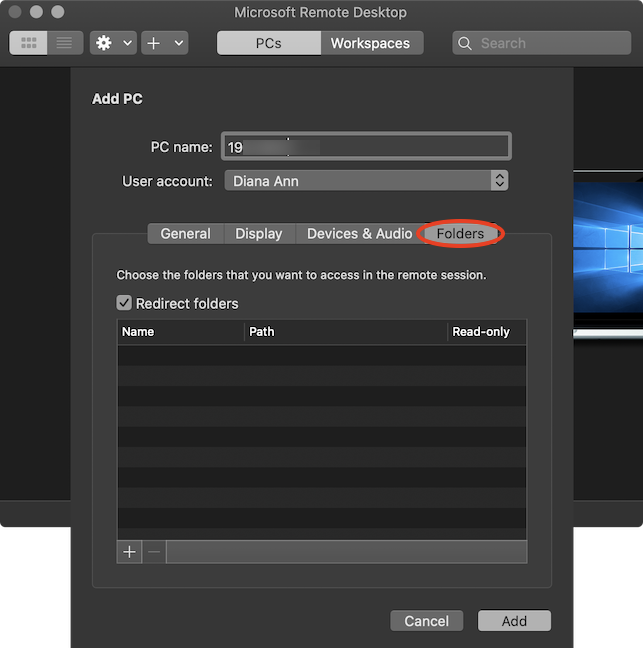
The last tab is called Folders and it allows you to share files and folders from your Mac to your remote Windows 10 PC. Check the Redirect folders box and press the + (plus sign) button at the bottom to browse your Mac for the files and folders you want to share and open them. Once you start the session, the shared items can be found on the remote Windows 10 PC. To find them, open File Explorer, access This PC, and you can see them in the "Redirected drives and folders" section.
When you are done tinkering with the various settings from the four different tabs, click the Add button in the bottom-right corner of the screen.
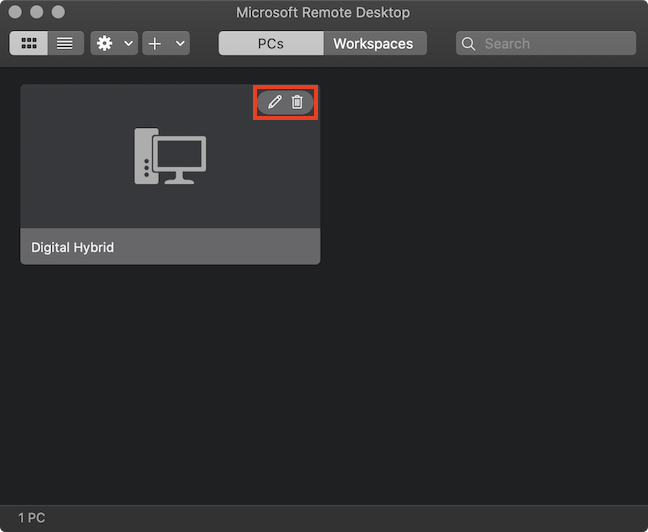
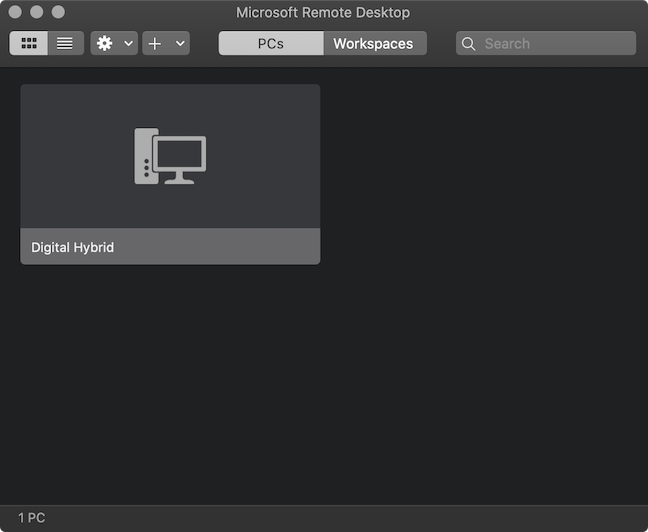
Your connection is displayed in the Microsoft Remote Desktop app. Hover over it to reveal two buttons in the upper-right corner. Click on the pen if you want to edit the configuration for this connection, or press on the trash can icon to erase the connection if you no longer need it.
Step 4. Use Microsoft Remote Desktop on your Mac to connect to a Windows 10 PC
After completing the previous step, where you added and configured a new connection in the Microsoft Remote Desktop app, you can use it to access the Windows 10 device from your Mac.
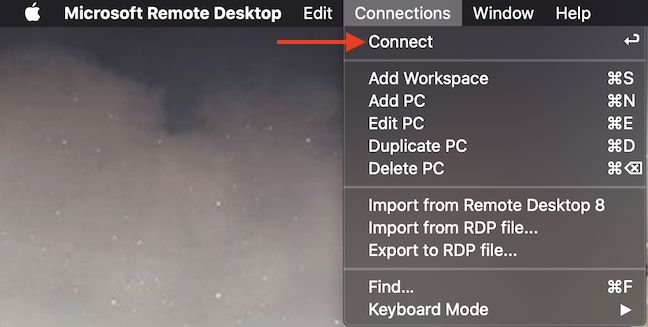
To start your remote session, double click on the connection or select it and press Enter on your keyboard.
Alternatively, you can also select the connection, access Microsoft Remote Desktop's Connections menu, and press Connect.
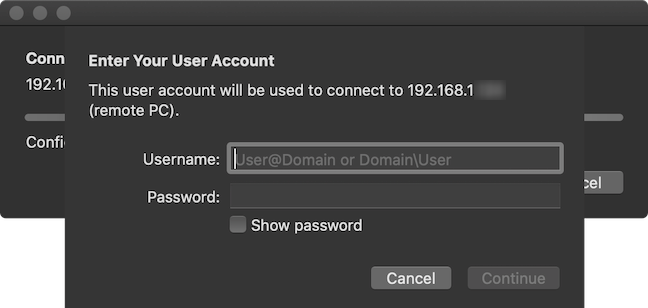
If you did not "Add a User Account" during the configuration process, you have to insert one now. Enter your Windows 10 Username and Password just like you would if you were sitting in front of the host computer. Then, click Continue.
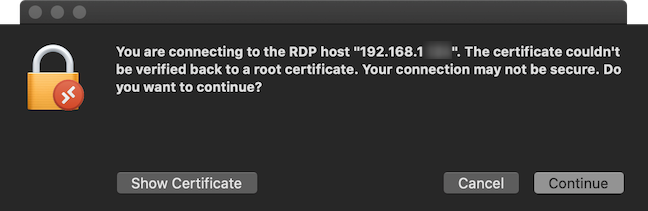
Depending on your network settings, you might see the prompt below. Click Continue to finalize the connection.
Your Remote Desktop session starts, and the screen of the remote Windows 10 PC is shown in a new Microsoft Remote Desktop window. If you configured your session to start in full screen, the window is expanded. Hover your cursor over the top edge of the window to reveal the menu bar and the usual options for closing or minimizing the window in the upper-left corner.

That is all! You can now enjoy your Remote Desktop session.
Why do you need to remote access Windows 10 from Mac?
My job at Digital Citizen requires me to use devices with Windows 10, but I like my Mac better. Since I am naturally lazy, I sometimes use Microsoft Remote Desktop to check certain details in Windows 10 from my beloved Mac. We assume the majority of our readers also got here trying to remotely connect to their Windows 10 work PCs. Is that the case for you also? Let us know in a comment below.