


Ever notice those annoying black bars on the sides or along the top and bottom of a video? Oftentimes, the culprit is an incorrectly set aspect ratio. In Movie Maker, it's easy to mistakenly save a movie in the wrong aspect ratio, thus creating these black bars in your final product. This tutorial will explain why these black bars appear and how you can get rid of them in Movie Maker for Windows.
Why Do Black Bars Show Up In Movie Maker Videos?
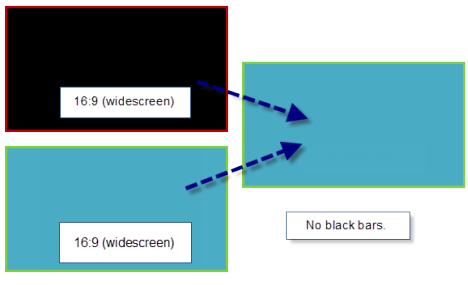
When you create a movie with Movie Maker, it's saved as a .WMV file. This .WMV can have one of two aspect ratios: Standard (4:3) and Widescreen (16:9).
These two formats are meant to accommodate the type of display on which you'll be viewing your videos and slideshows. For example, practically all flat-screen HDTVs are Widescreen (16:9), older TVs and computer monitors are usually Standard (4:3) and embedded YouTube videos are displayed in Widescreen (16:9).
To understand why black bars appear, it's best to think of the .WMV file as a picture frame. Just as you need padding in a picture frame if the photo doesn't fill up the entire frame, the black bars serve to fill in the empty space that is left behind when the video doesn't fill up the entire frame.
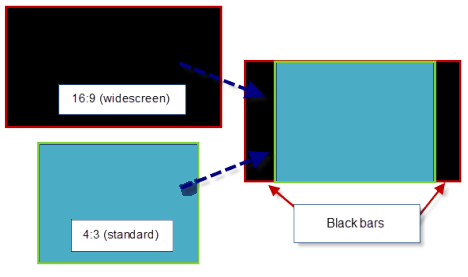
Usually, the video will be blown up to fit the frame, but in order to avoid distorting the picture or cutting off part of the video, the item you are placing inside the frame will maintain its aspect ratio (this is a good thing).
So, with that in mind, black bars will appear in your video for two reasons:
- The aspect ratio of your saved Movie Maker video (a.WMV file) does not match the aspect ratio of the display on which you are viewing it.
- The aspect ratio of the source video does not match the aspect ratio that you chose in Movie Maker.
While you can't always anticipate the aspect ratio of the display on which your video will be viewed, you can ensure that the aspect ratio of your .WMV file matches your source video as closely as possible. You don't actually have to know what aspect ratio your source files are in, since you'll immediately be able to see black bars in your Movie Maker video if there is an aspect ratio mismatch. So, all you have to do is choose which aspect ratio looks best.
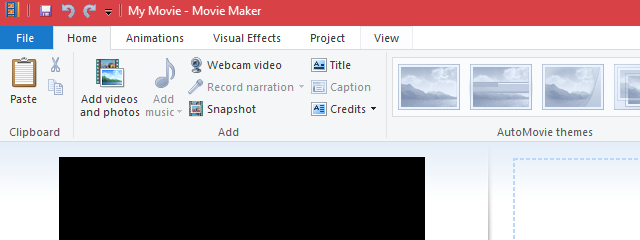
How To Set Aspect Ratio In Movie Maker
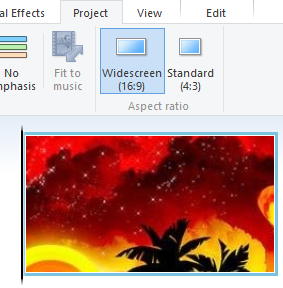
If you notice black bars in your Movie Maker preview pane, expand the Project tab.
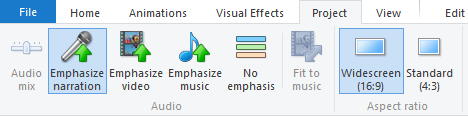
In the aspect ratio section, choose either Widescreen (16:9) or Standard (4:3).
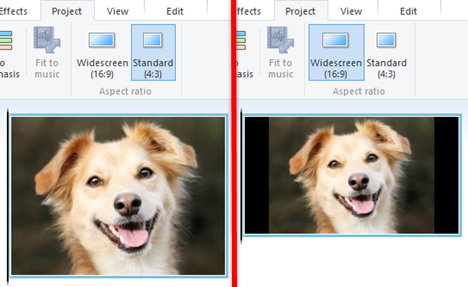
Check the preview pane to see if the black bars have been removed or reduced. If it looks worse, simply switch back.
IMPORTANT: This setting affects the entire video. You cannot set the aspect ratio to 4:3 for one clip and then switch it to 16:9 for the next.
How To Crop Pictures To 16:9 Or 4:3
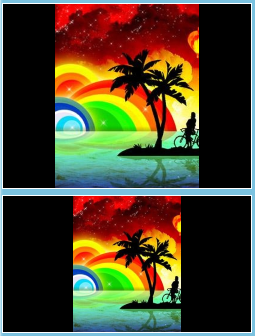
The above trick works for most video files, but the issue becomes more problematic with photos and images. That's because photos are rarely in 16:9 or 4:3. As such, no matter which one you choose, you get black space.
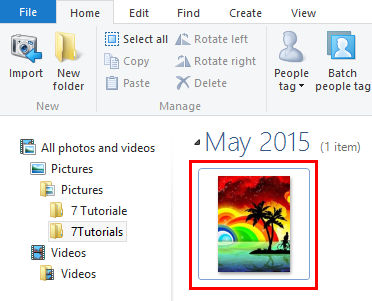
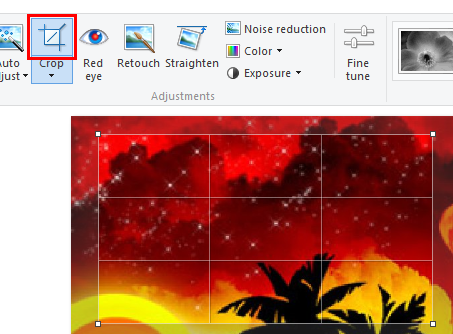
What you need to do is to crop your photos to the right aspect ratios prior to importing them into Movie Maker. In order to do this, open up your photos in Photo Gallery. Now choose one of them and double click it.
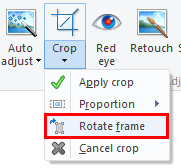
Expand the Crop menu and go to the Proportion section. There's already a preset there for Widescreen (16:9). Select it, if your Movie Maker video is set to widescreen.
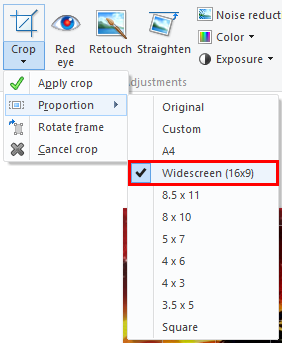
IMPORTANT: If your Movie Maker aspect ratio is set to 4:3 then use the 4 x 3 setting.
Now, it's important that the cropping frame be in landscape mode. In order to rotate the frame click Rotate Frame in the Crop menu.
Next, position the cropping square over the area that you'd like to include in your photo. Also, you can drag the corner to scale the crop without altering the aspect ratio.
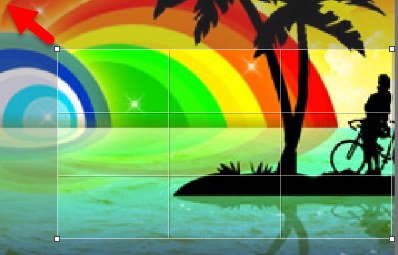
When you are ready click the Crop button.
Now close the editing window. Do this for all of the photos you want to include in your project before adding them into Movie Maker.
When you are done, add your photos back into Movie Maker and you'll see that they won't have black bars.
Conclusion
By ensuring that your source video or source photos are of the same aspect ratio as your Movie Maker project, you can reduce or eliminate black bars in your final product. Note that this won't correct any issues that arise from displaying your video on a screen or in a player with a different aspect ratio, but it will remove any black bars from the video file itself. Also note that if your video files are shot in an aspect ratio other than 16:9 or 4:3, you will not be able to remove the black bars completely. For more tips on Movie Maker, check out some of our related articles and if you have any questions or problems, do not hesitate to use the comments form below.


