Modern versions of Windows, such as Windows 10 and Windows 7, allow users to share folders with other computers and devices from the local network, using a wizard that is supposed to make things easy. However, it does not allow for the same level of customization that the old-school Advanced Sharing feature does. If you want to share folders with specific users, limit the number of users who have access simultaneously to them or block access for some of the users in your network, then you need to learn how to use Advanced Sharing in Windows. Here is all the information you need:
How to enable Advanced Sharing in Windows
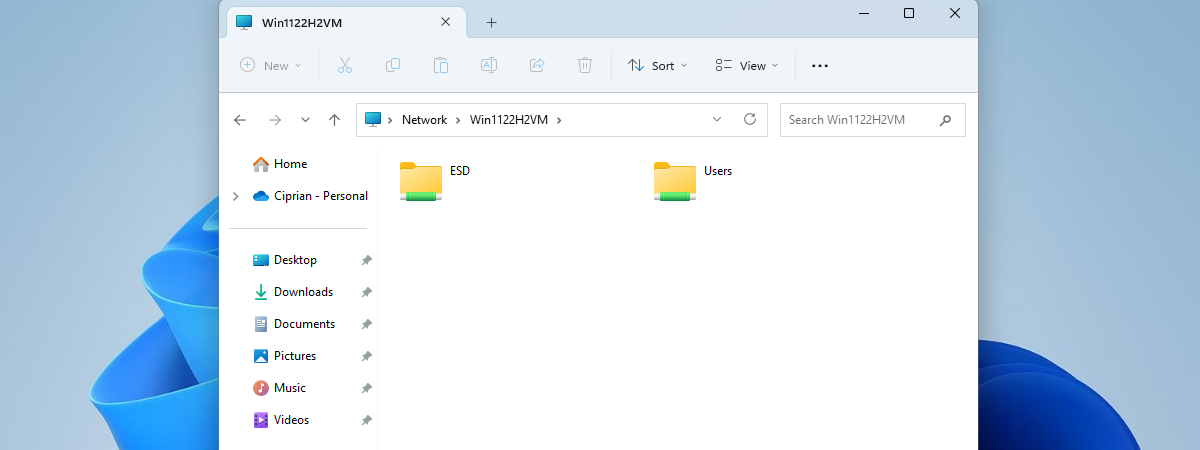
By default, both Windows 10 and Windows 7 use a sharing wizard to let you share folders with your local network. You can find more information in this tutorial: How to share folders and libraries, with the network, in Windows.
However, the sharing wizard gives you few sharing customization options. If you want detailed control over how you share folders in Windows, or if you just prefer the old-school approach, you can and should enable Windows' Advanced Sharing features. To do that, you must disable the sharing wizard. Here's how:
Open File Explorer if you're using Windows 10, or Windows Explorer if you are using Windows 7. Then open the Folder Options window, go to the View tab, and scroll down until you find the box that says "Use Sharing Wizard (Recommended)" and uncheck it.
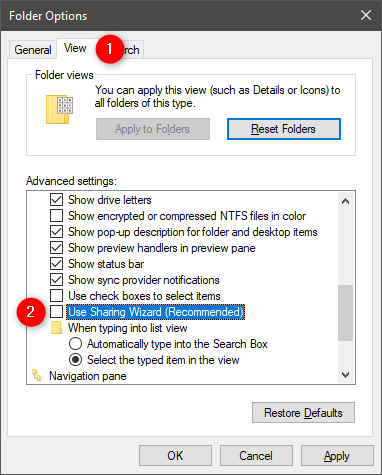
Click or tap on OK. The sharing wizard is now disabled, and that means that the Advanced Sharing is enabled. However, note that when you disable the sharing wizard, sharing libraries is no longer possible, and you can share only folders.
How to open Windows' Advanced Sharing options for sharing folders
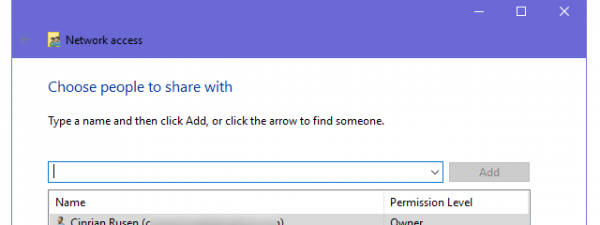
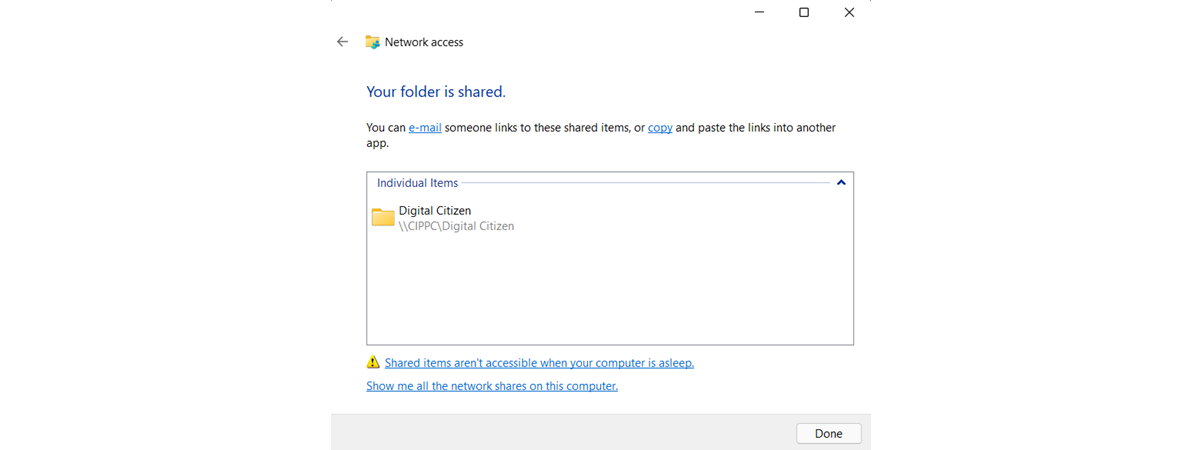
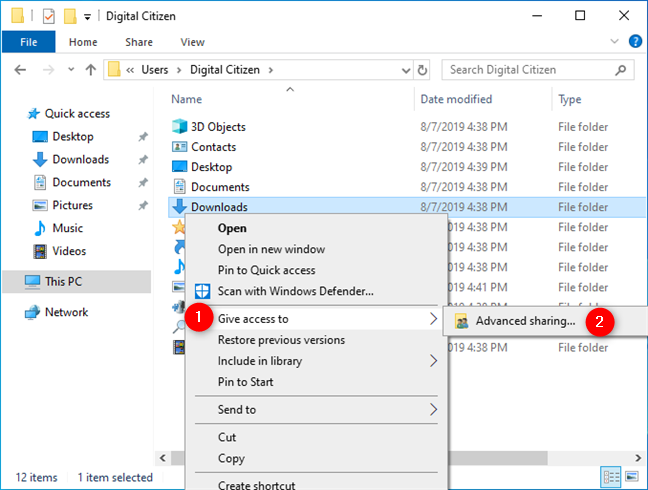
To share a folder with a specific user, right-click or press and hold on it to access the contextual menu. Then, click or tap on "Give access to" in Windows 10, or on "Share with" in Windows 7. In the sub-menu that is displayed, click or tap on Advanced sharing.
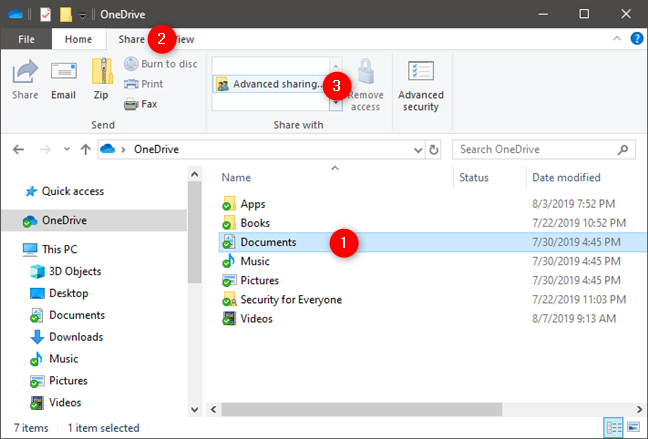
Alternatively, if you use Windows 10, you can also select the folder that you want to share, and then click or tap on Advanced sharing in the Share tab from File Explorer's ribbon interface. Similarly, in Windows 7, you can select the folder, click the Share with button from the top of the window, and then click on Advanced sharing.
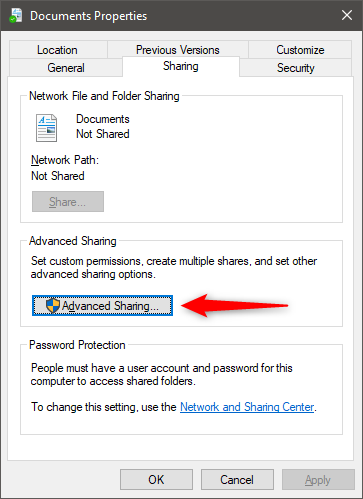
There's also a third method of opening the Advanced Sharing options for a folder, that does not even need you to turn the sharing wizard off like we showed you in the first section of this tutorial. Right-click or press and hold on the folder that you want to share, press Properties in the contextual menu, and then go to the Sharing tab in the folder's Properties window.
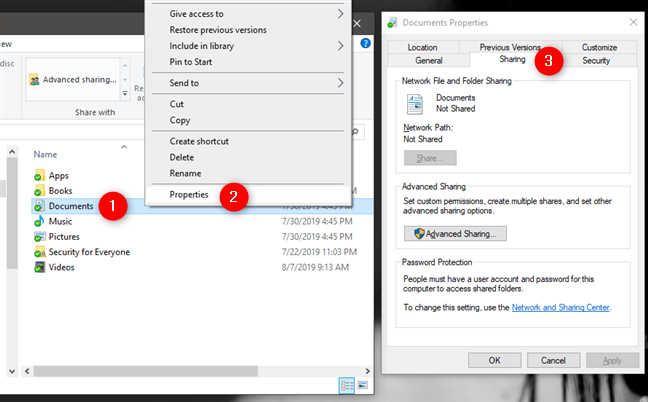
Regardless of the method you choose to get here, in the folder Properties window, click or tap the Advanced Sharing button from the section that bears the same name.
How to use Windows' Advanced Sharing options to share folders
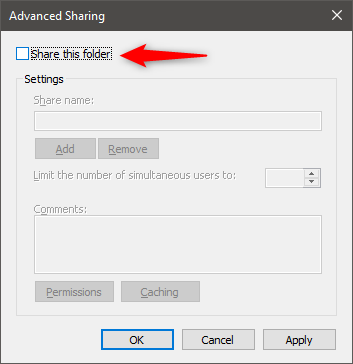
Now you should have the "Advanced Sharing" window opened. It looks the same in Windows 10 and Windows 7, and, if the folder you selected is not currently shared, you should see something similar to this:
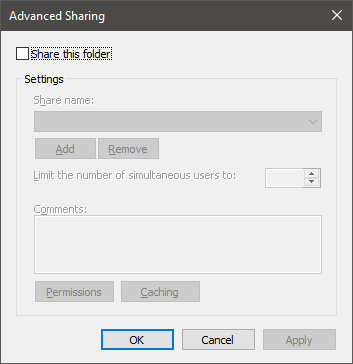
To start sharing the selected folder with users and computer or other devices from your local network, first, check the "Share this folder" box.
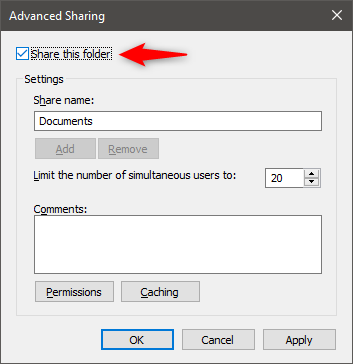
If you want to use a different share name from the default one, type the name you would like in the "Share name" text box.

If all you wanted was to quickly share that folder with everyone connected to your local network, you could stop right now, and save the changes with a click or tap on OK or Apply. However, if you want to further configure how the folder is shared, read on.
How to use Windows' Advanced Sharing options to limit the number of users with whom you share a folder
By default, Windows limits the number of simultaneously connected users to 20. That should be more than enough in normal circumstances. However, you might want to increase or, more likely, decrease the number of users allowed to simultaneously connect to a folder you share. To do that, change the value from the "Limit the number of simultaneous users" field to the value you prefer.
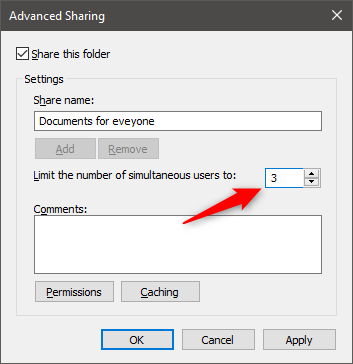
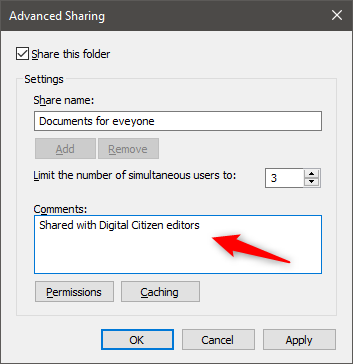
The Advanced Sharing window also lets you add some comments for your share, so before you go further, add some if you want.
How to use Windows' Advanced Sharing to share folders only with specific users
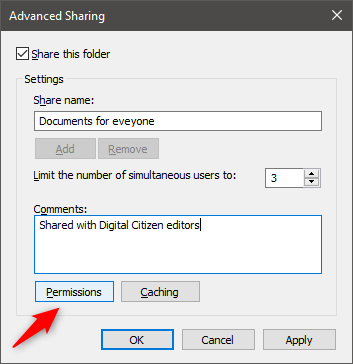
If you want to customize and allow only some users from your network to have access to your shared folder, then you need to set its permissions. To do that, click or tap Permissions.
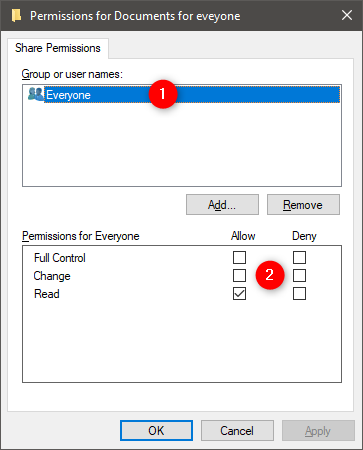
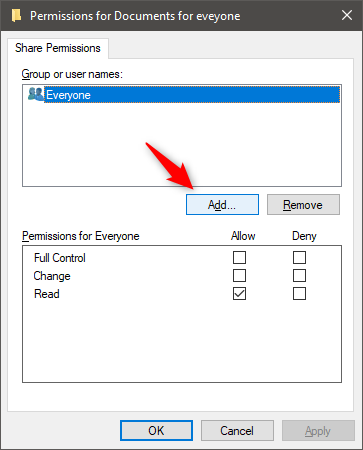
In the Permissions window, you get to see the users and groups that have permissions to access the folder that you are sharing. By default, folders are shared with Everyone. On the bottom, you can also see the permissions given to the selected user or group.
Before modifying the permissions assigned to each user or group, let's add another user account that should get access to the folder. Click or tap Add.
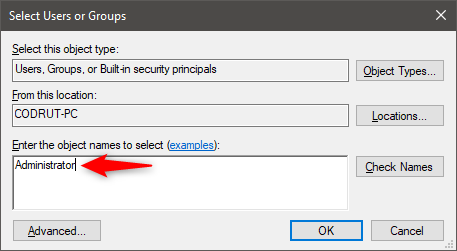
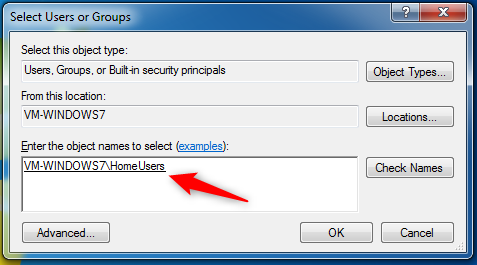
The Select Users or Groups window opens. In the text-box on the bottom, type the name of the user or group you want to give permissions to. If you are not sure which users and groups are registered on your computer or device, click or tap Advanced. If you know the exact user name or user group, click or tap Check Names to verify yourself, then OK and skip the next step.
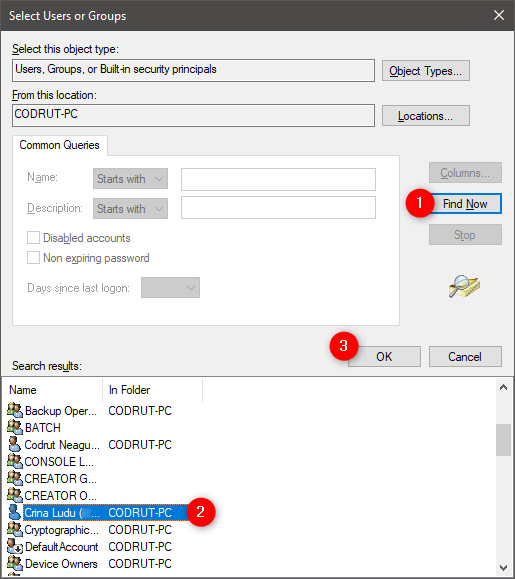
When you press on Advanced, the "Select Users or Groups" window expands with new options and buttons. Click or tap "Find Now," and Windows shows you the list of user accounts and groups registered on your PC. Choose the one you want to share the folder with and click or tap OK to get back to the previous window.
Click or tap on OK one more time.
How to use Windows' Advanced Sharing to choose what type of access (Full Control, Change, Read) users have on your shared folders
Now it is time to pick the access you want to give to each user or group. Select each user or group and check the permissions level you wish to assign:
- Full Control - This is self-explanatory. When assigned, users or groups who have access to the shared folder can do anything with it: view it, modify it, delete it, etc.
- Change - Users or groups can change the contents of the shared folder but cannot delete its content.
- Read - Users or groups can only view the existing content without being able to make any changes to it.
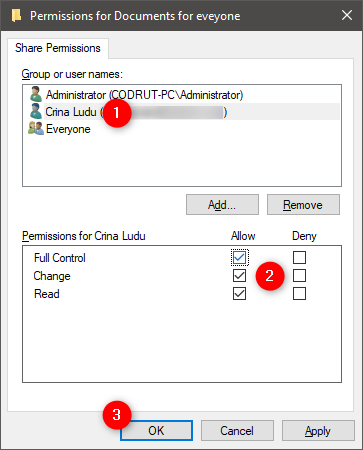
To remove a user or group, select it and click or tap Remove. When you're finished, click or tap OK. Then, click or tap Close in the Properties window. The folder is shared with the user accounts or groups you selected, using the permissions you have set.
How to use Windows' Advanced Sharing options to stop sharing folders
If you no longer want to share a folder with anyone from your network, open its Advanced Sharing window as we have shown you. Then, just uncheck the "Share this folder" box and click or tap OK. Then, click or tap Close in the Properties window.
How to use Windows' Advanced Sharing to share folders with the HomeGroup (only in Windows 7)
In Windows 10, the HomeGroup feature was removed by Microsoft and we can no longer benefit from it. However, if you are using Windows 7, you can. To share a folder with the HomeGroup, you need to follow the same steps as above. The only difference is that you need to give permissions to the HomeUsers group.
Once the HomeUsers group is added to the list of users and groups which have access to the shared folder, set the permissions you want to assign and you are done.
Do you prefer to use Advanced Sharing instead of the Sharing Wizard?
Sharing content over the network with Advanced Sharing without using the sharing wizard is not as easy and straightforward. However, it allows you to control the user accounts and user groups that can access a folder, the permissions assigned to every one of them, as well as choose different share names. So, which method do you like more? What's your favorite way of sharing folders in Windows?