A lot of people have several computers in their homes and workplaces. If you're one of them, then you may need to share folders, files, and libraries with other users and computers on the same network. Unfortunately, many don't know how to share something on their network, and use other, clunkier methods for sharing, like e-mail. Here is how to use Windows' sharing wizard to share any folder, file, or library over the network:
NOTE: This guide covers Windows 10 with May 2020 Update and Windows 7. Most things work the same in both operating systems, although Windows 7 has a few additional sharing options that are no longer available in Windows 10. Read the first part of this tutorial to learn how to use the sharing wizard, and the last section to see what are the additional options you get in the sharing wizard from Windows 7. If you do not know the version of Windows that you have, read: What version of Windows do I have installed?.
How to share folders, files, and libraries with the network, using the Windows sharing wizard
Before you can share things with other people or computers on your local network, there are a couple of things you must configure:
- First, make sure that both the PC from which you're sharing and the ones from which you want to access the shared files, folders, or libraries are on the same Workgroup. If you don't know how to check that or how to change your Workgroup, this guide is going to help you: What is the Workgroup & How to Change it in Windows?.
- Secondly, all the computers and devices that share files, folders, or libraries between them should use a Private network profile. If you need help with that, read How to change the Windows 10 network location to private (or public) or Change your Windows 7 network location to Public, Home or Work, in 2 steps, depending on what operating system you're using.
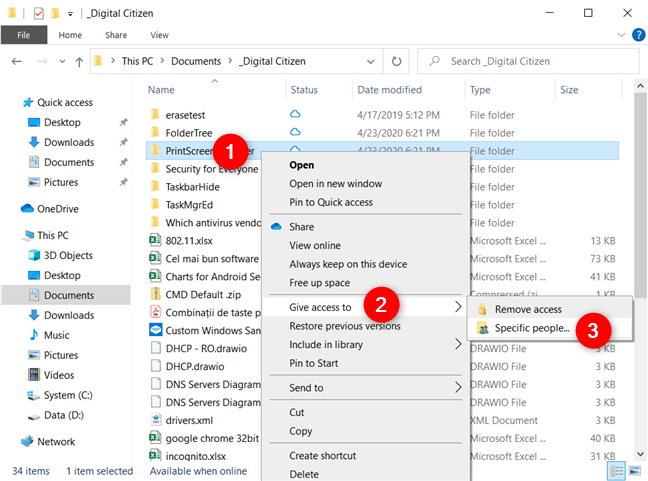
Once the above prerequisites are met, open File Explorer (or Windows Explorer, in Windows 7) and browse to the item or items that you want to share. Then, select the file(s), folder(s), or library(ies) that you want to share and right-click. In the contextual menu, go to "Give access to" (or Share with, in Windows 7) and click or tap on Specific people.
An alternative way to launch the Windows 10 sharing wizard is to select the items you want to share and then click or tap the Specific people button on the Share tab from File Explorer's ribbon.
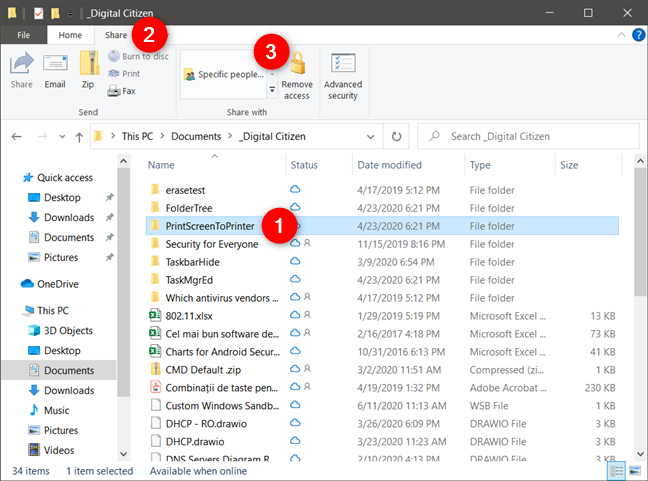
NOTE: The Specific people option is the only one available in Windows 10, and it allows you to share the selected item with one or more users, or even groups of users, as well as set individual sharing permissions for each.
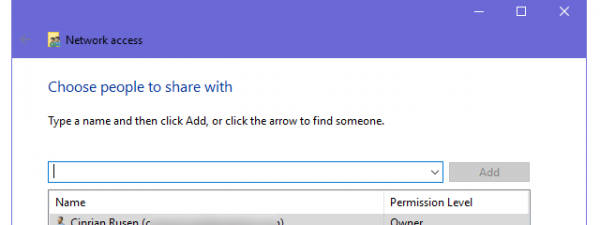
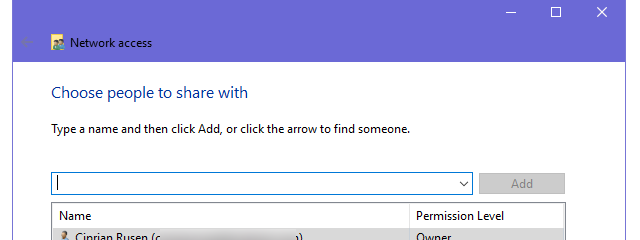
The previous action opens the sharing wizard, which Windows 10 calls Network access. In it, you must now "choose people to share with." Type the name of the user account or group of users with whom you want to share the items you selected.
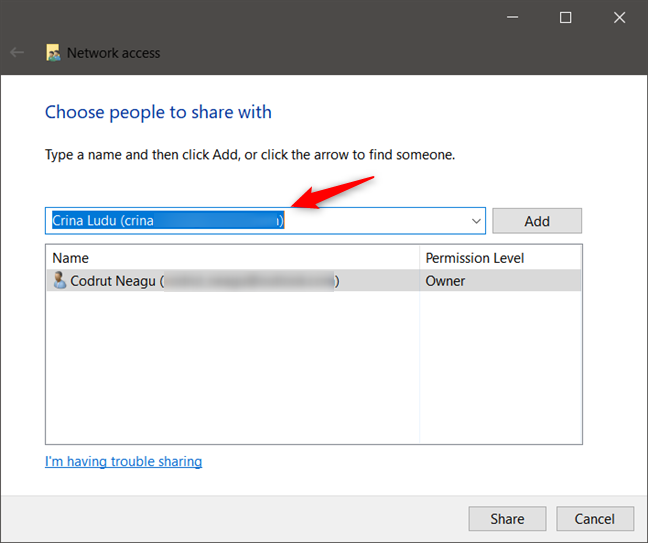
Alternatively, you can click or tap on the arrow next to the text field to select the user(s) with whom you want to share the folders, files, or libraries that you've chosen earlier. An interesting option is that you can share the items with Everyone, meaning that any computer and user account from your network gets access to those items.

Once you're done typing or selecting the people with whom you want to share your folders, files, or libraries, click or tap the Add button. The user(s) that you've typed or selected are then listed in the section below.
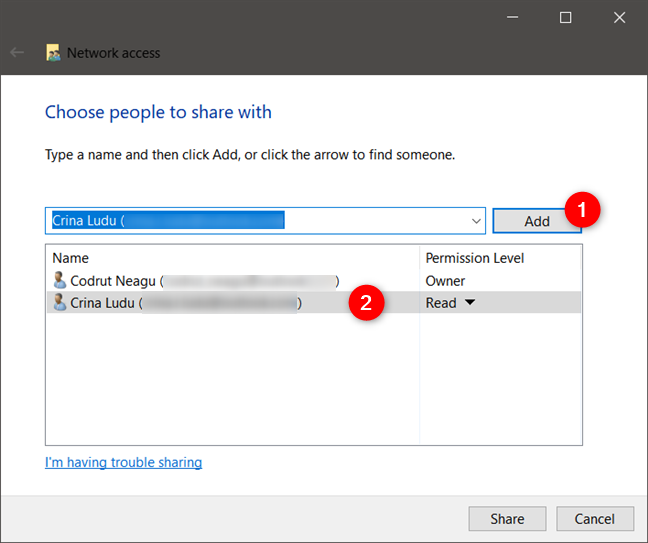
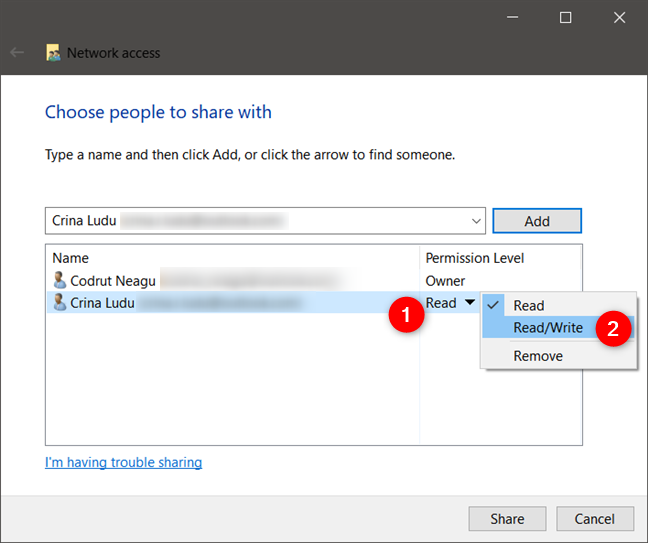
For every user(s) that you've added, you can also set their sharing permissions. On the right side of each user or group of users, click or tap on the Permission Level, and choose the type of sharing permissions that you want to give him or her:
- Read - the user or the group can only view and read the shared item(s). He, she, or them can't change or delete the item(s).
- Read/Write - the user or the group can view, read, change, or delete the shared item(s).
- Remove - the user or the group no longer has access to the shared item.
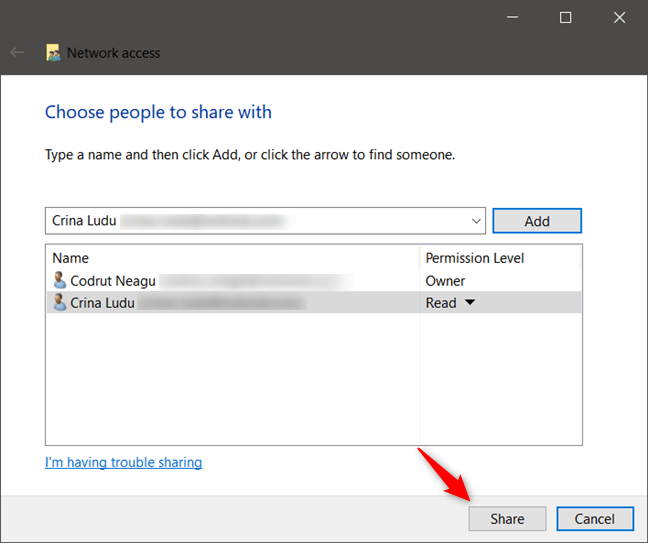
After you've finished adding all the users or groups of users that you wanted, click or tap on the Share button from the bottom-right corner of the Windows 10 sharing wizard.
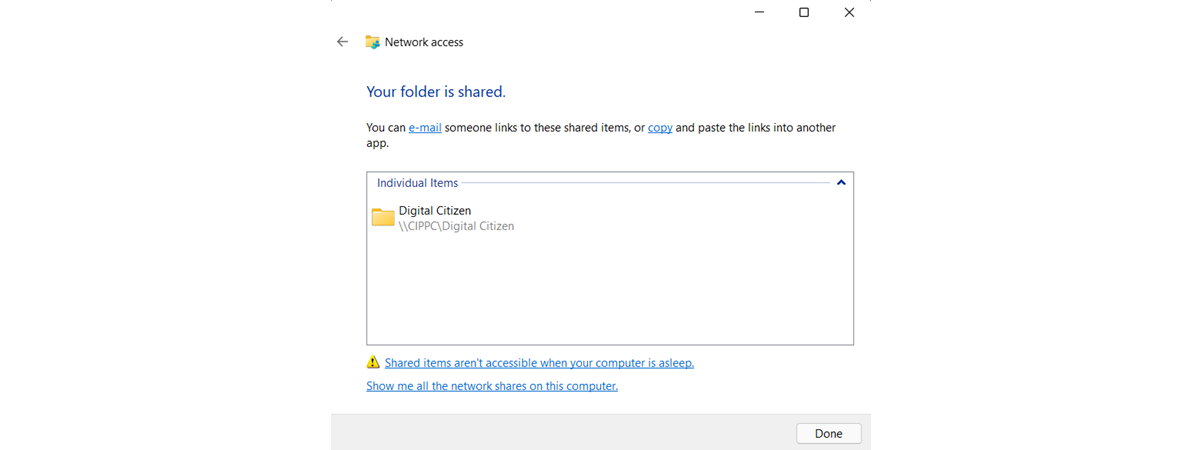
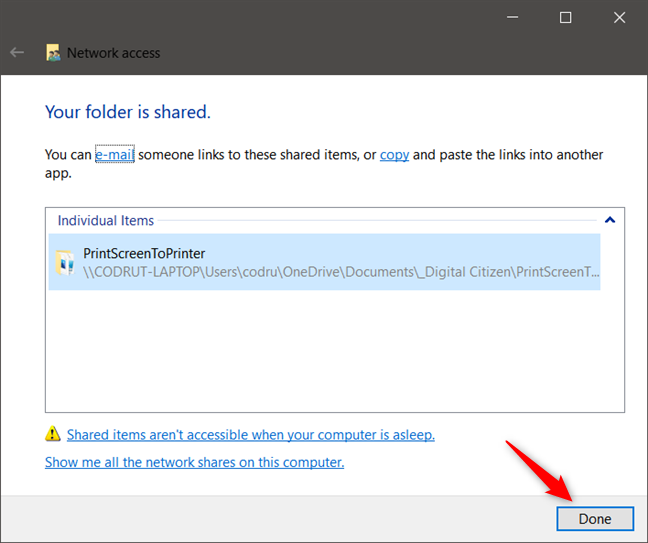
The final step of the Windows 10 sharing wizard tells you that everything's done, and that "You can e-mail someone links to these shared items, or copy and paste the links into another app." If you want, you can click or tap on the e-mail link to send a message with the path of the shared items to the people you want. You can also click or tap the copy link to get the path in your clipboard and send it to the people you want using other means. Either way, the files, folders, or libraries you've shared are now available in your network, for all the users that you've chosen. Click or tap on Done to close the sharing wizard.
How to stop sharing folders, files, or libraries in Windows
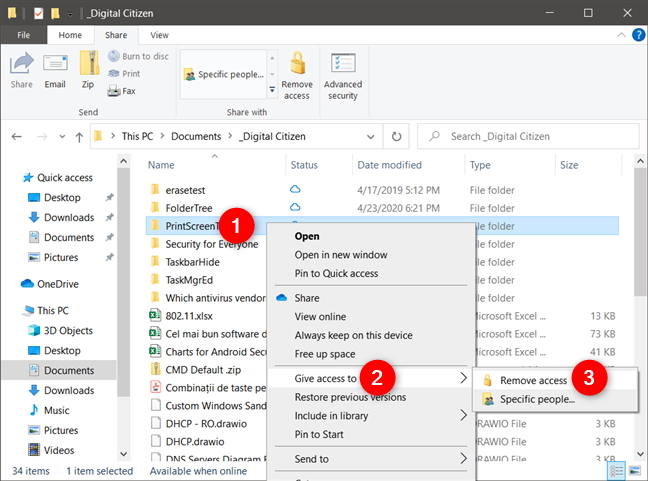
To stop sharing a folder, file, or library, right-click or press-and-hold on it, then select "Give access to" (or Share with, in Windows 7) and click or tap on Remove access (or Stop sharing, in Windows 7).
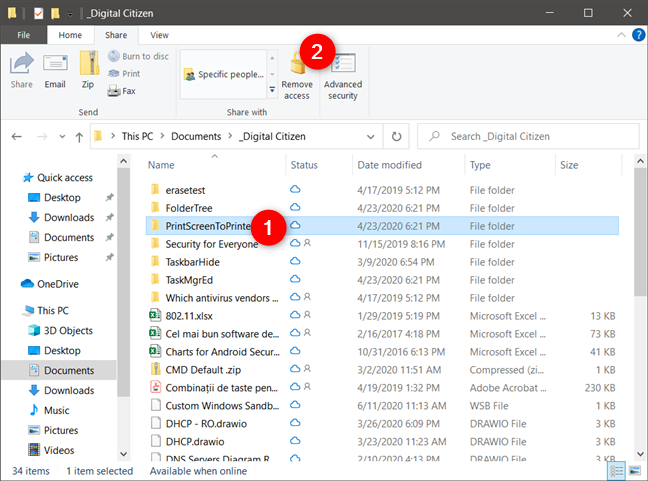
Alternatively, you can also use the ribbon from File Explorer. Select the item that you want to stop sharing, then click or tap the Share tab on the ribbon and press Remove access.
The selected item is no longer shared with anyone.
NOTE: If you're curious to see what and how many folders you're sharing on your local network, here are three different ways to do it.
What if you don't see the sharing wizard?
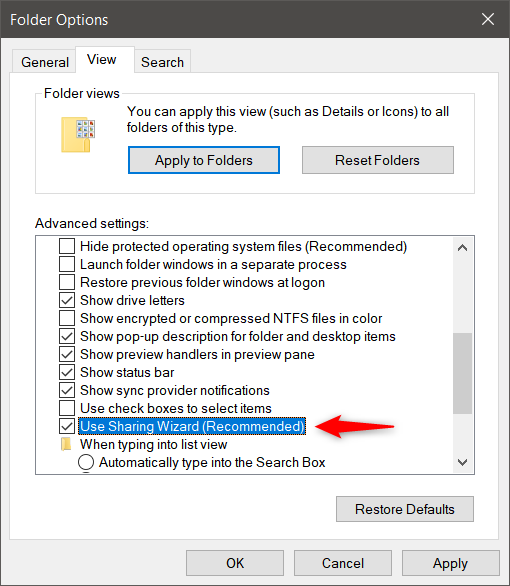
If you do not see the sharing options presented in this tutorial, and all you get are references to Advanced sharing, then it means that the Sharing Wizard is disabled.
To enable it, open Folder Options, go to the View tab, and, in the list of advanced settings, check the "Use Sharing Wizard" option. Then click or tap OK to apply your setting.
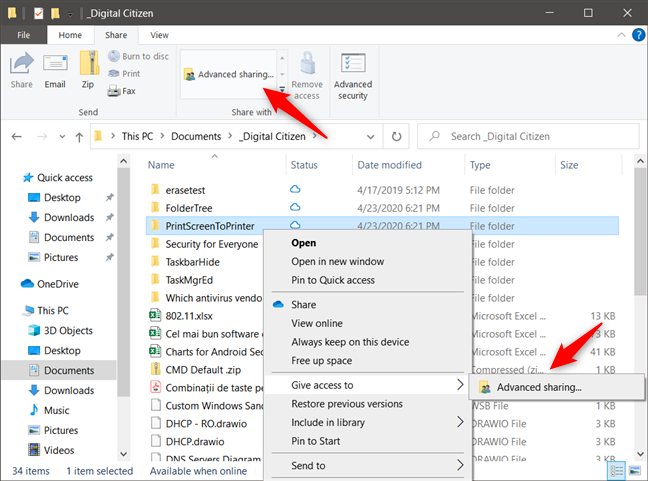
If you are stuck using Advanced Sharing, or if you prefer using it, then read this tutorial: How to use Windows advanced sharing to share folders with specific users.
What other sharing options do you get in Windows 7?
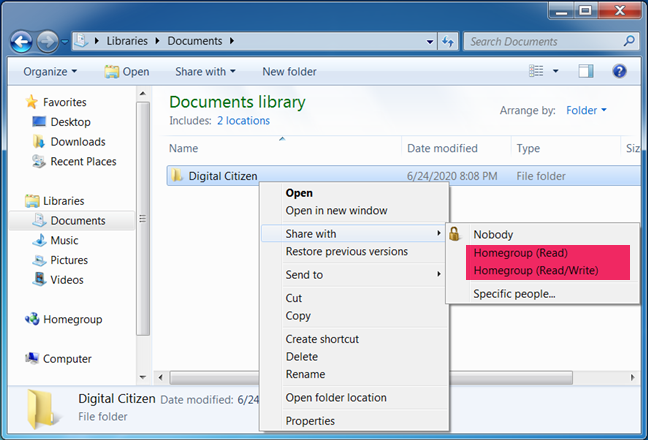
Windows 7's sharing wizard works the same way as the one in Windows 10. However, when you start it, you have a few additional options that are not available in Windows 10. These are sharing options that only work for Homegroups, a feature that Microsoft, unfortunately, chose to remove from Windows 10. When you right-click on a folder, file, or library in Windows 7, the Share with section of the contextual menu also lets you choose to share those items with the:
- Homegroup (Read) - shares the selected item with other computers and devices on the Homegroup, allowing them to view it and read it without being able to modify it, delete it or change it in any way. If you disconnect from the Homegroup, the item is no longer shared.
- Homegroup (Read/Write) - the selected item is shared with other computers and devices that are part of the Homegroup and allows them to view, read, change, or delete its contents. The item is no longer shared when you disconnect from the Homegroup.
- Names of other user accounts - if other user accounts exist on your Windows computer, you may see them listed as sharing options. If you see and choose another user account, that user can view the item you are sharing. That user may exist on more than one computer or device. The selected item is shared with that user account no matter what computer he or she is using.
Did you use the sharing wizard successfully?
As you could see in this guide, sharing folders with others on the network is not that difficult. All it takes is a few clicks or taps. Before closing this tutorial, let us know whether this guide was helpful or not. Did you encounter problems? If you did, comment below and let's discuss.