If you are not the only person using your computer, you might want to limit the amount of storage space that every user can use. If you do that, you ensure that the storage space on a specific drive or partition is never filled up by only one user account. Everybody has their personal space to fill, and nobody can trespass his or her limits. In Windows, this is called disk quotas, and, in this tutorial, we show you how to use quotas to limit the space of each user:
NOTE: This guide applies to Windows 10, Windows 7, and Windows 8.1. The processes described in this article are the same in all three versions of Windows. To make it easier to create this guide, we used screenshots taken in Windows 10.
What are disk quotas in Windows?
Disk quotas are a means of controlling the storage space available to Windows users. An administrator can enforce limits on disk quotas so that no user account can exceed them. This means that, whenever a user exceeds their disk quota, he or she can no longer add new data to the disk. Furthermore, the administrator can also set warning levels, so that the users know beforehand when they are getting close to their quota limit.
There are also a few other things that you should know:
- In Windows, disk quotas can be set up on drives or partitions that are formatted using the NTFS file system. You cannot use them on a volume that is formatted using FAT32 or exFAT because these file systems do not offer support for this feature.
- You can set disk quotas and enforce quota limits only if you have a Windows account that has administrative privileges. Standard users cannot set disk quotas.
- You can set disk quotas for disks or partitions, but you cannot set disk quotas on folders.
- If you have multiple drives or partitions on your Windows computer, you must set disk quota limits for each, individually. You cannot set disk quotas for multiple disks or partitions simultaneously.
Now let's see how to use disk quotas to limit the storage space of each user account:
Step 1. Turn on the disk quota management
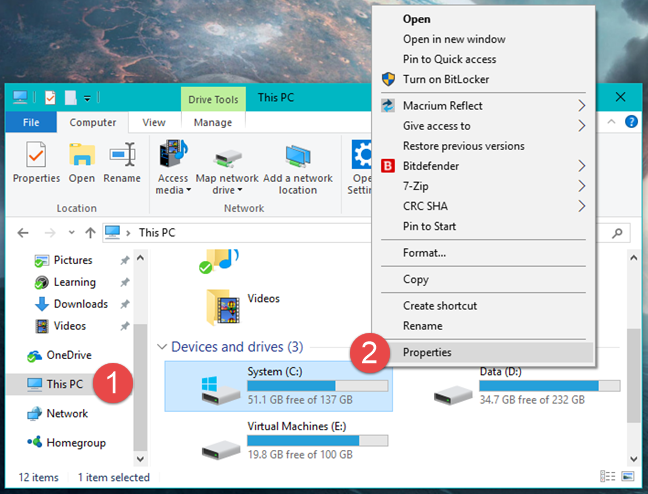
Start by opening File Explorer (in Windows 10 or 8.1) or Windows Explorer (in Windows 7). Then, go to This PC (in Windows 10 or 8.1) or Computer (in Windows 7) and click or tap the disk for which you want to set quota limits. Right-click or tap and hold on the disk, and then choose Properties.
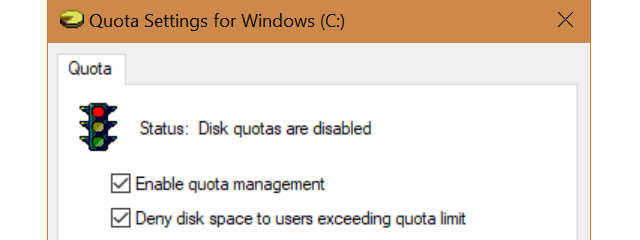
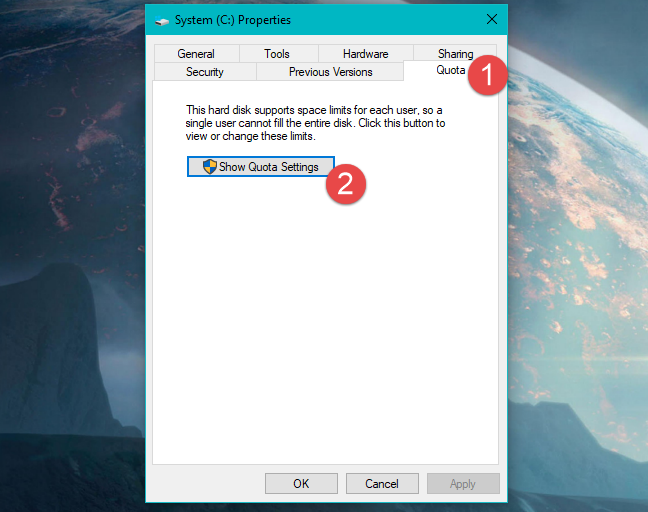
In the drive's Properties, go to the Quota tab, and click or tap the "Show Quota Settings" button.
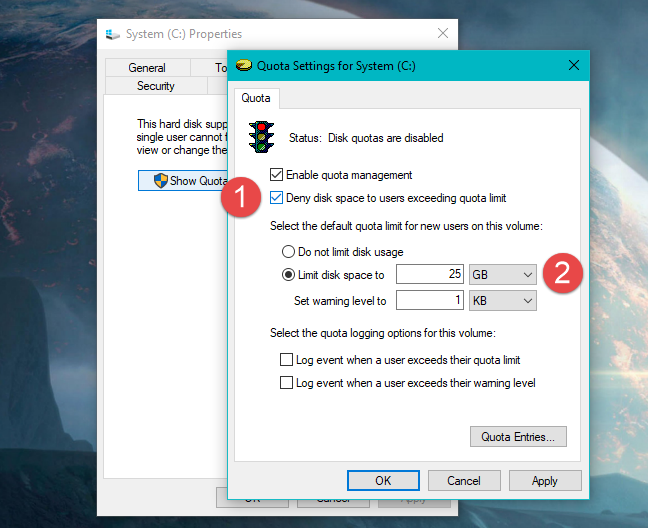
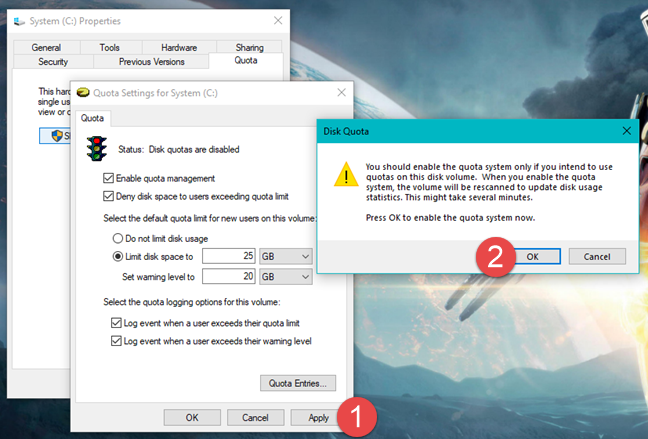
In the "Quota Settings" window, you can make the settings required to enforce quota limits for each user account from your Windows computer. This is what it looks like:
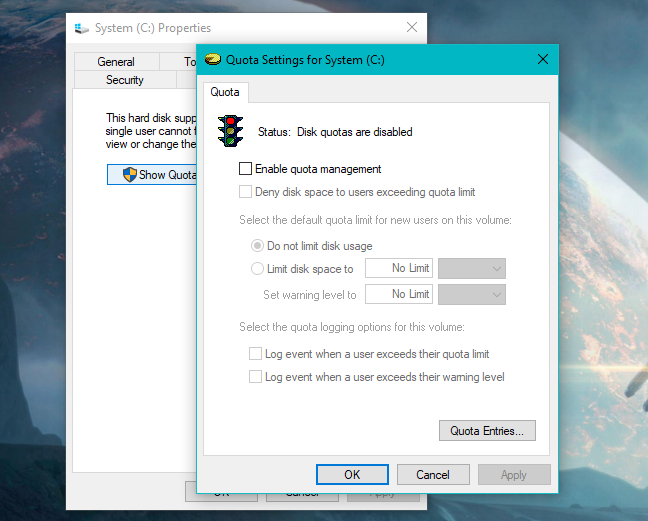
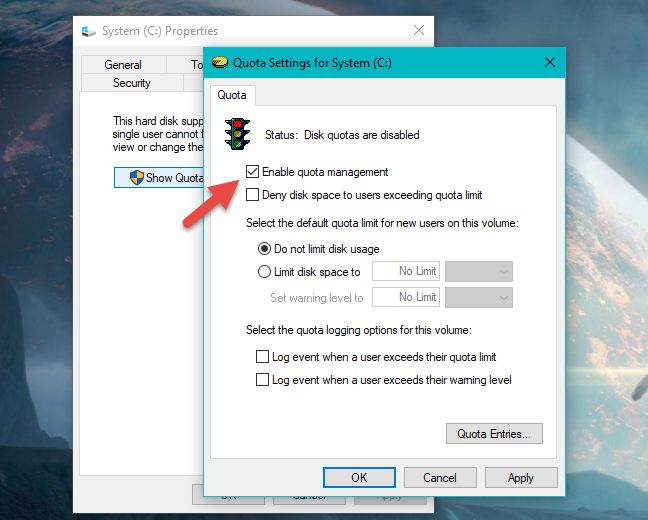
First and foremost, you have to "Enable quota management." This is the setting that turns on the disk quotas on the selected disk. All the other options in this window are greyed out, but once you enable the quota management, all the other settings should become active.
Step 2. Use disk quotas to limit the storage space of each user
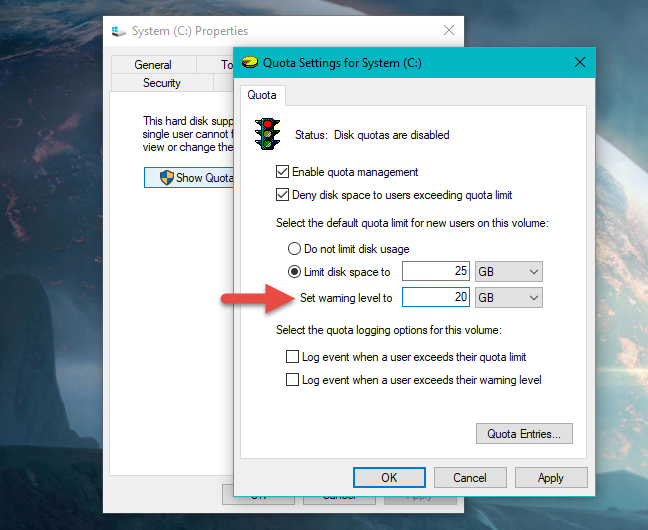
Now you can proceed and enforce quota limits: check the option that says "Deny disk space to users exceeding quota limit," select "Limit disk space to," and input the quota limit.
If you want the operating system to log an event when a user is close to his or her disk space limit, also set the warning level.
If you are wondering what happens if a user reaches his or her disk quota limit, know that every time a user fills his or her disk quota with files, two things take place:
- The user gets an "out of space" message, and
- The user cannot add new data on that drive.
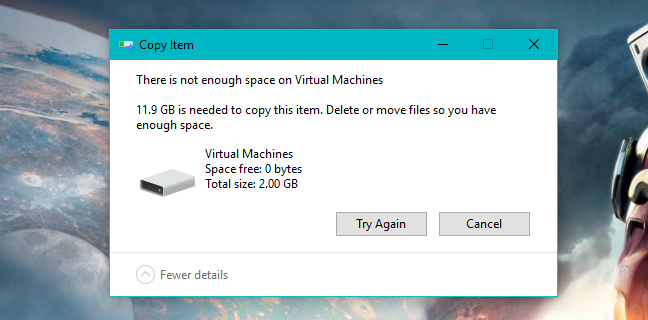
However, the user can clean some of its allocated disk space by doing things like:
- emptying the Recycle Bin,
- deleting the files he or she does not need,
- uninstalling some programs and apps.
Step 3. Log disk quota events when the users exceed their quota limits or warning levels
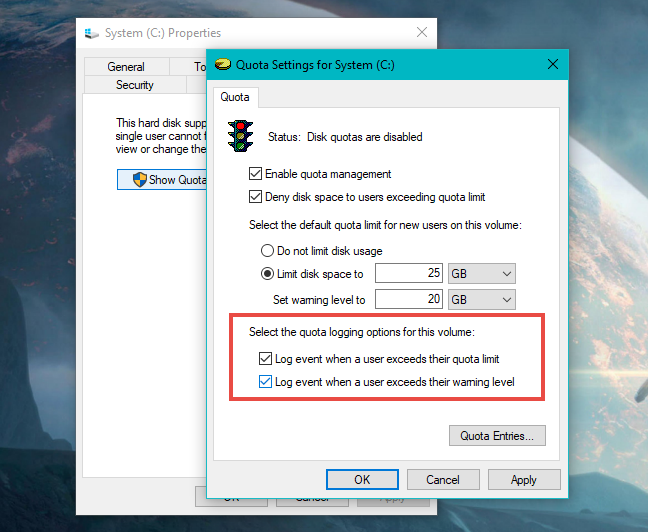
If you also want the operating system to log the disk quota events on your computer, you can enable the quota logging options. In the drive's "Quota Settings" window check one or both of the following options:
- "Log event when a user exceeds their quota limit."
- "Log event when a user exceeds their warning level."
Then, each time an event takes place, it is recorded by the operating system and can be viewed in Event Viewer, in the System category from the Windows Logs.
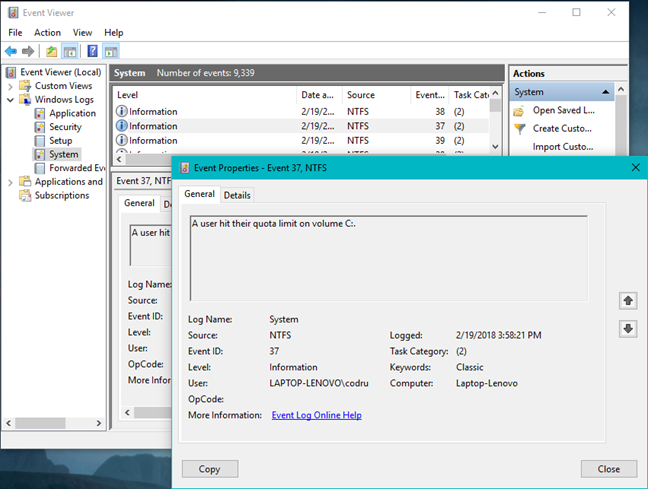
Step 4. Apply the disk quota settings
To enable all the settings that you have made until now, click or tap Apply. Windows should ask you to confirm again that you want to enable disk quotas. Press OK, and you are good to go.
NOTE: You might have noticed that we skipped explaining the "Quota Entries" button. This is the entry point to some advanced quota settings, like setting specific disk quotas for specific users, managing files owned by users and so on. These are settings not commonly used by home users, but rather by system administrators, on enterprise networks.
Conclusion
Enabling quota management and enforcing quota limits for users can be useful if the computer in question is used by more than one person. The process is simple and does not require advanced know-how. Do you believe disk quotas are useful even on a home computer, or just in office environments? Tell us what you think in the comments section below.