The Error Checking or chkdsk tool verifies the partitions and disk drives in your Windows 10 computer for problems such as disk errors or bad sectors. You can also use this tool to repair errors and have your drives working normally again. In Windows 10, chkdsk is available through a graphic interface called Error Checking. However, the command-line tool has kept its original name as in the previous Windows versions: chkdsk. Here is how to use Error Checking in Windows 10 to fix problems with your SSD or HDD drives:
NOTE: To use the tool covered in this article, you need to be logged in as an administrator.
How to start Error Checking in Windows 10
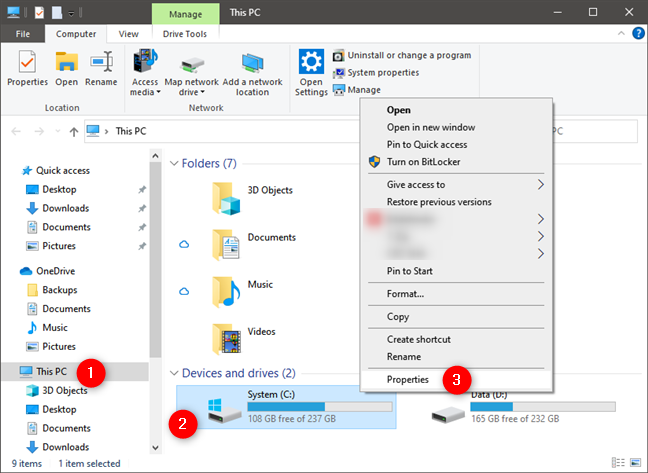
First, open File Explorer in Windows 10. Go to This PC and then to “Devices and drives.” Right-click or press and hold the drive that you want to check for errors and, in the right-click menu, choose Properties. Alternatively, you can click on the drive and then press the ALT + Enter keys on your keyboard.
How to start a check disk in Windows 10
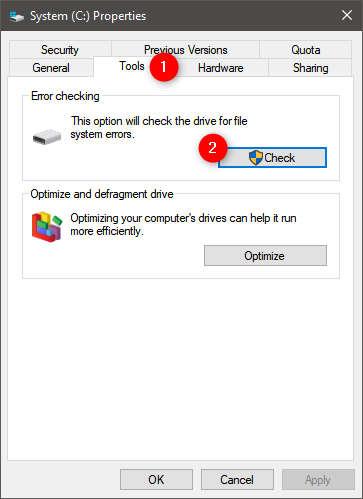
The Properties window is opened for the drive that you selected. Go to the Tools tab and look for the “Error checking” section. There, click or tap the Check button.
Start hard drive error checking in Windows 10
The Error Checking window is opened for the selected drive.
How to check a disk for errors in Windows 10 with Error Checking
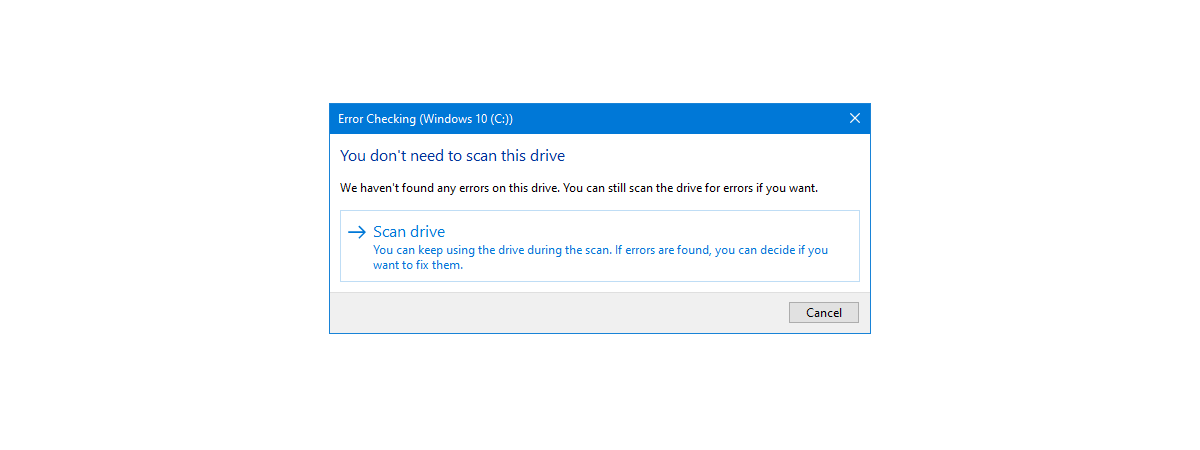
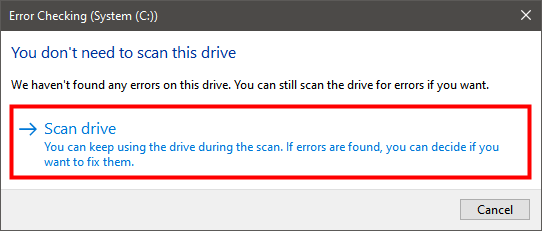
Windows 10 automatically runs maintenance tasks at regular intervals. Therefore, when the Error Checking window is opened, it is likely to say that “You don’t need to scan this drive.” Even so, you can force a manual check by clicking or tapping Scan drive.
Windows error checking tool
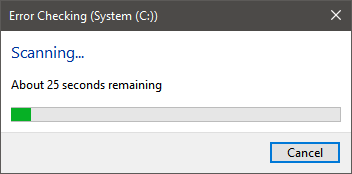
A progress bar is shown, sharing the process of the error checking process for the drive that you selected.
Scan progress of the Windows 10 Error Checking tool
When it is over, and all is well with your drive, you are informed that it was successfully scanned and no errors were found. If you click the Show Details link that is shown together with this notification, the Event Viewer is opened to the detailed log of the error checking process.
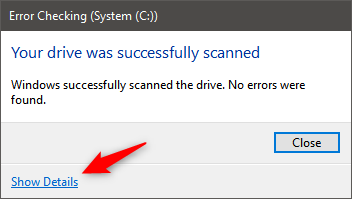
Successful scan of disk Error Checking in Windows 10
If you scroll through the Event Viewer log, you can see how the scan progressed and the detailed results of the whole process.
This is useful information if you want to learn what the Error Checking tool did in Windows. The first thing you notice is that the Error Checking interface runs the chkdsk tool in the background. The output stored for the Error Checking event is the output of the chkdsk tool.
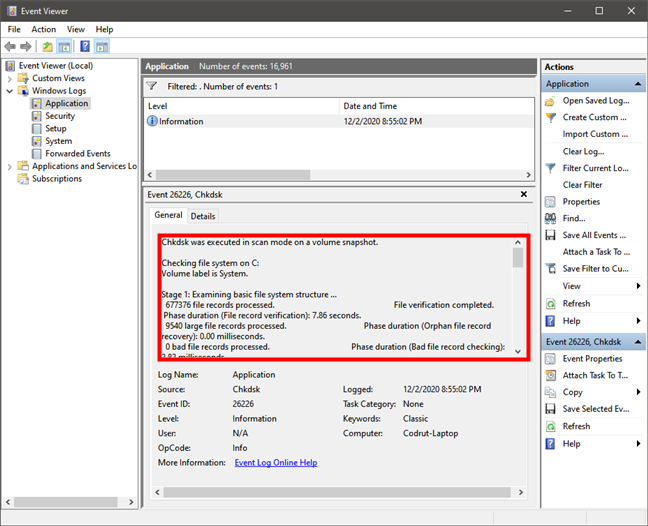
Event Viewer shows chkdsk results in Windows 10
The tool runs the checks in three stages:
- Stage 1: Examining basic file system structure
- Stage 2: Examining file name linkage
- Stage 3: Examining security descriptors
When you are done, close the Event Viewer window and press the Close button in the Error Checking window.
How to repair errors on your drive with Error Checking in Windows 10
The error checking process may say that it has found errors on your drive that need repair, like in the screenshot below.
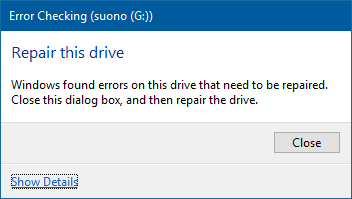
Error Checking prompt to repair this drive in Windows 10
When that happens, click Close, and a new Error Checking window is displayed with a button that says “Repair drive.” Click or tap on this button.
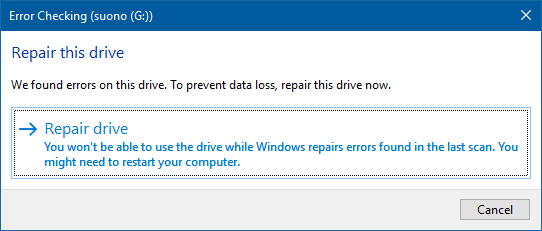
The Repair drive window in Error Checking in Windows 10
Now you are shown one or two options: “Repair now” and “Repair on next restart.” Choose the one that you prefer.
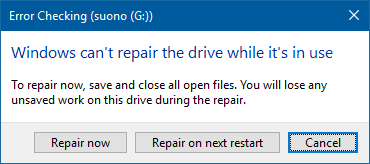
Repair now or Repair on next restart in Error Checking in Windows 10
If you press “Repair now," Windows shows a progress bar of the repair process. When the drive is repaired, you are informed. If you click or tap “Show Details,” the Event Viewer loads, where you can see the complete logs of the repairs that were made. If you do not want to see the logs, press Close, and you are done.
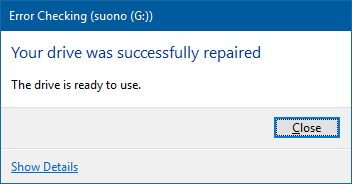
Your drive successfully repaired by chkdsk in Windows 10
If you press “Repair on next restart,” the repair process is automatically started the next time you restart your Windows 10 computer or device. Before Windows 10 loads, you are told that “To skip disk checking, press any key within” a few seconds (maximum 10).

Option to skip disk checking in chkdsk
We recommend that you do not do that and allow the repair process to be performed for the drive with errors. Then, the chkdsk tool automatically scans and repairs the drive.
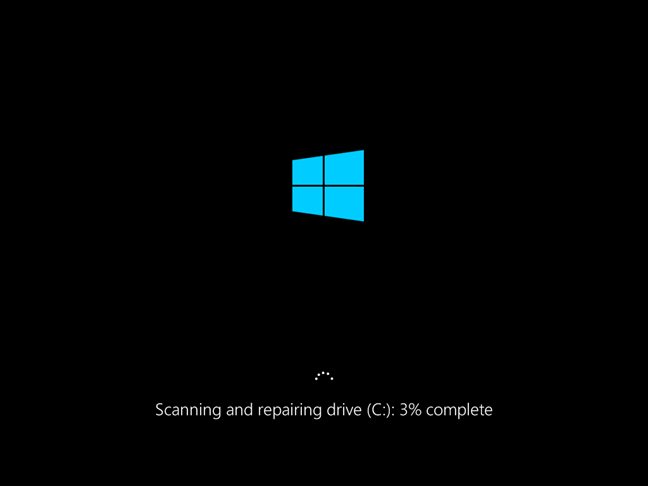
Progress in repairing in chkdsk
When the repair is over, Windows 10 is loaded, and you can sign in. A complete log of the repairs that were made can be found in the Event Viewer tool mentioned earlier in this article.
How to run chkdsk from the Command Prompt or PowerShell
If you want to skip the Error Checking graphical interface, you can run chkdsk from the Command Prompt or PowerShell.
In this example, we have run chkdsk with the /f parameter, which immediately fixes the errors that it finds, without asking if you want to do the repairs.
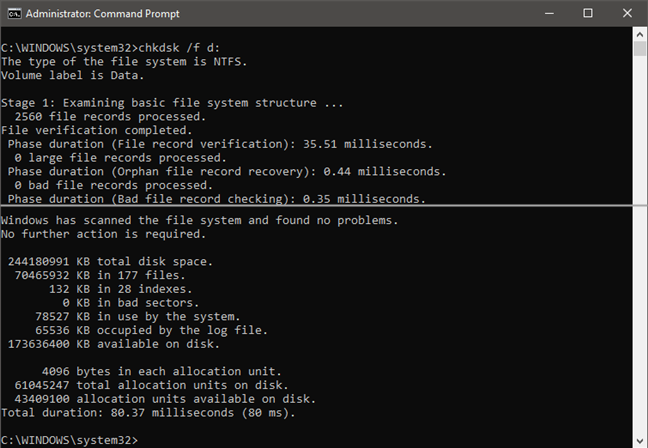
Running chkdsk /f command to verify a drive
This guide teaches you how to do this: How to use diskpart, chkdsk, defrag, and other disk-related commands. See section 6: How to use chkdsk to check a drive for errors from the Command Prompt or PowerShell.
Where to find the reports from chkdsk (Check Disk)
If you want to view the reports generated by chkdsk later, after you ran and closed Check Disk, or after it ran on boot, you can. Here’s how and where you can find the scan results from Check Disk in Windows 10:
Open the Event Viewer: a quick way to do it is to run the command eventvwr.msc in the Run window (Win + R), Command Prompt, or PowerShell.
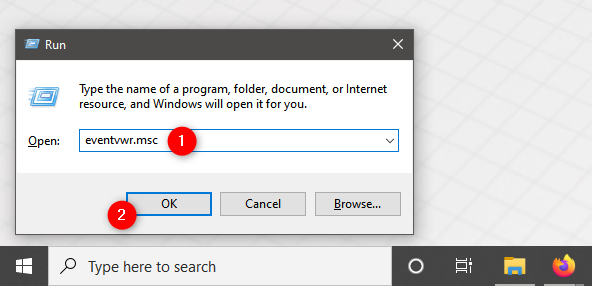
Running eventvwr.msc to open Event Viewer
On the left side of the Event Viewer window, open the Windows Logs group, right-click or press-and-hold Application, and select Find from the contextual menu.
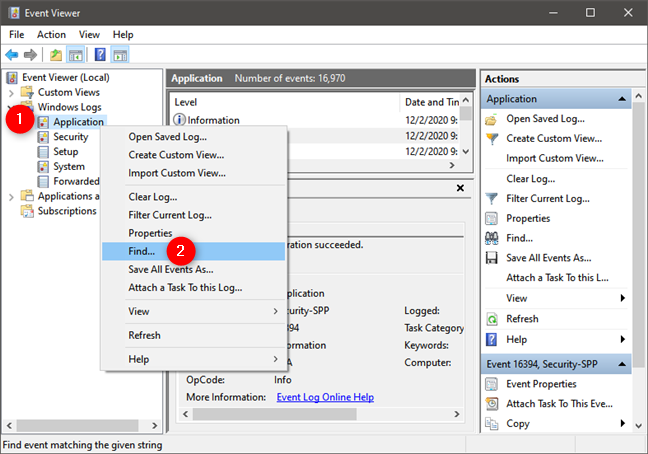
Select Find in Application Windows Logs (Event Viewer)
Type chkdsk in the “Find what” text field and press the Find Next button.
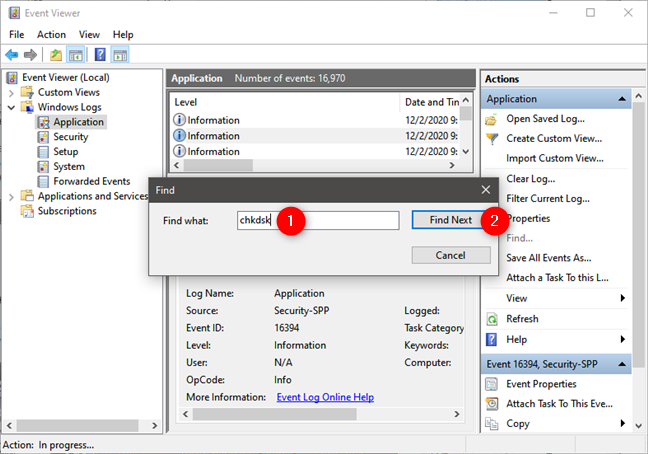
Find chkdsk events
Close the Find window and look at the list of results in the Application panel. The earlier search you’ve run selects the last Check Disk event. You can see the “Date and Time” when it was run and, in the panel below, you get to see the chkdsk scan results.
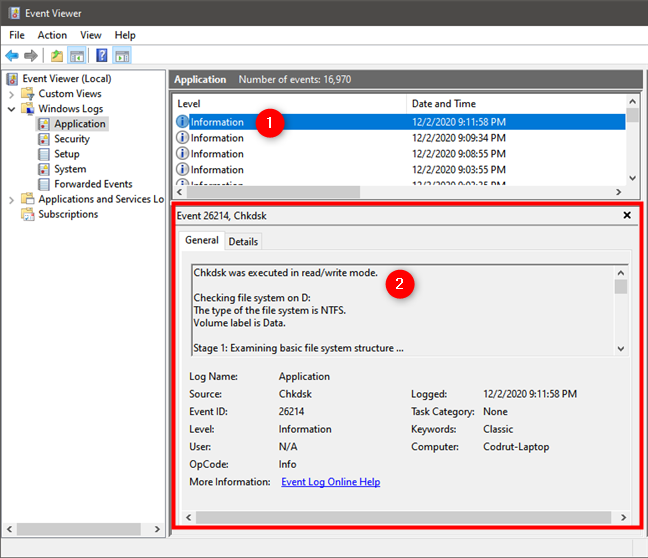
Last chkdsk scan results
If you previously ran chkdsk on boot, during the Windows 10 startup, you need to use a different search term to find the Check Disk scan results. Instead of typing chkdsk in the “Find what” text field from the Find dialog, enter Wininit.
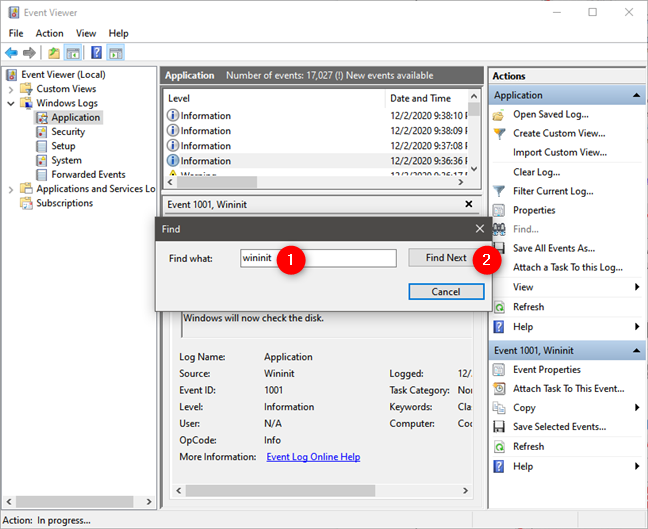
Find Wininit events in Event Viewer
The last event when you ran chkdsk on Windows 10 boot is selected, and you can view the scan results in the Event panel below.
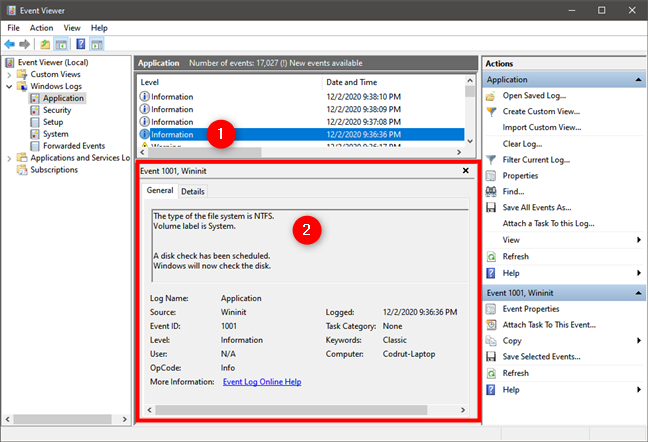
Last chkdsk scan results when Check Disk was run at Windows 10 startup
NOTE: You can continue searching for older chkdsk scan results by pressing the Find Next button repeatedly in the Find window.
Do you use chkdsk for hard drive error checking in Windows 10?
Error Checking (chkdsk) in Windows 10 can check any partition, including the system partition, even if it is in use. This tool can save the day when problems appear with your data and your hard disk(s). For example, if a power outage takes place, your computer stops, and this might cause file corruption. A quick scan and repair with Error Checking (Check Disk) can be of great help. If you want to learn more about other useful tools in Windows 10, do not hesitate to read the articles recommended below.