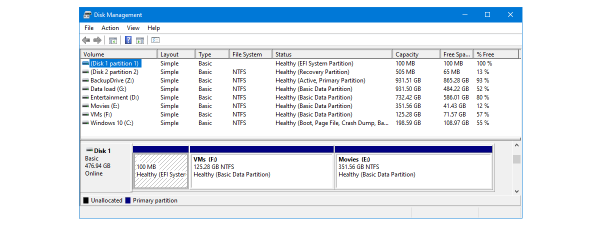
Have you ever needed to know when an NTFS partition was created or when Windows first initialized a drive and made it available for use? Although there are no easy, user-friendly ways to find out, we know two different methods by which you can find this information, by yourself. If you are curious to learn, read on:
1. Find out when a partition was created in Windows, using the System Volume Information folder
The easiest way to find out when a partition was created is to look at the System Volume Information folder. This folder is found on all the partitions where Windows has access. It is automatically created by Windows when it detects a new partition, and it stores essential things such as:
- System Restore points created by Windows for that partition (if it is set to create them).
- Distributed Link Tracking Service databases used to keep information about the creation and movement of linked files across your NTFS partitions.
- Indexing Service databases used for making fast file searches.
- Shadow Copies created by the Volume Snapshot Service that backups files specified by System Restore or Windows Backup.
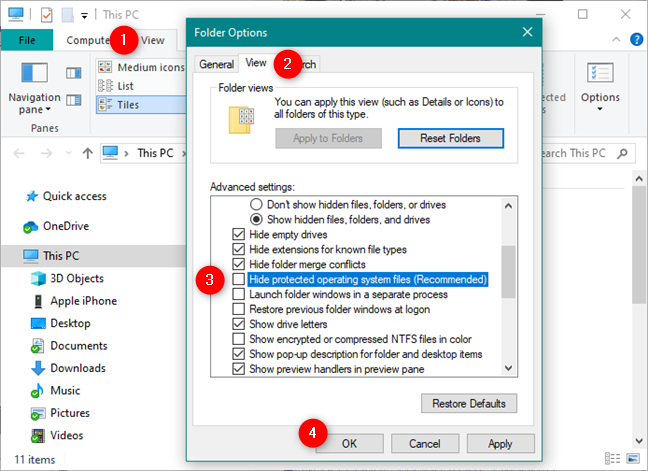
The folder is hidden by default, and you need to set File Explorer to show hidden operating system files and folders. If you do not know how to do it, read How to view all hidden files and folders in Windows 10. You must open File Explorer, access its Folder Options, and then uncheck the setting that says "Hide protected operating system files (Recommended)."
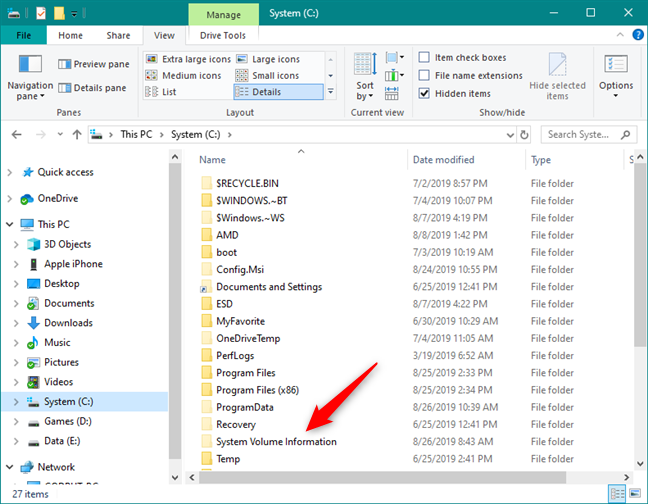
Next, use File Explorer to browse and access the drive or partition whose creation date you want to see. For example, if you want to know when the C: partition was created, use File Explorer to open it. In the partition's root, look for the folder called System Volume Information.
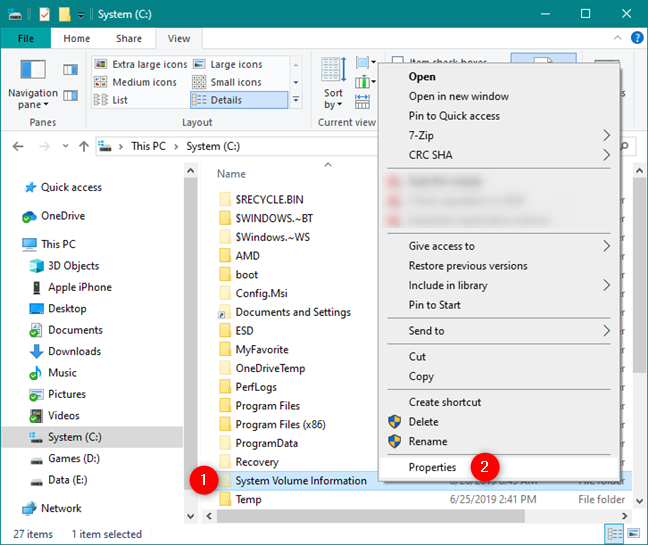
Right-click or tap and hold on it, and, in the contextual menu, choose Properties. Alternatively, you can also select the folder and press the Alt + Enter keys on your keyboard.
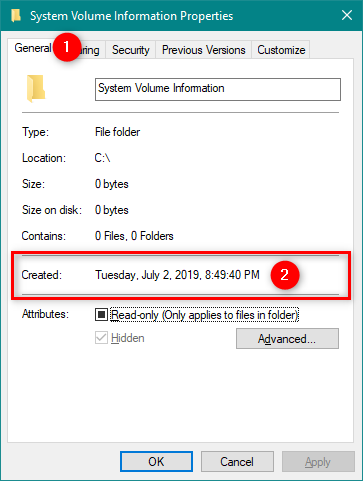
The previous action opens a window called System Volume Information Properties. In its General tab, you can find a field called Created. The date and time on its right side should be close (in many cases identical) to the date when the partition was created.
However, although this method is the easiest way to get a good approximation of the date when a partition was created, it can also show false data in some situations:
- If you did not create the partition directly from Windows, this folder was not created with it, automatically. The folder is created the first time Windows identifies the new partition. If you open Windows a few days after the partition was created, the creation date listed for the System Volume Information folder is going to be different from the real creation date.
- If you have only one partition, which you used to install/remove/reinstall different operating systems, Windows shows the date when it created the folder, not when the partition first existed.
- If the system clock was not set correctly when you created the partition, the date shown by the System Volume Information is going to be incorrect also.
If you want a more accurate method of finding out when a partition was created in Windows, check the next method:
2. Find out when a partition was created in Windows, using a free tool called "NTFS volume creation timestamp" and the Command Prompt
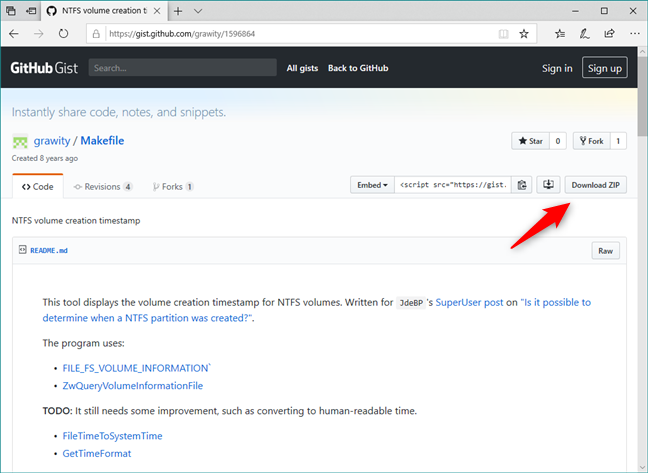
The second method we found is based on using a tool developed by Mantas Mikulėnas, aka grawity. It is called "NTFS volume creation timestamp," and you can get it from GitHub.
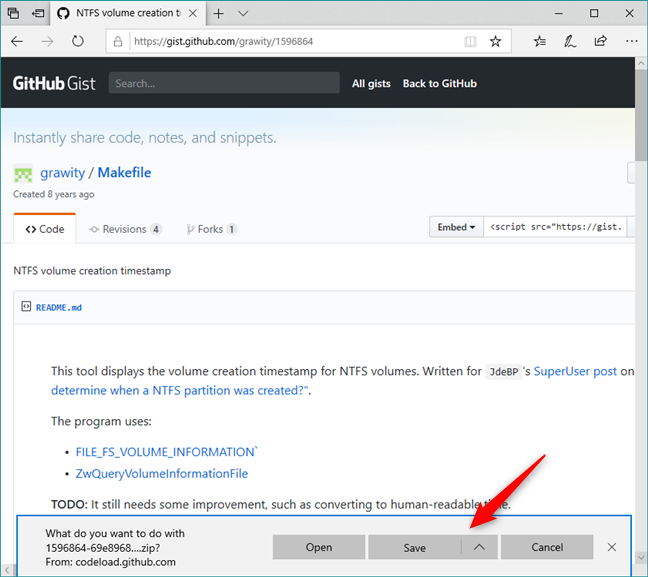
Use any web browser you prefer to visit this webpage and click or tap the Download ZIP button from the top-right corner of the page.
The ZIP file has a long name made of random numbers and a size of only 9.57 KB. When your browser asks you what to do, choose to save the ZIP file somewhere on your Windows 10 PC. For example, on your Desktop.
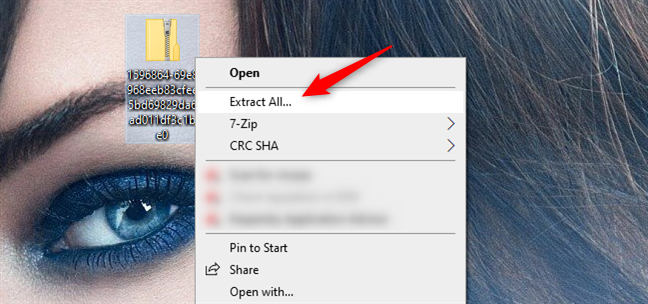
Use File Explorer to go to where you saved the ZIP file, and extract its contents. If you do not know how, read: How to unzip a file in Windows (with built-in tools).
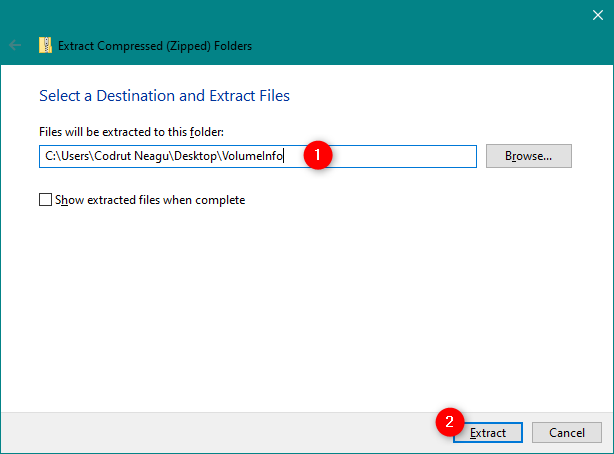
We recommend that you choose a more straightforward name for the folder to which the ZIP file is extracted. The default one is the same as the name of the file and it is just a long string of numbers. For simplicity, we chose to name it VolumeInfo.
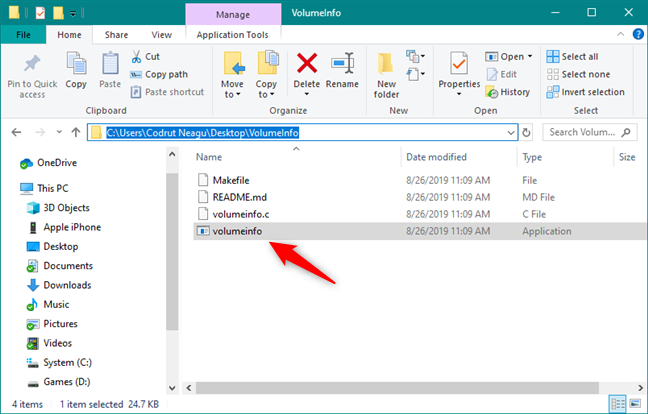
If you open the folder with the extracted ZIP file, you should find four files, including an executable called volumeinfo.exe. Do not try to open it because nothing happens. You need to run it from the Command Prompt to be able to use it.
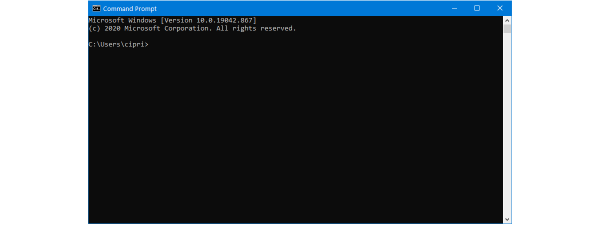
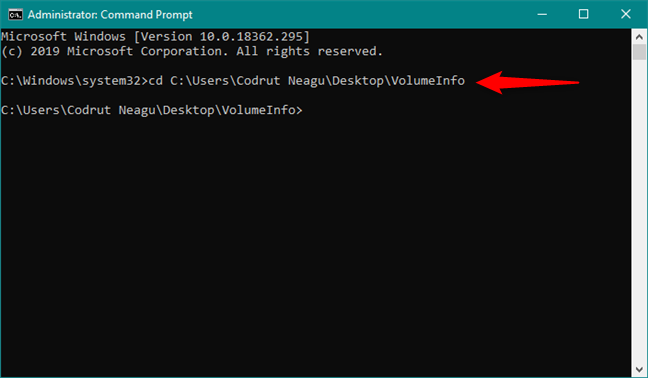
Open Command Prompt as administrator and use the CD command to navigate to the location of the folder that contains the volumeinfo.exe file. If you do not know how to use the CD command, read Command Prompt: 11 basic commands you should know (cd, dir, mkdir, etc.).
In my case, because I chose to extract the ZIP file in the folder called VolumeInfo on my Desktop, to get there, I have to type the command cd C:UsersCodrut NeaguDesktopVolumeInfo.
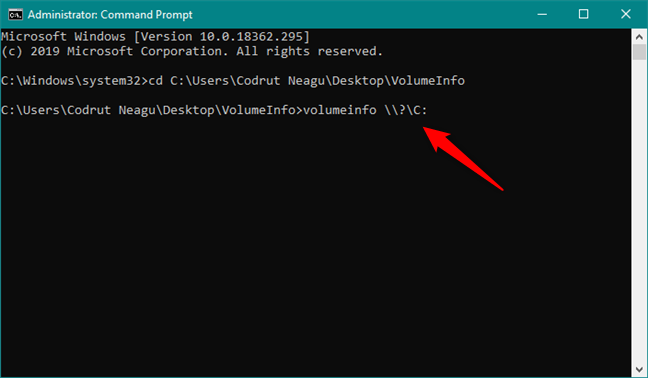
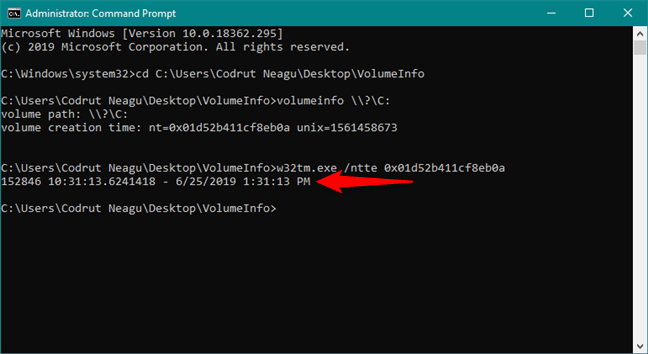
In the Command Prompt window, type the command volumeinfo \? followed by the drive or partition that interests you. For example, if you want to know when the C: partition was created, you should type volumeinfo \?C: and then press Enter on your keyboard.
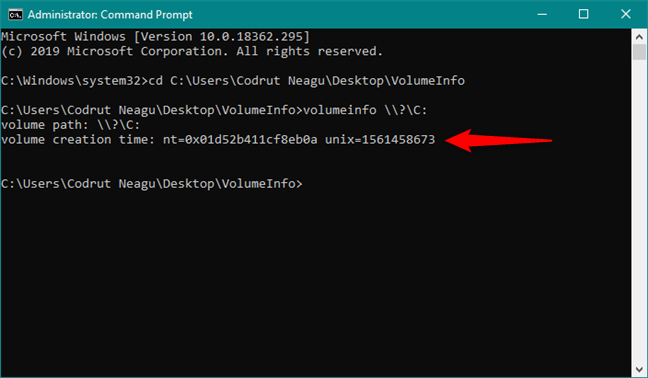
The volumeinfo command gives you a result called volume creation time similar to the one in the screenshot below. It has two values: one called nt, and one called unix. The one that interests us is the one called nt. It tells us the date and time when the partition was created, but not in a human-intelligible form, so we must convert it to a readable date and time format.
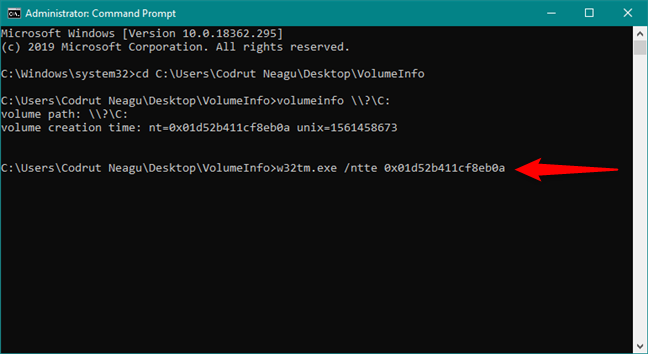
Still, in the Command Prompt window, type the command w32tm.exe /ntte followed by the volume creation time nt value that you got on the previous command. For example, in my case, I have to type w32tm.exe /ntte 0x01d52b411cf8eb0a. Then, press Enter on your keyboard.
The final result shown in the Command Prompt tells you the date and time when the partition was created:
That's it! You can use this method for any partition or drive on your Windows computer or device.
Do you know other easier or more reliable ways to find out when a partition was created?
We admit that none of the methods that we have shown is great. The first one is easy, but it is not reliable, and it can be used only as an approximation. The second method is reliable, but it is not easy to get it done. Do you know other ways of finding out when was a partition created, in Windows? If you do, please share in the comments below.